The third edition of Automate the Boring Stuff with Python is now available for purchase or to read for free online. It has updated content and several new chapters, but one chapter that was left on the cutting room floor was "Working with Audio, Video, and Webcams". I present the 26-page rough draft chapter in this blog, where you can learn how to write Python code that records and plays multimedia content.
Working with Audio, Video, and Webcams
These days a smartphone is a portable film studio that fits in your pocket. The ability to not just readily view but also produce video has led to an explosion of video content easily accessible over the internet. There’s plenty of video and audio editing software available for users of all levels of sophistication. But if you have, say, a thousand video files that you need to automate reducing their volume by 50% and then extract thumbnail images, you don’t want to have to edit each of those files individually yourself. Similarly, you may want to record video, audio, or photos from a laptop’s webcam for some automated process too specialized for off-the-shelf software. Or maybe you’d just like your program to play a funny sound effect. In this chapter, you’ll learn how to control your computer’s microphone, webcam, and speaker hardware from Python and play multimedia files.
This chapter assumes you have already read Chapter 21 to learn the basics about how programs work with image data. Since video is just a series of images, many of the same concepts apply.
Audio and Video Data
First, you should have a reliable way to open and view video and audio files. Since its release over twenty years ago, the open source VLC Media Player application has been free of charge and the gold standard for multimedia players. Install the VLC Media Player from https://www.videolan.org/vlc/, which runs on Windows, macOS, and Linux. Mobile versions for Android and iOS are also freely available. VLC is far superior to any multimedia application that came with your computer.
While you may be familiar with audio and video files by their file extension such as .mp3 or .webm, audio and video formats are split into container formats and codecs. A container format is a wrapper that contains metadata and the encoded video or audio data. MP4, AVI, MKV, and MOV are popular container formats. A codec (or encoding) is the compression algorithm used for the video or audio data. MP3, H.264, VP9, and AAC are common video or audio codecs. Not all applications and devices support all codecs.
The audio file formats we’ll be using in this chapter are:
- .wav files - an uncompressed format that are widely supported by apps and libraries but tend to have large file sizes so they are often used for short sound effects.
- .mp3 files - a popular compressed format often used for music and other lengthy audio.
- .ogg files - an open standard, compressed format that is less popular than .mp3 but provides better compression and quality.
The video file formats we’ll be using in this chapter are:
- .avi files - an older format that tends to have larger file sizes.
- .mp4 files - a popular format that is widely supported by different software
- .mkv files - an open format that has many features but isn’t as widely supported as .mp4.
- .webm files - a more recent format based on .mkv that offers better compression and quality.
Common Video Sizes and Aspect Ratios
The aspect ratio is the relative size of a video or screen’s width to its height, often written as width:height. For example, 4:3 (4 pixels of width for every 3 pixels of height) was a common aspect ratio for 20th century computer monitors and standard-definition televisions in the broadcast TV era. Today, 16:9 is common for most laptop screens and high-definition televisions. More recently, the wider 19.5:9 aspect ratio is becoming common for smart phones. An aspect ratio that is wider than it is tall has a landscape orientation, while an upright aspect ratio that is taller than it is wide is called a portrait orientation.
Screen resolution is the number of columns and rows of pixels that a laptop or mobile screen displays. It’s often written as width x height, such as 1280 x 720 or 1920 x 1080 (also written as 720p and 1080p, respectively). Your laptop’s screen often supports multiple resolutions that can be configured in your operating system’s settings. Videos have one size, though they can be scaled larger or smaller to fit a display or app window. While videos can have any size, they often match common screen resolutions so they can be viewed in fullscreen mode without disproportionate scaling.
Recording from Webcams and Microphones
The webcam and microphone you use for video chats can be accessed by Python scripts through the OpenCV, sounddevice, and wavio Python packages. OpenCV, the open computer vision library, is an advanced open source imaging library. To use it you must first you must install the mathematics and data science package NumPy by running pip install numpy on Windows and macOS or sudo apt install python3-numpy on Ubuntu Linux. Then you can install OpenCV with pip install opencv-python from the terminal. See Appendix A for full instructions. The sounddevice and wavio packages are installed with pip install sounddevice and pip install wavio, respectively.
The following programs have been kept to a minimum so that you can easily insert their code into your own Python programs that record audio and video.
Taking a Photo from a Webcam
You can use your laptop’s webcam to take photos or record videos through a Python script. This has a few advantages over using a regular camera or photo app. Your Python script could:
-
Automatically take photos in response to certain events such as receiving emails.
-
Take time lapse photos over a long period of time at various intervals.
-
Add a photo booth feature to your program, using the Pillow module to edit the photos.
-
Scan QR codes.
OpenCV list your computer’s webcams with integer indexes that begin with 0. A laptop could easily have multiple webcams. For example, it could have a built-in camera at the top of the screen (perhaps at index 0 in OpenCV) along with a separate USB webcam (perhaps at index 1). The following webcamPreview.py program has a `list_webcam_indexes()`` function check which OpenCV webcam indexes exist on your computer. The program then takes repeated photos from the webcam to display in a preview window. When the user presses the space key, it saves the latest photo as photo.png (though you can change the filename to photo.jpg or any other image format.) Or the user can press the Esc key to quit without saving.
import cv2

def list_webcam_indexes():
    detected_webcam_indexes = []
    for i in range(10):  # Test for up to 10 possible webcams.
        webcam = cv2.VideoCapture(i)  # Connect to webcam.
        status, frame = webcam.read()
        if status:
            # A webcam exists at this index:
            detected_webcam_indexes.append(i)
        webcam.release()  # Disconnect from webcam.
    return detected_webcam_indexes  # Returns a list of integer webcam indexes.

first_available_index = list_webcam_indexes()[0]  # Fails if there are no webcams.
webcam = cv2.VideoCapture(first_available_index)  # (1) Connect to webcam.

print('index:', first_available_index)
print('width:', webcam.get(cv2.CAP_PROP_FRAME_WIDTH))
print('height:', webcam.get(cv2.CAP_PROP_FRAME_HEIGHT))
print('fps:', webcam.get(cv2.CAP_PROP_FPS))

while True:  # (2)
    success, frame = webcam.read()  # (3)
    if not success:
        print('Could not capture frame.')
        break

    # Show the frame in a preview window:
    cv2.imshow('Press space to save photo or Esc to exit', frame)  # (4)

    pressed_key_code = cv2.waitKey(1)  # (5)
    if pressed_key_code == 32:  # (6) 32 is the space key code.
        cv2.imwrite("photo.png", frame)  # Save photo.
        break
    elif pressed_key_code == 27:  # (7) 27 is the Esc key code.
        break  # Exit without saving photo.

webcam.release()  # (8) Disconnect from webcam.
cv2.destroyAllWindows()  # Close preview window.
On my laptop, this program makes a window with a live preview from the built-in webcam and outputs the following text:
index: 0
width: 640.0
height: 480.0
fps: 30.0
From this output we can tell that the webcam produces 640 x 480 sized images and can record video up to 30 frames per second. The preview window closes when the user presses the space bar or Esc key. The live preview window looks like Figure 24-1.
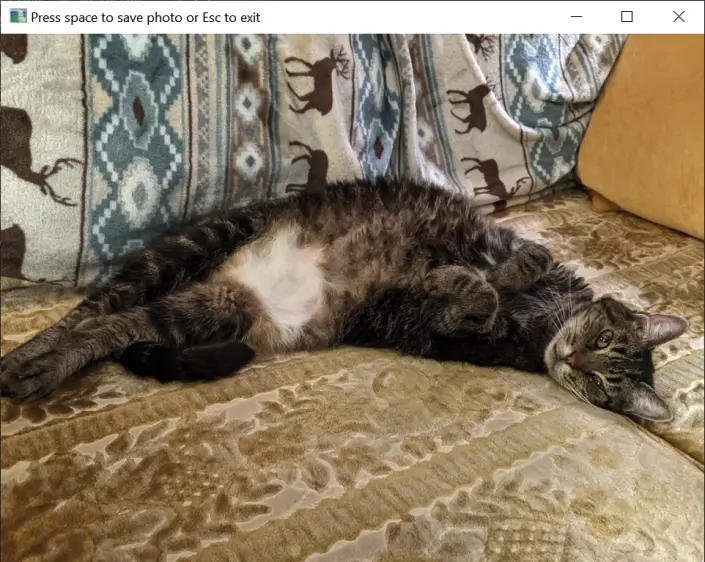
The live preview window from webcamPreview.py.
The VideoCapture object that gets stored in the webcam variable (1) represents the connected camera. The webcam.read() method (2) returns a numpy.ndarray data structure with all the photo pixel data in it. (NumPy is beyond the scope of this book, but an ndarray is similar to a Python list.) This can be passed to the cv2.imshow()`` function (3) to create a window with the webcam photo data. Thewhile` loop runs fast enough to make the series of still photos look like live video in the preview window 4.
The cv2.waitKey() function (5) returns an integer key code of the keyboard key the user pressed while the preview window is focused. The integer argument passed to cv2.waitKey() is how many milliseconds the function waits for the user to press a key, with cv2.waitKey(0) meaning that it should wait forever. We call cv2.waitKey(1) because the function should wait just 1 millisecond before returning so our program can continue to fetch new images from the webcam. If the user hasn’t pressed a key, cv2.waitKey() returns -1. The program checks if the key code is 32 (for the space key) (6) and 27 (for the Esc key) (7) lets the user choose whether to save a photo or not. Afterwards, the VideoCapture object in webcam is released (8) and the live preview window is closed so that the program can exit.
To find other keyboard key codes, pass a single-character string to Python’s ord() function. For example, ord('q') returns the integer 113, and 113 is the key code for the Q key.
Take a Photo without the Preview Window
If you want a program that simply saves a picture from the first available webcam as soon as possible, you can use this much simpler webcamPhoto.py program:
import cv2, sys
camera = cv2.VideoCapture(0)  # 0 is the index of the webcam to use.
success, frame = camera.read()
if not success:
    sys.exit('Invalid webcam index.')
cv2.imwrite('photo.png', frame)
You can incorporate this code into your own program that needs to take a photo from the webcam (though you may also wish to include the list_webcam_indexes() from webcamPreview.py instead of assuming index 0 is correct.)
You can also use the Pygame library to take photos from a webcam. While Pygame is designed for making 2D video games, it has several useful multimedia features as well. You can install it by running pip install pygame. Appendix A has full instructions. The following webcamPhotoPygame.py program takes a photo with the webcam and saves it as photo.png:
import pygame.camera, pygame.image, time
pygame.camera.init()

all_webcams = pygame.camera.list_cameras()  # (1)
webcam = pygame.camera.Camera(all_webcams[0])  # (2) Use the first found webcam.
webcam.start()  # (3) Initialize the webcam.

time.sleep(1)  # (4) Wait for the camera to get ready.
photo = webcam.get_image()  # (5) Take a photo from the webcam.

pygame.image.save(photo, "photo.png")  # (6) You can also use .jpg or .bmp.
pygame.camera.quit()
After importing the pygame.camera and pygame.image modules and initializing the pygame.camera module by calling pygame.camera.init(), you can obtain a list of the webcams connected to your computer by calling pygame.camera.list_cameras() (1). For example, on my computer, this function call returned the list ['HD Pro Webcam C920', 'Integrated Camera'] which represents an external USB webcam and the built-in webcam at the top of my laptop’s screen. You can then pass one of these strings to pygame.camera.Camera() to obtain a new Camera object to take pictures with.
This Camera object, which this program stores in a variable named webcam (2), must also be initialized by calling its start() method (3). You can take a picture by calling the get_image() method (5), which returns a Surface object that holds the image data.
Unfortunately, the start() method can take up to a full second before it’s ready to take photos. If you call get_image() before it’s ready, you will get a blank, black image. In my testing, it only takes 0.6 or 0.7 seconds for the webcam to get ready, so a full second delay by calling time.sleep(1) should be more than enough of a wait before calling get_image() for any modern computer. Test this on your computer and increase the delay if you are getting an all-black image.
After this, you can save the image to a file by passing the Surface object and image filename to pygame.image.save() (6). The file extension in your filename can either be .bmp, .jpg, or .png. When your program is done using the webcam, it can call pygame.camera.quit().
Recording Video from a Webcam
OpenCV can also record video files. Open a new file editor window and enter the following code, saving it as webcamVideo.py. This program begins recording immediately while showing a preview window of the video it’s recording to the file video.avi. When the user presses the Esc key, the program stops recording.
import cv2

# NOTE: Using webcam index 0 by default:
webcam = cv2.VideoCapture(0)  # (1) Connect to webcam.

# Define the codec using VideoWriter_fourcc and create a VideoWriter object
fourcc = cv2.VideoWriter_fourcc(*'XVID')  # (2)
fps = webcam.get(cv2.CAP_PROP_FPS)
width = int(webcam.get(cv2.CAP_PROP_FRAME_WIDTH))
height = int(webcam.get(cv2.CAP_PROP_FRAME_HEIGHT))

video_file = cv2.VideoWriter('video.avi', fourcc, fps, (width, height))  # (3)

while True:
    success, frame = webcam.read()  # (4)
    if not success:
        print('Could not capture frame.')
        break

    cv2.imshow('Recording... (press Esc to stop)', frame)
    video_file.write(frame)  # (5)

    if cv2.waitKey(1) == 27:  # (6) 27 is the Esc key code.
        break  # Stop recording.

webcam.release()  # Disconnect from webcam.
video_file.release()  # Disconnect from output video file.
cv2.destroyAllWindows()  # Close preview window.
While the VideoCapture object stored in the webcam variable (1) represents the camera hardware, the VideoWriter object stored in the video_file variable (3) represents the video file. The VideoWriter_fourcc object (2) we create represents the four-character code that identifies the video encoding. In our case, the four-character code is 'XVID' for the Xvid codec. The width, height, and frames per second settings are also passed to cv2.VideoWriter(). Each frame of video from the webcam.read() method call (4) is added to the video file by calling video_file.write() (5) until the user presses the Esc key (6).
Note that OpenCV can record video but not audio. We’ll use the sounddevice module in the next section to record audio, but unfortunately recording videos that include synced audio is complicated and beyond the scope of this book.
Recording Audio from a Webcam or Microphone
The sounddevice and wavio third-party modules can use your computer’s or external webcam’s microphones to record audio. These modules have several audio-related features, but the following micRecord.py program has been stripped down to the basics. Still, you may want to review multithreaded programming in Chapter 19 to understand how the record_audio_stream() function runs in the background while the rest of the Python program continues executing.
import sounddevice, wavio, threading, time

1def list_microphone_devices():
    # Return a list of microphone indexes and names.
    microphones = []
    for i, device in enumerate(sounddevice.query_devices()):
        # Check if the microphone has max input channels:
        if device['max_input_channels'] > 0:  # (2)
            # Append i (the device id) and mic name:
            microphones.append((i, device['name']))
    return microphones

def record_audio_stream(filename, device=None, rate=44100, channels=2):
    # Create a list to store the audio data:
    recorded_data = []

    with sounddevice.InputStream(samplerate=rate, channels=channels, device=device) as stream:  # (3)
        while True:
            # Record audio in chunks and add it the recorded_data list:
            audio_chunk, overflowed = stream.read(rate)
            recorded_data.extend(audio_chunk.tolist())

            if stop_recording_signal.is_set():
                break

    # Save the recorded data to a WAV file
    wavio.write(filename, recorded_data, rate, sampwidth=2)  # (4)

# Display information about audio/visual recording devices:
print('Devices on this computer:')
5print(sounddevice.query_devices())
print()

print('Microphones connected to this computer:')
print(list_microphone_devices())
print()

# Create an event to signal the other thread to stop:
stop_recording_signal = threading.Event()

input('Ready. Press Enter to start recording.')
# Start recording in a separate thread:
recording_thread = threading.Thread(target=record_audio_stream, args=('output.wav',))  # (6)
recording_thread.start()

# Wait for user to press Enter:
input('Now recording. Press Enter to stop.')  # (7)

# Replace the previous input() call with this code to record for a set time:
#time.sleep(1.0)  # Record for 1 second.

# Signal the recording thread to stop and wait for it to finish:
stop_recording_signal.set()  # (8)
recording_thread.join()  # (9) Block until the other thread has stopped.
print('Recording saved.')
There are several parts to this program aside from the actual recording of audio, so let’s explore those first. The sounddevice.query_devices() function (5) returns an object that, when printed, displays a numbered list of multimedia input and output devices on the computer, such as the following:
>>> import sounddevice
>>> print(sounddevice.query_devices())
   0 Microsoft Sound Mapper - Input, MME (2 in, 0 out)
>  1 Microphone Array (Realtek High , MME (2 in, 0 out)
   2 Microsoft Sound Mapper - Output, MME (0 in, 2 out)
<  3 Speaker/HP (Realtek High Defini, MME (0 in, 2 out)
   4 Primary Sound Capture Driver, Windows DirectSound (2 in, 0 out)
   5 Microphone Array (Realtek High Definition Audio), Windows DirectSound (2 in, 0 out)
--snip--
This lists the various microphone input and speaker output devices on your computer, along with their integer sounddevice index. The > angle bracket marks the default input device and the < angle bracket marks the default output device. This program also has a list_microphone_devices() function (1) that calls sounddevice.query_devices() and filters for only the microphone devices (which will have a max_input_channels key with a value greater than 0 (2)) to make it easy to find microphones. The list_microphone_devices() returns a list of tuples, with each tuple having the device index and string description, like:
[(0, 'Microsoft Sound Mapper - Input'), (1, 'Microphone Array (Realtek High '), --snip—
The program also has a record_audio_stream() function, with the following parameters:
filename, a string of the filename (which should end with .wav) to save the audio.device, the integersounddeviceindex of the microphone to use to record the audio (the default value None indicates that the default input device should be used.)rate, the number of samples to take per second. Higher sample rates provide higher quality audio, and 44.1k (or the integer44100) is a standard sample rate for most microphones.channels, the number of channels to use. The default stereo audio uses 2 channels and mono audio uses 1.
These parameters are used to create the InputStream object (3) that represents the recording from the given microphone. The while loop that follows constantly reads audio data in from the read() method call, which is a list of audio sample data that is added to the recorded_data list. The recording stops and breaks out of the while loop when the stop_recorded_signal thread event is set (explained later). Then the wavio.write() function (4) saves it to a .wav audio file.
We use a separate thread of execution to have our program run the code inside the record_audio_stream() function while the rest of the code continues to also run. Multithreaded programming was explained in Chapter 19. First we create a Thread object set with the record_audio_stream (without the parentheses, since we want to refer to the function itself rather than call it) and the function arguments 'output.wav' for its filename parameter. For the sake of this explanation, we’ll call this the “recording thread” and the program’s original thread that continues in the main part of the program the “main thread.”
Next, we don’t want to call record_audio_stream() directly. Instead, we call the start() method on this Thread object so the recording thread runs the code inside record_audio_stream() (6) while the main thread continues on to input('Now recording. Press Enter to stop.') (7). This way, the user can choose when to stop the recording by pressing Enter. (Alternatively, we can replace the call to input() with a call to time.sleep() to record a set number of seconds instead of however long until the user presses Enter.) The user input thread then calls stop_recording_signal.set() (8). The recording thread will notice this when stop_recording_signal.is_set() returns True, causing it to break out of the while loop that continuously calls stream.read().
Finally, the user input thread calls recording_thread.join() (9), making it pause until the recording thread has returned from the record_audio_stream() function. Now there will be only the user input thread running, which then calls print('Recording saved.') and exits the program.
This program is rather complicated, but that’s because it has to handle so many small details: selecting which of possibly multiple microphones to record from, the sample rate and number of audio channels to use for the recording, and constantly gathering the audio data until the user directs the program to stop. The sounddevice and wavio modules themselves offer even more features, and you can find their full documentation at https://python-sounddevice.readthedocs.io/ and https://github.com/WarrenWeckesser/wavio.
Playing Audio Files
If you just need to play a simple audio file, you can use the playsound module. First, install it from the terminal by running pip install playsound. See Appendix A for full instructions. Once installed, you can play an audio file by calling the playsound module’s playsound() function and passing the filename of the audio file. Download the hello.mp3 file from https://autbor.com/hello.mp3 (or use your own .mp3 file) and enter the following into the interactive shell:
>>> import playsound
>>> playsound.playsound('hello.mp3')
The playsound() function won’t return until the audio file has finished playing, that is, the function blocks until the audio has finished. Keep in mind that this will halt your program for a while if you give it a long audio file to play. The playsound module can play MP3 and WAV files. If you cannot hear the sound, make sure your computer is unmuted. If playsound() raises exceptions (which happens if the filename contains odd characters such as an equal sign), try passing a Path object of the audio file instead of a string, as in the following example:
>>> import playsound
>>> from pathlib import Path
>>> audio_file = Path(r'C:\Users\Al\Desktop\hello.mp3')
>>> playsound.playsound(audio_file)
The playsound module is best if you just need to play a simple sound effect and you want your program to block until the sound has finished. If you need to have better control over playback, such as changing volume, pausing and unpausing the audio file, seeking to a specific time in the audio, and other features, use the Pygame’s mixer module.
For example, to play hello.mp3 with Pygame, enter the following into the interactive shell:
>>> import pygame.mixer
>>> pygame.mixer.init()
>>> pygame.mixer.music.load('hello.mp3')
>>> pygame.mixer.music.play()
With Pygame, you must call the pygame.mixer.init() function once after importing the pygame.mixer module in order to play any audio files. Then load the audio file by calling pygame.mixer.music.load() and pass either a string or Path object of the audio file’s filename. Calling pygame.mixer.music.play() starts playing the loaded audio file from the beginning. The play() function doesn’t block; it returns immediately and the audio continues to play in the background while your Python program runs other lines of code.
You can continue to affect the playing of the music with the other functions in the pygame.mixer.music module. All of these functions are non-blocking and return immediately:
pygame.mixer.music.stop()stops playing the music immediately.pygame.mixer.music.pause()stops playing the music, but will resume where it left off when unpaused.pygame.mixer.music.unpause()resumes playing paused music.pygame.mixer.music.fadeout(milliseconds)fades the volume of the music down to silence over the nextmillisecondsmilliseconds. For example, passing2000will fade out the music over the next 2 seconds after the function call.pygame.mixer.music.get_volume()returns a float of the volume level for thepygame.mixermusic, with1.0for full volume and0.0for muted volume.pygame.mixer.music.set_volume(level)lets you set the volume by passing a float between1.0and0.0.pygame.mixer.music.get_busy()returnsTrueif music is currently playing and False if the music has finished, stopped, or paused.pygame.mixer.music.get_pos()returns the position in the audio file Pygame's mixer module is playing it (or, if paused, would play it) in milliseconds. For example, returning 0 means the position is at the very start of the audio file and returning5000means the position is 5 seconds into the audio file.pygame.mixer.music.set_pos(position)sets the position in the audio file to play. The position parameter is a float or int for the number of seconds into the audio. The audio must currently be playing to call set_pos().pygame.mixer.music.queue(audio_filename)lets you set another audio file to begin playing as soon as the current one has finished. The audio_filename parameter is either a string or a Path object of the audio file to queue.
Pygame also has other audio features such as playing multiple sound files at the same time. The full documentation is at https://www.pygame.org/docs/.
Working with Video Files
The programs you create from this book have text-based input and output with the input() and print() commands, so displaying images and videos in a conventional graphical user interface (GUI) is beyond the scope of this book. However, your Python programs can still download videos from the internet without a GUI and control the playback of the video in VLC Media Player, as you’ll learn in this section.
Downloading Videos from YouTube
The main limitation of YouTube and other video sites is that you can only view the videos in a browser while online. You can’t edit the videos to extract clips or make adjustments. The yt-dlp tool is a fork of the youtube-dl project, and can download videos as files from YouTube, Vimeo, Facebook, TikTok, Instagram, and hundreds of other video websites. You can install it by running pip install yt-dlp from the terminal. Appendix A has full instructions.
The yt-dlp project is both a terminal command and a Python module. We’ll focus on the terminal command first but also explore how to incorporate it in your Python programs. Both youtube-dl and yt-dlp are written in Python. Because video websites change their layout from time to time, you’ll need to always run the latest version of yt-dlp. You can make yt-dlp update itself by running yt-dlp -U. The yt-dlp command uses calver or calendar versioning, so the version number is always the date of that version’s release. For example, version 2023.07.06 was released on July 6, 2023.
To download a video, run the yt-dlp command from a terminal with the video’s URL as the command-line argument:
C:\Users\Al\Desktop>yt-dlp https://youtu.be/mDNa10gQTJA
[youtube] Extracting URL: https://youtu.be/mDNa10gQTJA
[youtube] mDNa10gQTJA: Downloading webpage
--snip--
If the URL contains characters such as an ampersand or spaces, you may have to enclose them in double quotes. The filename is automatically made from the video description. To specify your own filename for the downloaded video file, pass the -o argument:
C:\Users\Al\Desktop>yt-dlp -o catvideo.webm https://youtu.be/mDNa10gQTJA
If the video is a music video and you only want the audio data, pass the -x argument to extract the audio:
C:\Users\Al\Desktop>yt-dlp -x https://youtu.be/9RHFFeQ2tu4
Depending on the video and video website, the audio format may be an .mp3, .ogg, or .webm file. You can convert it to another audio format with ffmpeg, explained later in this chapter.
If a video requires that you must be logged in to view it, log into the site in your browser and then run yt-dlp with the --cookies-from-browser argument followed by the name of the browser (either Firefox, Chrome, Edge, or Safari). This makes yt-dlp examine your browser’s cookies to reuse the login session information there:
C:\Users\Al\Desktop>yt-dlp --cookies-from-browser Firefox https://youtu.be/mDNa10gQTJA
You can also specify the username and password of the account with the -u and -p command line arguments. You can leave out the -p argument to have yt-dlp ask you to enter the password at the keyboard.
C:\Users\Al\Desktop>yt-dlp -u my_username -p secret_passw0rd https://youtu.be/9RHFFeQ2tu4
There are many features for downloading videos with yt-dlp, such as downloading entire playlists, using a VPN proxy, downloading subtitles, and others. To view all of them, run yt-dlp --help.
Running yt-dlp from Python
You can also download videos using yt-dlp using Python code. The module name is yt_dlp, which lets you create YoutubeDL objects. Despite the name, the YoutubeDL object can download videos from any video website that yt-dlp supports. Open a new file and add the following code for a minimal program that downloads videos with the `yt_dlp module. Name it videoDownloader.py:
from yt_dlp import YoutubeDL
URLs = ['https://www.youtube.com/watch?v=BaW_jenozKc']  # Add video URLs here.
with YoutubeDL() as ydl:
    ydl.download(URLs)
The yt-dlp documentation at https://pypi.org/project/yt-dlp/ has more information on supplying the download() function with more options.
Alternatively, you can run the yt-dlp terminal command from a Python script using the subprocess.run() function:
>>> import subprocess
>>> subprocess.run(['yt-dlp', 'https://www.youtube.com/watch?v=BaW_jenozKc'])
If you want the video’s metadata, such as duration, number of views, or description, you can download this as JSON data using the -J argument. Chapter 19 covers using the subprocess module to run terminal commands from a Python program and capture their output as strings. Chapter 18 covers the json module and how to work with JSON data. Let’s look at the following example of parsing a video’s metadata as JSON from Python code:
>>> import json, subprocess
>>> proc = subprocess.run(['yt-dlp', '-J', 'https://youtu.be/mDNa10gQTJA'], capture_output=True, text=True)
>>> json_text = proc.stdout
>>> python_data = json.loads(json_text)
>>> list(python_data.keys())
['id', 'title', 'formats', 'thumbnails', 'thumbnail', 'description', 'channel_id', 'channel_url', 'duration', 'view_count', --snip--
>>> python_data['title']
'Sister cats Grace, Mercy, and Patience love each other very much.'
>>> python_data['description']
"These were kittens I rescued from a backyard cat colony in Houston in October 2021. Grace (gray), Mercy (brown tabby), and Patience (tortoiseshell) probably aren't actually sisters, but they grew up together in my house and are the same age and--snip--
>>> python_data['duration']  # In seconds.
116
>>> python_data['view_count']
1797
>>> python_data['upload_date']  # In YYYYMMDD format.
'20220903'
Every video website returns different metadata, so the list(python_data.keys()) part of our example can show you the dictionary keys that are available.
Play a Video File
Playing a video file from your Python program is complicated. For the most part, this book covers Python programs that don’t use a graphical user interface. However, if you just need a video to play somewhere on your screen, you can install VLC Media Player and then use the third-party python-vlc library to display videos in their own window. After installing VLC Media Player, run pip install python-vlc to install the module that lets you control VLC from your Python programs. See Appendix A for full instructions.
Once installed, you can then use the vlc module to create an Instance, MediaPlayer, and Media object. Just replace the 'video.mp4' string with the filename of the video file you want to play. Enter the following into the interactive shell with a video file named video.mp4 in the current working directory:
>>> import vlc
>>> instance = vlc.Instance('--no-xlib', '--quiet')  # These arguments stop debug output.
>>> player = instance.media_player_new()
>>> media = instance.media_new('video.mp4')  # Replace with your filename.
>>> player.set_media(media)
>>> player.play()
The play() method call causes the video to appear in a new window and start playing until it has finished. This method immediately returns; it doesn’t block until the video has finished playing. You can also call other MediaPlayer methods:
pause()will pause the video, and unpauses when play() is called again.stop()will immediately stop the video and close the video’s window.is_playing()returns 1 if the video is currently playing and returns 0 if the video is paused, stopped, or has finished. (In Python, True is equal to 1 and False is equal to 0.)get_length()returns an integer of the video length in milliseconds.get_fps()returns the frame rate of the video in frames per second.get_time()returns the position currently playing in the video, in milliseconds. Returns -1 if the video is stopped.set_time(seek)sets the position of the video to seek milliseconds. This can only be called while the video is playing or is paused.toggle_fullscreen()switches the video window between windowed and fullscreen mode.audio_get_volume()returns an integer of the MediaPlayer object’s volume: 100 is full volume and 0 is muted.audio_set_volume(volume)sets the MediaPlayer object’s volume to the volume integer, which can be greater than 100.video_get_size()returns a tuple of two integers of the width and height of the video in pixels.video_take_snapshot(0, '.', 0, 0)takes a snapshot of the current frame. The first0argument is for the “video output number” which is usually zero, the'.'argument tells VLC to save the snapshot image file in the current working directory, and the third and fourth arguments are the width and height of the snapshot (with the0arguments meaning “use the original video’s width and height”). The snapshot image filename will be “vlcsnap” followed by a timestamp, such as vlcsnap-2025-08-21-15h21m32s719.png. The method returns0if the snapshot was successful and-1if it failed for some reason.
While the vlc module doesn’t provide much in the way a graphical user interface, the popup video window is enough for your basic Python programs to display a video clip as needed.
Editing Video and Audio with ffmpeg
One of the most powerful tools for editing video and audio content is the ffmpeg command. While ffmpeg has no user-friendly graphical user interface like other apps (though ffmpeg GUI extensions have been separately made), it does have an extensive set of command line arguments. This makes it easy to automate from Python programs which is invaluable if you have a large number of multimedia files to process.
Downloading and Installing ffmpeg
The ffmpeg command is available for Windows, macOS, and Linux. You can download it from https://ffmpeg.org/download.html. The ffmpeg website also has an ffplay and ffprobe programs available for download. The ffplay is a terminal command that plays video and audio files in a barebones window while the ffprobe command extracts information about video and audio files. There is no installer for these commands. Instead, just place the ffmpeg, ffplay, and ffprobe executable files into a folder on your system PATH. (On Ubuntu Linux, you may be able to install them with the sudo apt install ffmpeg command.) See Chapter 12 for an explanation of the PATH environment variable and working on the terminal command-line in general.
On macOS, the ffmpeg, ffprobe, and ffplay programs might not run from the terminal since they don’t have a digital signature. Double-click on these commands in the Finder, and in the warning window about “unidentified developer,” click the Open button. This tells macOS that you consider these programs safe to run. You’ll only have to do this once for each program.
ffmpeg Recipes
The ffmpeg program’s set of command line arguments is far too complicated to cover in this book. Instead, this chapter features specific recipes for carrying out common editing tasks.
The ffmpeg program produces a lot of output. You can hide all of this by passing the -loglevel warning command-line arguments, which suppresses all logging output except for warnings and errors. For example, instead of running ffmpeg -i input.mp4 output.avi to show you all the information associated with converting an .mp4 video file to an .avi file, you can run ffmpeg -loglevel warning -i input.mp4 output.avi to do the conversion with no output.
In all of the ffmpeg recipes, the input file follows the -i command line argument and the output file is placed at the very end of the command after all the other command line arguments.
If a file already exists with the output filename you passed to ffmpeg, then ffmpeg pauses and asks for confirmation to overwrite this file by asking the user to press y and Enter on the keyboard. This pause can interrupt your programs, so the -y argument you see in the ffmpeg recipes causes ffmpeg to skip this confirmation step.
You can run the ffmpeg command from your Python scripts using the subprocess.run() function, as covered in Chapter 19. Remember to run import subprocess first before calling subprocess.run().
You can transform the audio or video of your files with ffmpeg’s many filters. The recipes here explain some, but you can view the full list by running ffmpeg -filters and then get help information about a specific filter by running ffmpeg -h filter=filter_name.
The ffmpeg command has a vast set of command line arguments for doing almost any kind of editing you’d like from a terminal window or Python script. If you don’t have the time to read through its documentation, you can ask an AI large language model such as ChatGPT for the command. For example, you could give it the prompt: “What is the ffmpeg command for converting a video to black and white?” and receive the command along with an explanation of each command-line argument. Be sure to test the information the AI gives you, as it often makes mistakes.
Alternatively, the website https://ffmpeg.app/ features an interactive prompt system that reliably guides you to an ffmpeg command with arguments to carry out your intended actions. The website looks like Figure 24-2:

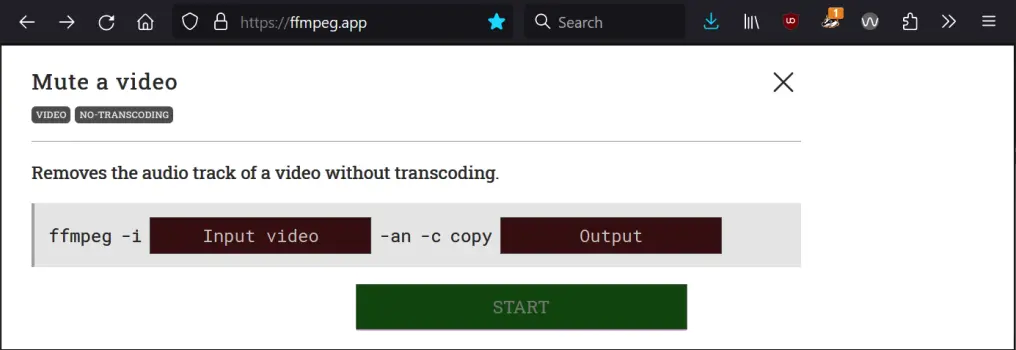
The website https://ffmpeg.app helps you find command line arguments.
Keep in mind that ffmpeg can not only edit video and audio, it can also edit image files as well. Instead of specifying a video file with -i input.mp4 or output.mp4 command line arguments, for images you can use -i input.png or output.webp If ffmpeg gives you an error message about how the output filename “does not contain an image sequence pattern” you can include the -update 1 argument. See the Extract Frames from a Video section for more information about sequence patterns and the -update argument.
View Video and Audio File Metadata with ffprobe
The ffprobe command (which comes with ffmpeg) can give you a large amount of information about a video or audio file. Its basic usage looks like this:
This command produces a large amount of text output with details about the input.mp4 file:
ffprobe version N-109948-ge026e29460-20230301 Copyright (c) 2007-2023 the FFmpeg developers
  built with gcc 12.2.0 (crosstool-NG 1.25.0.90_cf9beb1)
--snip--
  Stream #0:0[0x1](eng): Audio: aac (LC) (mp4a / 0x6134706D), 48000 Hz, stereo, fltp, 191 kb/s (default)
--snip--
  Stream #0:1[0x2](eng): Video: h264 (High) (avc1 / 0x31637661), yuvj420p(pc, smpte170m/bt470bg/smpte170m, progressive), 1920x1080, 22582 kb/s, SAR 1:1 DAR 16:9, 30.01 fps, 30 tbr, 90k tbn (default)
--snip--
You can also run this command from the following Python instruction, which saves the output as a string in proc.stderr:
>>> import subprocess
>>> proc = subprocess.run(['ffprobe', 'input.mp4'], capture_output=True, text=True)
>>> print(proc.stderr)
ffprobe version N-109948-ge026e29460-20230301 Copyright (c) 2007-2023 the FFmpeg developers
--snip--
Video and audio files contain streams of encoded video and audio data. For example, a movie video file may have a stream of video data and multiple audio streams for English, Spanish, and French dubs. The ffprobe command can show you these streams and their associated information. For example, this input.mp4 file has audio encoded with the AAC codec and video that has 30.01 frames per second (fps) and a size of 1920x1080. If you want your program to extract this information, you’ll likely need to use regular expressions (covered in Chapter 9).
For example, you can enter this code into the interactive shell to use regular expressions to find the 1920 x 1080 width and height dimensions of an input.mp4 video file:
>>> import subprocess, re
>>> proc = subprocess.run(['ffprobe', 'input.mp4'], capture_output=True, text=True)
>>> mo = re.search('Video.*, (\d+)x(\d+),', proc.stderr)
>>> int(mo.group(1))
1920
>>> int(mo.group(2))
1080
Using code like this, you could then find the dimensions of, say, each video file in a folder. This is similar to the video_get_size() method in the vlc module, though ffprobe can read far more detail than just video size.
You can run ffprobe --help to view the command-line options, but the output is over 2,400 lines long! It may be useful to ask a large language model AI for specific command line arguments to pass to ffprobe for a given task if you are overwhelmed by the documentation.
The next several sections cover individual ffmpeg commands along with their command line arguments for performing a number of common video-related tasks. We’ll be using example filenames such as input.mp4 and output.mp4, and keep in mind that ffmpeg won’t modify the input video and audio files; it only produces a new video or audio file with the changes as the output. You can download some short example files to practice with from https://autbor.com/input_ffmpeg.zip.
Convert Video and Audio File Formats
You can convert video and audio files from one format to another with this terminal command or Python instruction:
ffmpeg -y -i input.mp4 output.avi

>>> subprocess.run(['ffmpeg', '-y', '-i', 'input.mp4', 'output.avi'])
The -i option indicates that the input.mp4 file is the input file, which is then converted to an .avi file named output.avi. You can specify any video file formats you want, including .gif for an animated GIF. Remember that ffmpeg works with image files as well, so you can convert a .png to a .webp or any other format.
Extract Audio from a Video
You can extract the audio from a video file with this terminal command or Python instruction:
ffmpeg -y -i input.mp4 output.mp3

>>> subprocess.run(['ffmpeg', '-y', '-i', 'input.mp4', 'output.mp3'])
This is the same set of arguments as converting formats. The ffmpeg command can understand that if the output file is an .mp3 audio file (or any other audio file format), the video data is dropped and only the audio data is used.
Mute or Change Volume in a Video File
You can increase, decrease, or mute the volume in a video file with the following terminal command or Python instruction:
ffmpeg -y -i input.mp4 -af volume=2.0 output.mp4

>>> subprocess.run(['ffmpeg', '-y', '-i', 'input.mp4', '-af', 'volume=2.0', 'output.mp4'])
The -af argument specifies an audio filter named volume to change the volume by a factor of 2.0, or double the volume of the input.mp4 file. The video with the new volume is in output.mp4. If you wanted to halve the volume, you could pass volume=0.5 instead. You could also change the volume by a number of decibels. For example, passing volume=5dB increases the volume of the input file by 5 decibels. You could also pass volume=-5dB to decrease the volume by 5 decibels.
If you want to simply mute the volume by removing the audio data completely, pass the -an argument:
ffmpeg -y -i input.mp4 -c:v copy -an output.mp4

>>> subprocess.run(['ffmpeg', '-y', '-i', 'input.mp4', '-c:v', 'copy', '-an', 'output.mp4'])
The -c:v copy argument means that ffmpeg will copy the video stream data from input.mp4 directly to output.mp4 without re-encoding it. The -an argument removes the audio stream data altogether. Keep in mind that once you completely mute the volume on a video, you won’t be able to increase the volume later.
Combine a Video and Audio File
You can add an audio file to a silent video with the following terminal command or Python instruction:
ffmpeg -y -i input_video.mp4 -i input_audio.mp3 -c copy output.mp4

>>> subprocess.run(['ffmpeg', '-y', '-i', 'input_video.mp4', '-i', 'input_audio.mp3', '-c', 'copy', 'output.mp4'])
The -c copy arguments copy the video and audio stream data without re-encoding, respectively. If the audio has some problems because the video format doesn’t support it, try replacing -c copy with -c:v copy -c:a aac to copy the video but re-encode the audio with the widely-supported AAC audio codec.
If the video already has audio, but you want to replace it with the audio in a separate audio file, run the following terminal command or Python instruction:
ffmpeg -y -i video.mp4 -i audio.mp3 -c copy -map 0:v:0 -map 1:a:0 output.mp4

>>> subprocess.run(['ffmpeg', '-y', '-i', 'video.mp4', '-i', 'audio.mp3', '-c', 'copy', '-map', '0:v:0', '-map', '1:a:0', 'output.mp4'])
The -map 0:v:0 -map 1:a:0 arguments direct ffmpeg to use the video stream from the first input, video.mp4, and the audio from the second input, audio.mp3, when creating the output.mp4 file. The original audio stream data in video.mp4 is dropped.
Resize a Video
You can resize a video with this terminal command or Python instruction:
ffmpeg -y -i input.mp4 -vf scale=1280:720 output.mp4
>>> subprocess.run(['ffmpeg', '-y', '-i', 'input.mp4', '-vf', 'scale=1280:720', 'output.mp4'])
The -vf indicates you are using a video filter, in this case a filter named scale that scales the size of the video to 1280 x 720 resolution and outputs it to a video file named output.mp4. You can change the resolution to any dimensions you want.
Extract a Video or Audio Segment
You can extract a segment from a video or audio file with the following terminal command or Python instruction:
ffmpeg -y -i input.mp4 -ss 00:01:30 -to 00:01:45 output.mp4
>>> subprocess.run(['ffmpeg', '-y', '-i', 'input.mp4', '-ss', '00:01:30', '-to', '00:01:45', 'output.mp4'])
The -ss argument and -to arguments mark the starting and ending times of the segment to extract, given in an HH:MM:SS format. So -ss 00:01:30 -to 00:01:45 means extract the video or audio content from 1 minute, 30 seconds to 1 minute, 45 seconds from input.mp4 file. This will result in a 15 second segment placed in a file named output.mp4. You can change the starting and ending timestamps as needed.
To extract an audio segment from an audio file, use the audio filenames for the input and output file. The rest of the command remains the same. You can use an ffprobe recipe described later in this chapter to find out the length of the video or audio content in a file.
Extract Frames from a Video
You can extract a single frame from a video with the following terminal command or Python instruction:
ffmpeg -y -i input.mp4 -ss 00:00:15 -vframes 12 output%04d.jpg
>>> subprocess.run(['ffmpeg', '-y', '-i', 'input.mp4', '-ss', '00:00:15', '-vframes', '12', 'output%04d.jpg'])
The -vframes 12 and -ss 00:00:15 arguments mean that 12 frames are extracted from the video starting at 15 seconds into the video is extracted and placed into an image file named output0001.jpg. The %04d in the output%04d.jpg output name is a sequence pattern that means the 12 frames are saved to files with 4-digit numbers with leading zeros: output0001.jpg, output0002.jpg, output0003.jpg, and so on up to output0012.jpg. Also, you can use a wide range of image formats in addition to .jpg, including .png, .bmp, or .webp.
If you only want to extract a single frame from the video and don’t want to use a sequence pattern in the output filenames, use -vframe 1 and add the additional -update 1 argument:
ffmpeg -y -i input.mp4 -ss 00:00:15 -vframes 1 -update 1 output.jpg
>>> subprocess.run(['ffmpeg', '-y', '-i', 'input.mp4', '-ss', '00:00:15', '-vframes', '1', '-update', '1', 'output.jpg'])
If you want to extract every frame from a video, you can run a much simpler terminal command or Python instruction:
ffmpeg -y -i input.mp4 output%04d.jpg
>>> subprocess.run(['ffmpeg', '-y', '-i', 'input.mp4', 'output%04d.jpg'])
Many videos are about 30 frames per second, so a single minute of video will produce about 1,800 image files.
Concatenate Multiple Video or Audio Files
You can concatenate a video or audio file to the end of another video or audio file with the following terminal command or Python instruction:
ffmpeg -y -f concat -i videolist.txt -c copy output.mp4
>>> subprocess.run(['ffmpeg', '-y', '-f', 'concat', '-i', 'mylist.txt', '-c', 'copy', 'output.mp4'])
This command concatenates all the videos listed in the videolist.txt text file together into a single video in a file named output.mp4. The videolist.txt file has the following format:
file 'input_spam.mp4'
file 'input_eggs.mp4'
file 'input_bacon.mp4'
This command only works if the videos have the same codecs and size, otherwise you’ll need to consult the ffmpeg documentation for mixing videos of different formats.
Add Watermark or Overlay to a Video
You can add a watermark or overlay image to a video with the following terminal command or Python instruction:
ffmpeg -y -i input.mp4 -i logo.png -filter_complex overlay=10:50 output.mp4
>>> subprocess.run(['ffmpeg', '-y', '-i', 'input.mp4', '-i', 'logo.png', '-filter_complex', 'overlay=10:50', 'output.mp4'])
The -i logo.png means that the logo.png file is also an input, and the -filter_complex overlay=10:50 means that it will be placed on top of the input.mp4 input video, 10 pixels from the left edge and 50 pixels from the top edge.
You can also use a video as the overlay instead of a still image if you want a picture-in-picture effect.
Rotate a Video
If you have videos that are incorrectly rotated, you can correct this with the following terminal command or Python instruction:
ffmpeg -y -i input.mp4 -vf transpose=1 -c:a copy output.mp4
>>> subprocess.run(['ffmpeg', '-y', '-i', 'input.mp4', '-vf', 'transpose=1', '-c:a', 'copy', 'output.mp4'])
The -vf argument means ffmpeg will apply a video filter, and the specific video filter is transpose=1. The number 1 means the video is rotated 90 degrees clockwise. You can also use any of the following numbers:
0: Rotate by 90 degrees counterclockwise and flip vertically.1: Rotate by 90 degrees clockwise.2: Rotate by 90 degrees counterclockwise.3: Rotate by 90 degrees clockwise and flip vertically.
If you would like to rotate the video 180 degrees clockwise, then apply the transpose video filter twice with the -vf transpose=1,transpose=1 arguments.
Normalizing audio in a video file
If you have audio with wild fluctuations in volume, you can normalize it with the following terminal command or Python instruction:
ffmpeg -y -i input.mp4 -af dynaudnorm output.mp4
>>> subprocess.run(['ffmpeg', '-y', '-i', 'input.mp4', '-af', 'dynaudnorm', 'output.mp4'])
The dynaudnorm audio filter performs dynamic audio normalization and is good for evening out volume for, say, conversations where people speak at different volumes. There’s also the loudnorm audio filter, which sets specific loudness standards commonly used in broadcast media:
ffmpeg -y -i input.mp4 -af loudnorm output.mp4
>>> subprocess.run(['ffmpeg', '-y', '-i', 'input.mp4', '-af', 'dynaudnorm', 'output.mp4'])
The default settings for these filters should work well, but you can run ffmpeg -h filter=dynaudnorm and ffmpeg -h filter=loudnorm to view the help information for their various settings.
Compress a Video or Audio File
Video files, especially high-quality videos, can be quite large. You can re-encode a video with the following terminal command or Python instruction:
ffmpeg -y -i input.mp4 -vcodec libx265 -crf 28 output.mp4
>>> subprocess.run(['ffmpeg', '-y', '-i', 'input.mp4', '-vcodec', 'libx265', '-crf', '28', 'output.mp4'])
This command compresses a video file by re-encoding its video stream data with the H.265 (HEVC) codec and setting a higher CRF (Constant Rate Factor) value. This may slightly reduce the quality of the video, but it also reduces its disk size.
The bitrate of an audio file is how many bits are used per unit of time. For example, 128kbps uses 128 kilobits (or 16 kilobytes) per second of audio, so a 60 second MP3 file at 128kbps would take up about 1.1 megabytes of disk space. In general, a higher bitrate produces higher quality audio.
You can re-encode an audio file with a lower bitrate with the following terminal command or Python instruction:
ffmpeg -y -i input.mp3 -b:a 32k output.mp3
>>> subprocess.run(['ffmpeg', '-y', '-i', 'input.mp3', '-b:a', '32k', 'output.mp3'])
For MP3s, 32kbps is low quality while 256kbps is high quality and 320kbps is almost indistinguishable from a music CD. (CDs, or compact discs, were an audio storage media used by ancient civilizations.)
While you can create smaller files by re-encoding a high quality audio file to a lower bitrate audio file, re-encoding a low bitrate audio file to a higher bitrate won’t magically improve the audio quality.
Video Fade In and Out
You can add a fade in from or fade out to black effect at the start or end of your video with the following terminal command or Python instruction:
ffmpeg -y -i input.mp4 -vf fade=in:0:30 output.mp4
>>> subprocess.run(['ffmpeg', '-y', '-i', 'input.mp4', '-vf', 'fade=in:0:30', 'output.mp4'])
This recipe uses a video filter name fade. The -vf fade=in:0:30 argument means that the fade in starts at frame 0 (the very start of the video) and ends at frame 30. For a video that is 30 frames per second, this creates a 1-second fade in at the start of the video. You can also have a fade out with this terminal command or Python instruction:
ffmpeg -y -i input.mp4 -vf fade=in:0:30,fade=out:150:60 output.mp4
>>> subprocess.run(['ffmpeg', '-y', '-i', 'input.mp4', '-vf', 'fade=in:0:30,fade=out:300:15', 'output.mp4'])
The fade out starts at frame 150 (5 seconds into the video) and finishes in 60 frames, or two seconds.
Decrease Saturation or Convert to Black and White
You can decrease the saturation (how colorful the video is) with the following terminal commands or Python instructions:
ffmpeg -y -i input.mp4 -vf eq=saturation=0.5 output.mp4
>>> subprocess.run(['ffmpeg', '-y', '-i', 'input.mp4', '-vf', 'eq=saturation=0.5', 'output.mp4'])
The -vf argument applies a video filter, specifically the eq=saturation=0.5 video filter, which reduces the saturation by one half. To make the video completely black and white (that is, grayscale), use eq=saturation=0.0. You can also increase the saturation to give the video a colorful, almost cartoon look by doubling the saturation with eq=saturation=2.0.
Adjust Video Brightness and Contrast
You can increase the brightness of a video by 6% with the following terminal command or Python instruction:
ffmpeg -y -i input.mp4 -vf eq=brightness=0.06 output.mp4
>>> subprocess.run(['ffmpeg', '-y', '-i', 'input.mp4', '-vf', 'eq=brightness=0.06', 'output.mp4'])
The -vf argument means you want to apply a video filter, specifically the eq=brightness=0.06 filter that increases brightness by 6%. Using eq=brightness=0.5 would increase brightness by 50%, while using eq=brightness=-0.5 would decrease brightness by 50%.
On the other hand, the value for the contrast filter ranges from 0.0 (no contrast) to 1.0 (normal contrast) and up. You can set the contrast 30% higher than normal with the following terminal command or Python instruction:
ffmpeg -y -i input.mp4 -vf eq=contrast=1.3 output.mp4
>>> subprocess.run(['ffmpeg', '-y', '-i', 'input.mp4', '-vf', 'eq=contrast=1.3', 'output.mp4'])
Alternatively, you can make the contrast 30% lower than normal by using eq=contrast=0.7.
Summary
Audio and video data make up a large part of how we interact with computers whether it’s podcasts, dance videos, security camera footage, or sound effects. Python has several third-party modules for downloading, playing, and editing audio and video data, and this chapter provides small code examples you can embed in your own programs.
Python has are several multimedia libraries installable through pip. The OpenCV computer vision library can access your webcam to take photos and videos. The Pygame library, while designed for making video games, can record images from webcams as well as play sound files. The sounddevice and wavio modules for Python can record audio from your computer’s microphone.
There are also several free, open source applications for dealing with multimedia data: yt-dlp for downloading videos, VLC Media Player for viewing videos, and ffmpeg for applying a wide range of filters and conversions to video and audio files.
The topics touched on here could easily fill a book of their own, but this chapter provides a wide introduction and sample code for getting started. Python is much more than a programming language; it’s also a popular development community that has created many free third-party modules to bring new features to your programs.
Practice Questions
- Divide the following into audio or video file format: .ogg, .mp3, .mp4, .wav, .avi
- Can the OpenCV library record audio for the video files it creates?
- Between the sounddevice and pygame modules, which would you use to play an audio file and block the execution of the Python program until the audio finishes playing? Which would you use to start playing an audio file and immediately continue with the rest of the Python program?
- What yt-dlp command line argument extracts the audio from a downloaded video file?
- How do you specify the input file for the ffmpeg command?
- How much does the VLC Media Player application cost?
- What does the ffprobe command do?
Practice Projects
For practice, write programs that do the following.
Take Time Lapse Photos
Write a program that uses either OpenCV to take photos using a webcam once every 5 seconds, and then after a preset number of photos, assembles them into a time lapse video. Since time lapse videos can take hours to create, for testing purposes, it may help to find a lava lamp video online to play while the webcam on top of your screen is pointed at a mirror to view the video.
Add Fade In and Fade Out
Write a program that uses ffmpeg to add a two second fade in and fade out effect to every video file in a given folder. For testing purposes, you can make multiple copies of the same short video file. The program should also check the video length and offer a warning if the video is shorter than four seconds.
Brightness Preview
Write a program that uses ffmpeg to get a preview of various brightness changes. It can take quite a while to adjust the brightness of an entire video, and you may want to reprocess the video multiple times at varying brightness levels until you find one you like. It’s much faster to have ffmpeg change the brightness of a single image than an entire video. To keep from having to re-run ffmpeg, your program should extract a frame from an input video, then run ffmpeg again on that frame image to produce other images at varying brightness levels. For example, in a loop you can pass ffmpeg the argument eq=brightness=0.01, eq=brightness=0.02, eq=brightness=0.03 and so on up to, say, eq=brightness=0.50. Be sure to give the output image files different names, such as brightness0.01.png, brightness0.02.png, and so on. Then user will be free to view the different preview images and pick the brightness setting they’d like to later apply to the entire video.