#A History of UPL’s Cameras
For almost as long as the Undergraduate Projects Lab at the University of Wisconsin has existed, there’s been a camera of some sort peering at the room. There’s evidence of a system existing even as far back as the 1990s, with a prehistoric revision of the site mentioning that an old iteration was:
…a $15 video camera attached to the wall with duct tape, connected to a VCR, connected to a video spigot in a Mac IIcx, running Timed Video Grabber (TVG), and FTPd. Dax, an HP workstation ran a script that would try to FTP the latest image every 60 seconds. Because the clocks would drift, occasionally, the file accesses would collide, and the whole scheme would break.
Just reading that makes me stare at the camera that now sits perched on top of the arcade cabinet with wonder. What used to be several thousand dollars of equipment is now achievable (with immeasurably better quality) with a $50 webcam plugged into a Raspberry Pi.
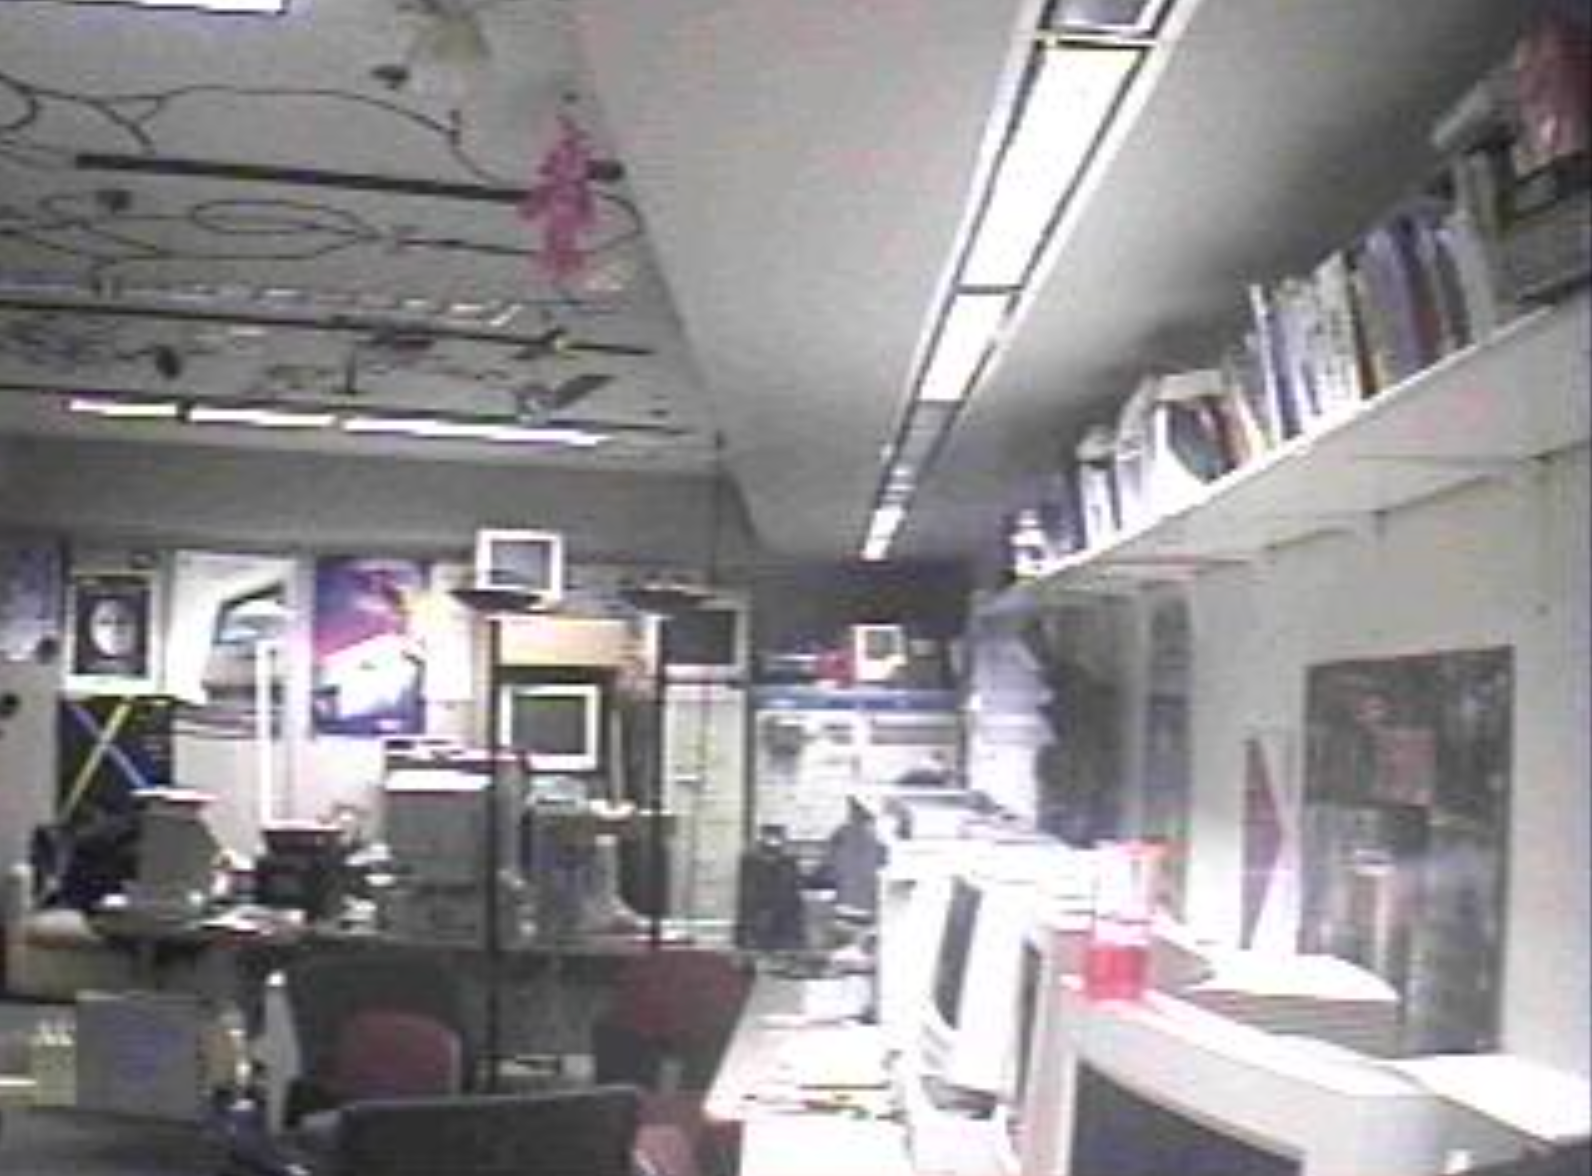
Taken ~25 years apart.
I could—and probably will—write an entire other blog post about the intricate history of the UPL, mentioning how older versions of the website allowed for users to control the tilt and pan of the camera using four stepper motors attached to the camera.
However, the focus of this article is about the two latest iterations of cameras in the UPL.
#“Is the UPL open right now?”
I’m sure that any UPL member can testify the horror of arriving to the lab to see a closed door. If you live anywhere off campus, it’s heartbreaking to see your arduous trek to the CS building result in failure.
There’s no doubt that as far back as IRC, members of the UPL messaged each other asking if the lab was open. With the advent of mobile phones, it’s gotten easier to bother your friends—who may not even be in the room!
Well, myself, in collaboration with other UPL members, decided to fix this issue in, perhaps, the most CS-student-esque way possible: an automated system to identify the occupancy of the lab.
#People counting
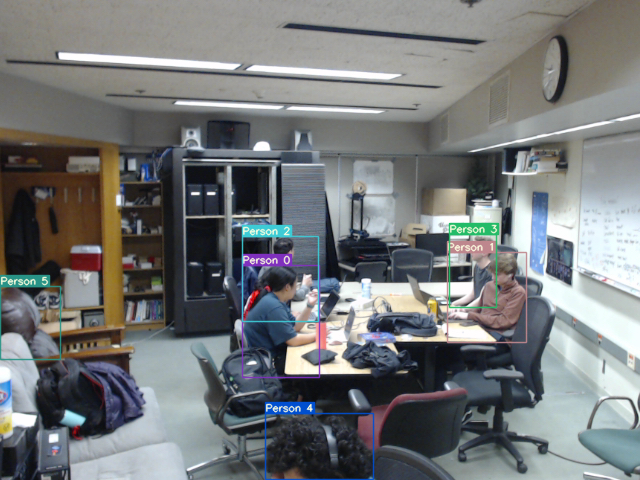
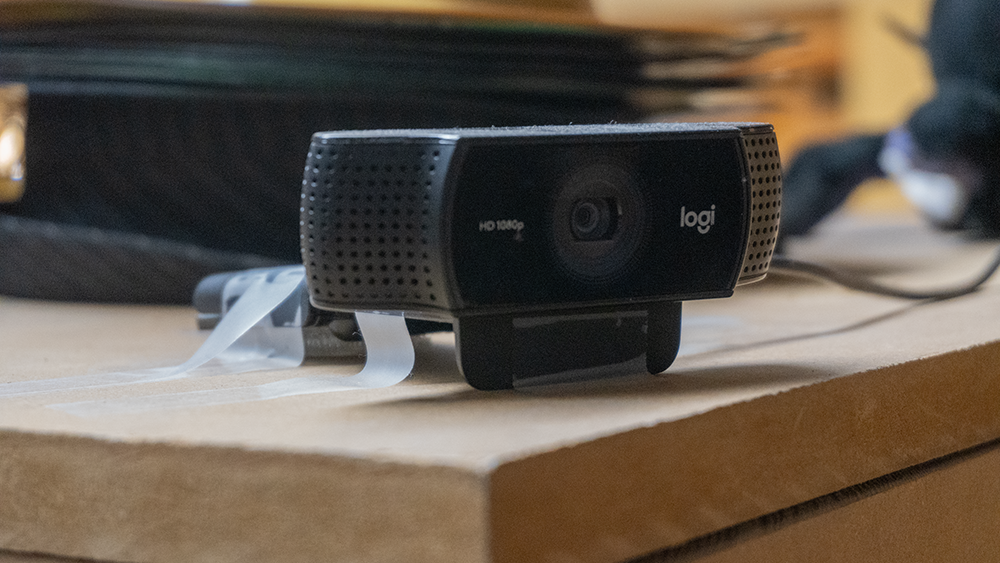
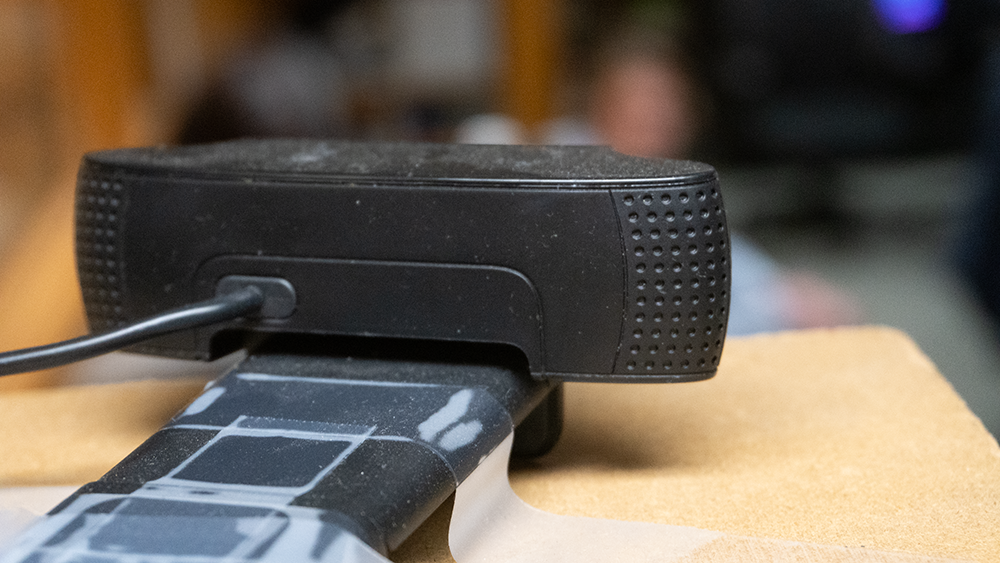
The first iteration of the people counting system (as built by Michael Berkey) utilized a Logitech C920 camera mounted on a vantage point that had a clear view of the room. A Discord bot was set on a 15 minute loop (using discord.py.ext’s @tasks.loop(minutes=15)) to call a YOLOv7 model set to class 0 (detecting people). The bot called the webcam to take an image, then ran it through the model for inference. It returned the number of people in the room (and annotated the image with bounding boxes of where it believed the people to be, for debug purposes).
…don’t mind the tape.
It then set the name of a channel to the results (either 1-person-in-upl or X-people-in-upl), which others could check.

An example of what the Discord looked like on a day with a semi-busy UPL.
#Switching to door sensing
This worked perfectly for a while — people would check the Discord channel name and see the estimated count of the number of people in the room. If it said “zero people”, they could infer that the UPL wasn’t open.
However, this solution started presenting issues. For one, having people in the room didn’t necessarily indicate that the UPL was open. There could be a meeting, or a separate gathering where the doors were closed and people weren’t allowed inside. This was confusing to people who might have seen “8 people inside the UPL”, only to arrive at the building to see coords having a meeting.
There was also the issue of the model sometimes interpreting the chair in the corner as a person1:

Either the model is too sensitive, or the UPL has a friendly ghost!
It was around this time that I stumbled upon the homepage of MITERS, a makerspace at MIT. On their website, they broadcast whether the door to the space is open using a reed switch attached to a Raspberry Pi. Reed switches are small, physical components that are able to detect a magnetic field. If you put one on a doorframe, and then attach a tiny magnet to the door itself, you have an effective way of detecting whether a door is open or closed! I was able to find a writeup by a former member of the space on their implementation, but I can’t guarantee that it’s accurate to how it’s set up there currently.
I considered using similar components for a door status checker for the UPL — it wouldn’t have been too much effort to buy WiFi enabled ESP32 modules and off-the-shelf door-mountable reed switches. Then, I would have the chips simply send a POST request with their status every time the door was opened or closed.
I decided against this approach for a few reasons:
-
The UPL doesn’t really have the equipment to maintain such a system. I don’t know how to solder, and mounting breadboards to the walls doesn’t seem like the most future-proof or aesthetically pleasing solution.
-
If the system were to spontaneously break after I left, it would be difficult to find somebody to fix it. The UPL is mainly a software oriented lab!
-
The WiFi ran by the university (UWNet) requires you to log in with a captive portal to register your device to connect to the network. Without intervention, it will occasionally require you to sign back in to renew your ability to connect2. While there are some ways to emulate the specific requests a typical browser would use to authenticate with your NetID, it would be a ton of recurring effort (and the login it used would have to be changed as people graduated)!
So, I decided that the sensors themselves would have to act autonomously and simply relay their state to a device elsewhere in the room. Luckily, the Raspberry Pi that ran the code for the people counter was easily repurposed. I installed Home Assistant, an open source platform for interfacing with various network connected devices.
There are plenty of devices that track the status of doors, made by companies like Ring and ADT for home security. However, they usually require proprietary hubs to check their status, and don’t offer easily accessible APIs to interface with the device. Luckily, there was a better solution!
#Zigbee!
Enter Zigbee. It’s a low-rate mesh wireless protocol that allows for smart devices to communicate over a personal area network. A benefit of this is that you’re able to use one hub to communicate with a variety of devices, even those made by different manufacturers. Instead of searching for a particular brand for the door contact sensors, I would just have to find ones that supported the Zigbee protocol. Then I would be able to view their status through Home Assistant’s dashboard.
It’s important to note that Zigbee radios operate independently from WiFi or Bluetooth antennas. If you want to interface with Zigbee devices, you’ll have to pick up a special receiver that can support the protocol. For this project, I picked up this one made by SONOFF. Home Assistant’s Zigbee integration is called Zigbee Home Automation, and it supports a variety of Zigbee coordinators (the USB dongles that allow for connections). When you use this integration, Home Assistant automatically creates a Zigbee network that the devices can join.
I decided to use these Aqara door and window sensors for this project. They had the best reviews out of all of the Zigbee door sensors I looked at, and have a battery life of two years (with an easily replaceable CR1632 cell).
Once the coordinator and sensors arrived, I created a Home Assistant login and installed the ZHA integration. Pairing simply required holding the “reset” button on the sensors until Home Assistant recognized them and added the corresponding entities in the dashboard.
#Using the door statuses
Once this was all configured, I had the live statuses of the doors through the Home Assistant dashboard! I’m not going to lie, it was really fun opening and closing the doors repeatedly and seeing the dashboard change in real-time (even if passerby in the CS building probably thought I was crazy).
It’s so satisfying to watch this happen in real-time.3
An important thing to note here is that UWNet provides total access point isolation. None of the devices on the network can see any of the others (for good reason, as it would be a huge security vulnerability for any devices with open ports). If this wasn’t a limitation, I would just have the website directly query the rpi.
My first intuition was to use Home Assistant’s RESTful Command integration to send a POST request to my webserver whenever the status of the doors changed. These require you to setup each command ahead of time, in HA’s configuration.yml:
1
rest_command:
2
door1_opened:
3
url: "https://doors.amoses.dev/door1/open"
4
method: POST
5
headers:
6
content-type: "application/json"
7
payload: '{"door": "door1", "state": "open"}'
8
content_type: "application/json; charset=utf-8"
9
10
door1_closed:
11
url: "https://doors.amoses.dev/door1/close"
12
method: POST
13
headers:
14
content-type: "application/json"
15
payload: '{"door": "door1", "state": "closed"}'
16
content_type: "application/json; charset=utf-8"
17
18
door2_opened:
19
url: "https://doors.amoses.dev/door2/open"
20
method: POST
21
headers:
22
content-type: "application/json"
23
payload: '{"door": "door2", "state": "open"}'
24
content_type: "application/json; charset=utf-8"
25
26
door2_closed:
27
url: "https://doors.amoses.dev/door2/close"
28
method: POST
29
headers:
30
content-type: "application/json"
31
payload: '{"door": "door2", "state": "closed"}'
32
content_type: "application/json; charset=utf-8"
…but I very quickly realized that this solution wasn’t the best. For one, when I published the source code onto GitHub, some very funny students decided that they would manually simulate the POST requests and change the status of the doors to be inaccurate. That’s what I get for leaving the endpoint unsecured!4
I eventually learned that Home Assistant provides a RESTful API directly alongside the web dashboard. If I set that up, I would be able to query the instance for the states of the connected devices.5 All it took was appending an /api/ route to the HA URL. I could just use that!
The API has all of its routes authenticated with a bearer token (to most likely mirror the permissions of the frontend, which requires a user login before showing any data). Given that I wanted to display the door status on the UPL’s page, I realized the potential danger in shipping the bearer token with the site. Any crafty user could take it and access any other route on Home Assistant’s API. Given the level of information and control available on HA instances, this could be disastrous.
I made a quick webserver using Express that proxies the request with the bearer token and only serves the relevant door information. Because it displays this separately, the user has no way of seeing or manipulating anything beyond this.
const express = require("express");
const axios = require("axios");
const cors = require("cors");
const app = express();
const PORT = 3500;
8
const apiUrl = "https://HOMEASSISTANT-URL-HERE/api/states";
9
const token = "Bearer TOKEN-GOES-HERE";
10
11
app.use(cors());
12
13
app.get("/door-status", async (req, res) => {
14
try {
15
const response = await axios.get(apiUrl, {
16
headers: {
17
Authorization: token,
18
},
19
});
20
21
const data = response.data;
22
23
// grab the items with the appropriate HA entity ids
24
const doors = data.filter(
25
(item) =>
26
item.entity_id === "binary_sensor.back" ||
27
item.entity_id === "binary_sensor.front"
28
);
29
30
// extract status and last updated information
31
const doorStatus = doors.map((door) => ({
32
door: door.attributes.friendly_name,
33
status: door.state,
34
last_updated: door.last_updated,
35
}));
36
37
// send the filtered data as a json response
38
res.json(doorStatus);
39
} catch (error) {
40
res.status(500).send("Error fetching data");
41
}
42
});
// :P
app.get("/", async (req, res) => {
res
.status(200)
.send("<html><body><b>wow upl door status endpoint 443</b></body></html>");
});
app.listen(PORT, () => {
console.log(`Server is running on port ${PORT}`);
});
Now, the server will query Home Assistant’s API on your behalf (with the proper bearer token). It’ll return a JSON object of the door statuses and their last change, like so:
[
{
"door": "back",
"status": "on",
"last_updated": "2024-10-12T20:01:54.353657+00:00"
},
{
"door": "front",
"status": "on",
"last_updated": "2024-10-12T20:02:10.132178+00:00"
}
]
…and the Discord bot/UPL website can use that to let people know what the status is.

The UPL website uses a header component which fetches the door status every 15 seconds.

The Discord channel name is an easy way to see the status without opening the site.
#Conclusion
I’m pretty happy with how this project turned out. It’s been really fun developing something that I actually use every day, and I find it pretty special that every time I check if the UPL’s open or not, I’m doing it via something that I made myself.