DISCLOSURE: If you buy through affiliate links, I may earn a small commission. (disclosures)
I've been pleasantly surprised with the amount of freedom and possibilities you have when building in Pokopia. In many ways it feels like a simplified factory game a la Satisfactory.
I saw some cool lava gate builds online and wanted to build my own so here we'll walk through how my gate works so you can build your own.
What is a lava gate?
A lava gate in Pokopia is basically a waterfall of lava that you can trigger on / off that serves as a gate.
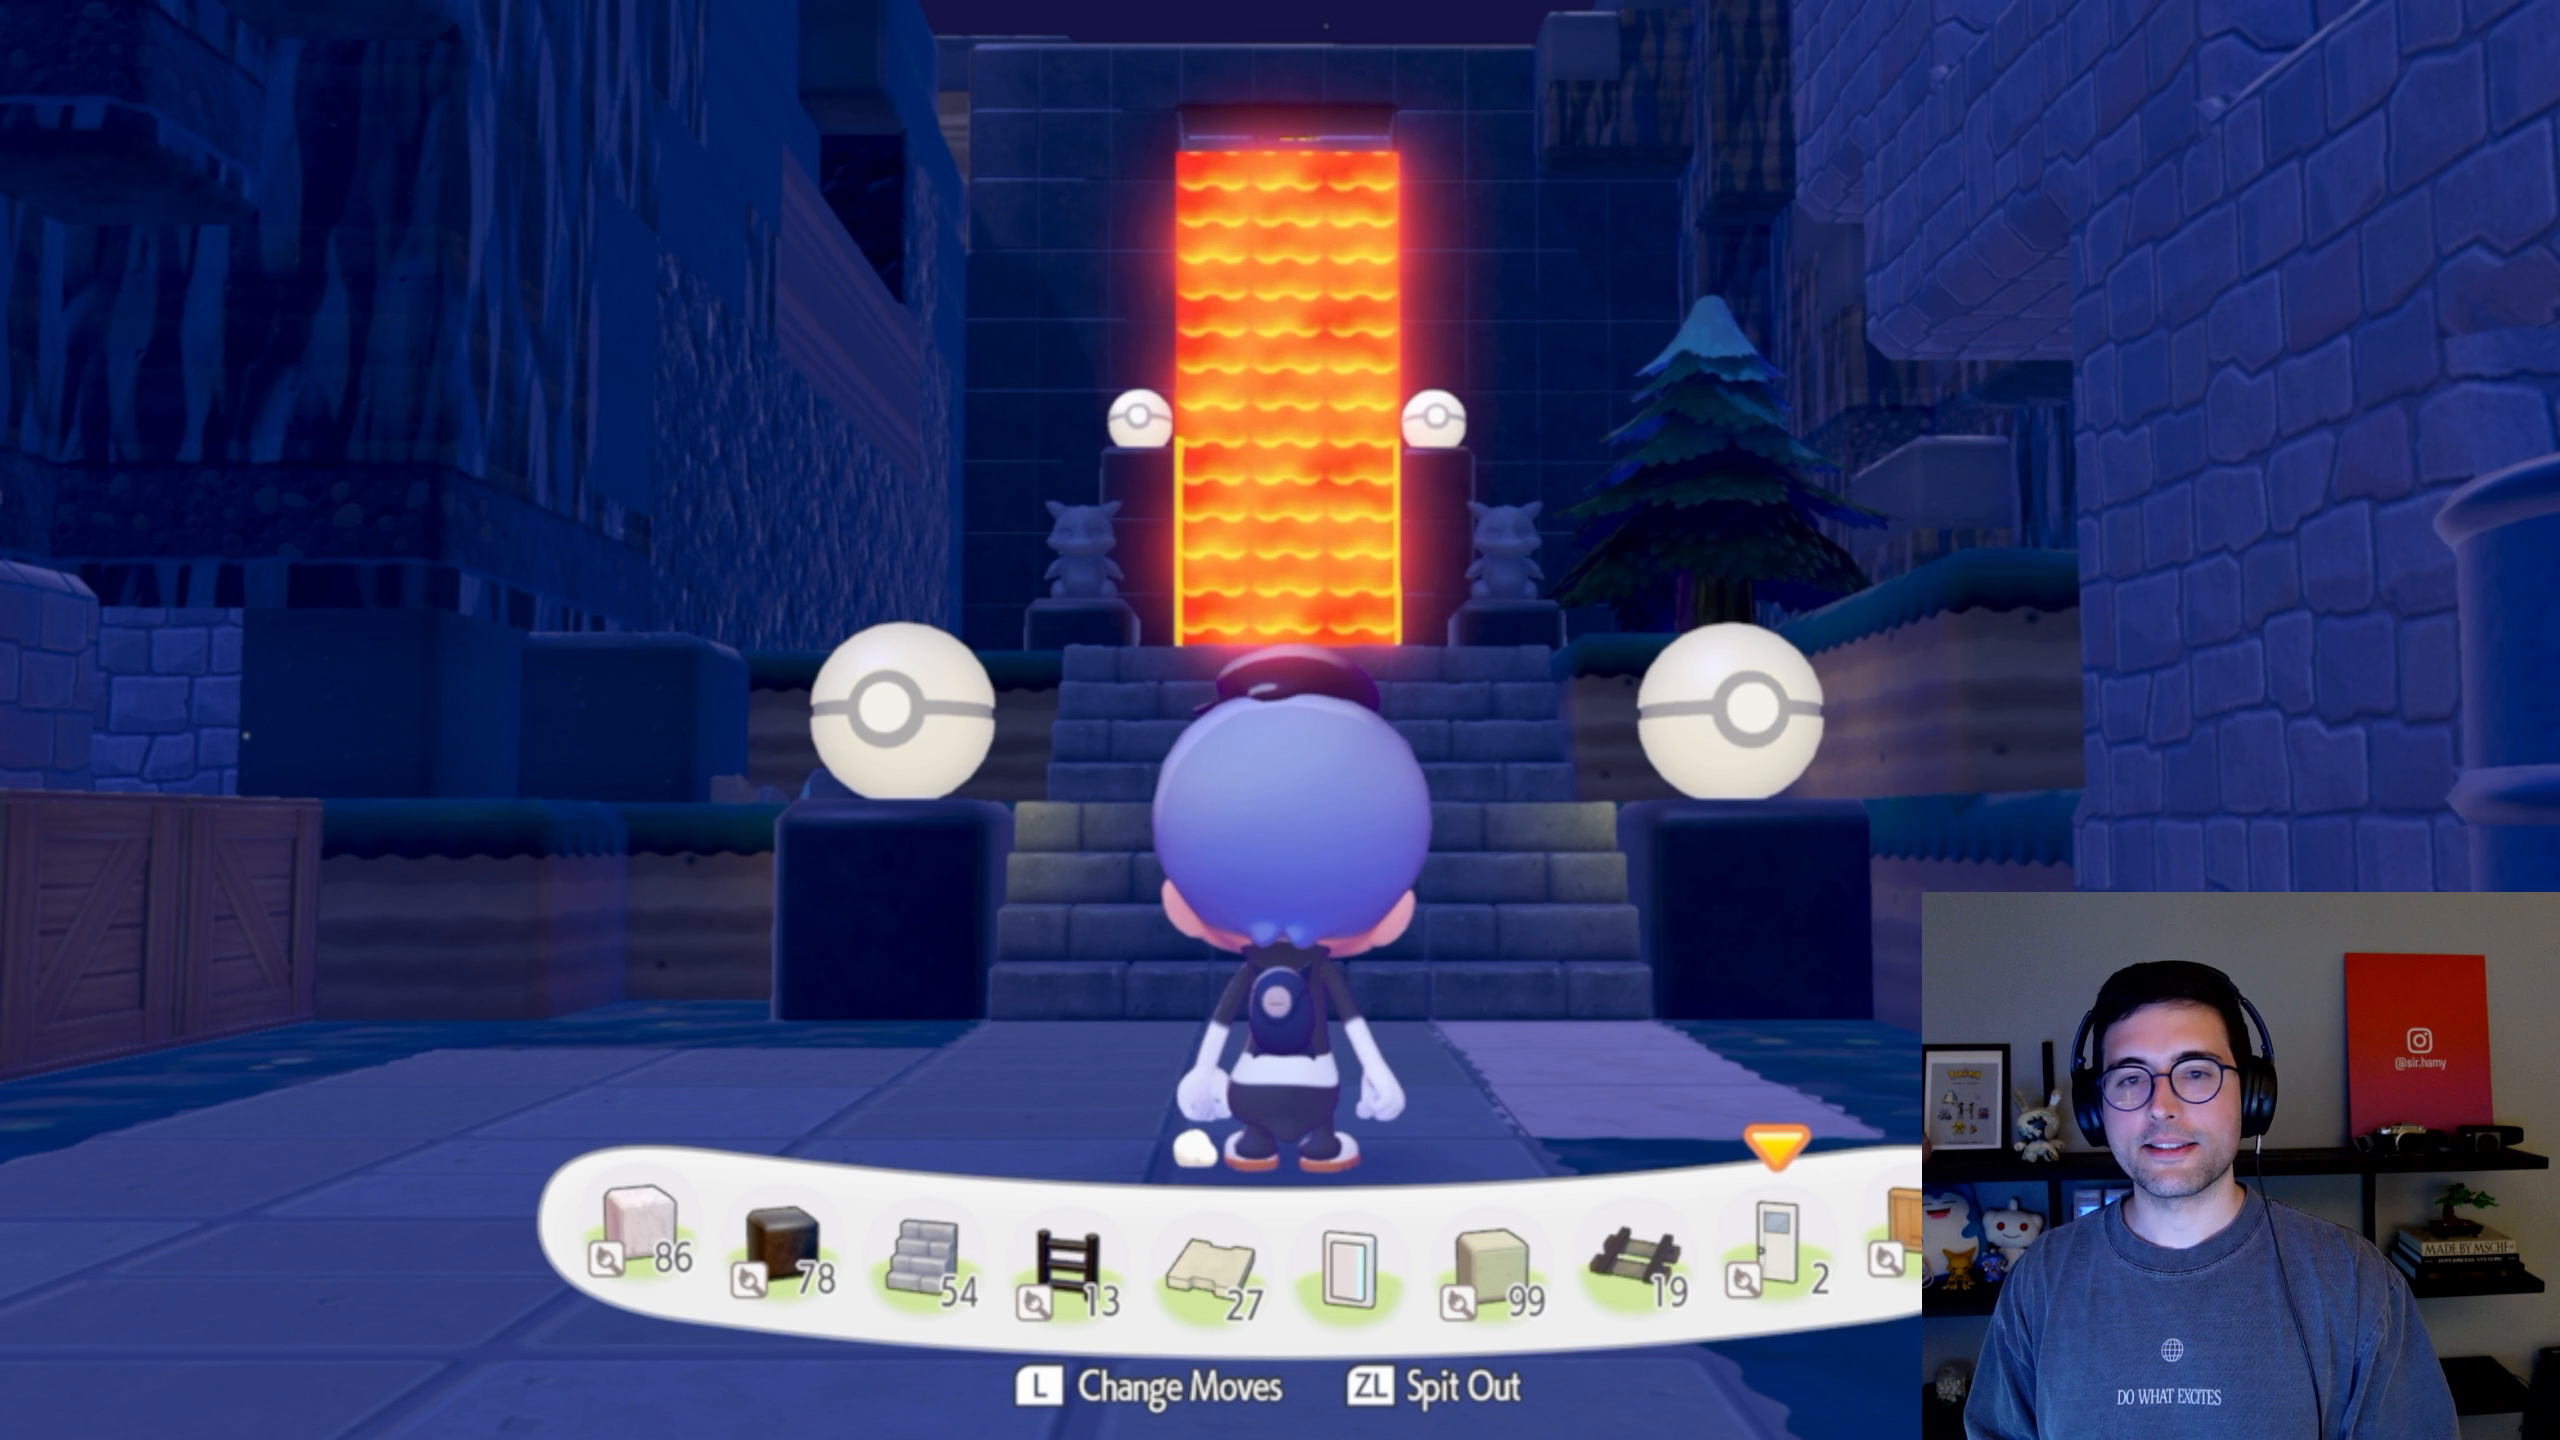
This doesn't really have any practical purpose in the game as mons spawn in / out randomly and there's no combat / raids. So you really only build these cause they look cool. But they do look cool so well worth it.
How to build a lava gate
A lava gate is made up of 2 components:
- The lava handling so you can start / stop the lava flow
- The trigger so you can trigger it when you want - by movement, a switch, etc
Handling Lava flows
We'll first start with lava handling as you'll likely want to get the basic flow down first before trying to add on/off switches.
You can get lava with chili liquid from vending machines or by sucking up lava. You unlock the ability to suck up lava when you unlock sucking up liquid from a quest line with Wooper.
You can suck up lava the same way you suck up liquid - Y + ZR at the same time. This will put the lava in your mouth then you can place it in infinite places.
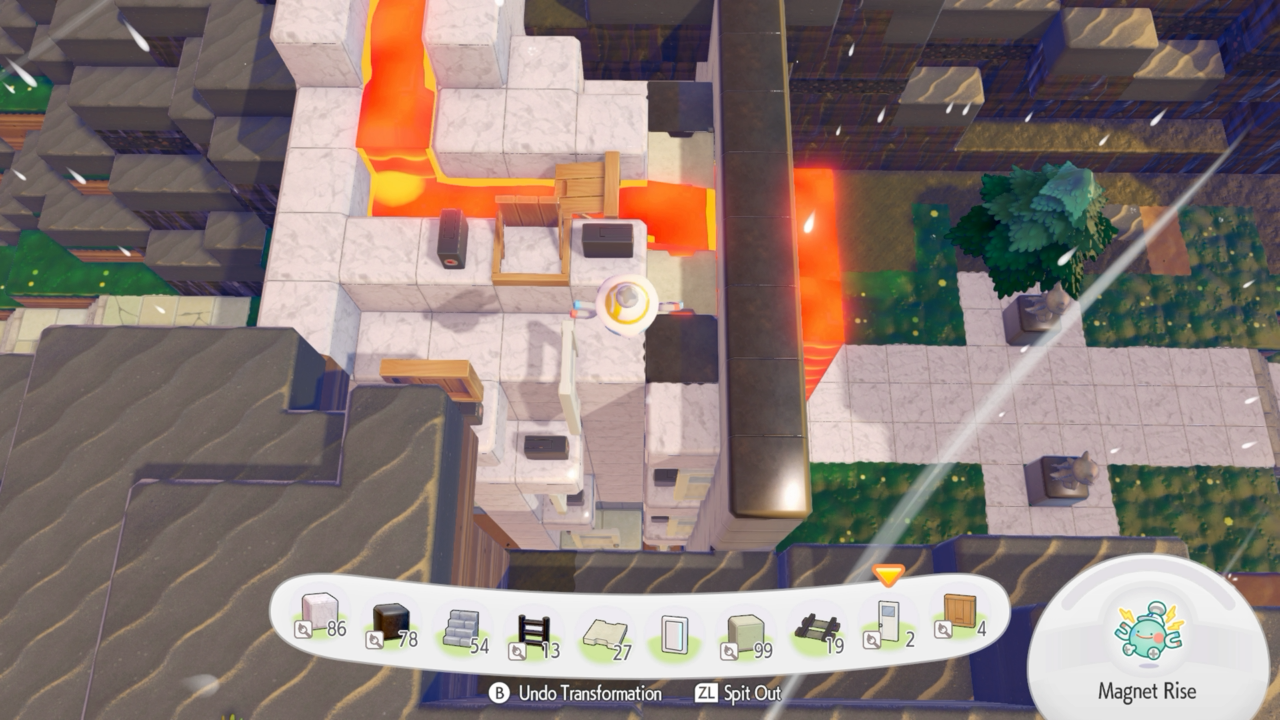
So to build your lava gate you need to:
- Build a wall / choke point where you want your lava to block off
- Build a channel above it from the lava storage to the wall
- Put a door / window hatch near the waterfall point which will serve as our on/off capability (on when open, off when closed)
- Test that the lava is falling where you want it before moving on
A few tips about handling:
- Always build a small 2x2 pit when working with liquids so you can put the liquid in there, near where you're working and have an infinite supply to reuse (you suck it up, spit it out, and now have a mouth full of liquid + more to suck up).
- Liquid movement works by elevation + distance, not by volume (at least not that I've been able to replicate). It seems that liquids will move 6-7 squares from the previous elevation drop before stopping. So if you want to move it long distances you need to insert an elevation drop every 5-6 blocks. Note that this is the case when the channel is 1 block wide, it seems to change when you have more blocks wide (more width means less length it will travel).
- Always start with a little ~2x2 reservoir blocked by a window hatch so you can easily start / stop liquid flow without needing to suck it all up again. This is useful because you can't build in an active lava flow so as you're developing your channel / gate you'll likely need to start / stop it a number of times to get it right.
Adding Lava Switches
Now that we have our lava where we want it, we likely want to have a means of turning it on / off from the base of the gate so we get that cool visual effect and also don't accidentally lock ourselves from one side to the other. To do this we need to pass a switch signal from one location to another and to do that, laser sensors are our best bet.
I have a whole post on how laser sensors work and how to build with them in Pokopia so for a deep dive, check that out but we'll go over the basics here.

The way laser sensors work is:
- Detect movement 1-2 squares in front of them
- Trigger devices in 1 radius around them (NOT forward or diagonals in x-axis)
We can chain these together using a switch -> sensor -> door -> sensor -> door -> repeat pattern to transfer the signal from the switch all the way up to the lava flow gate.
In my experience the best way to do this is:
- Horizontal sections - use sensors and doors/windows - this lets you move the signal ~4 spaces per pair
- Vertical sections - use a sensor and then the door right on top / bottom of the sensor and repeat back and forth. This lets you move ~3 spaces vertically per pair.
Creating your first lava gate
With that you should have everything you need to build your first lava gate.
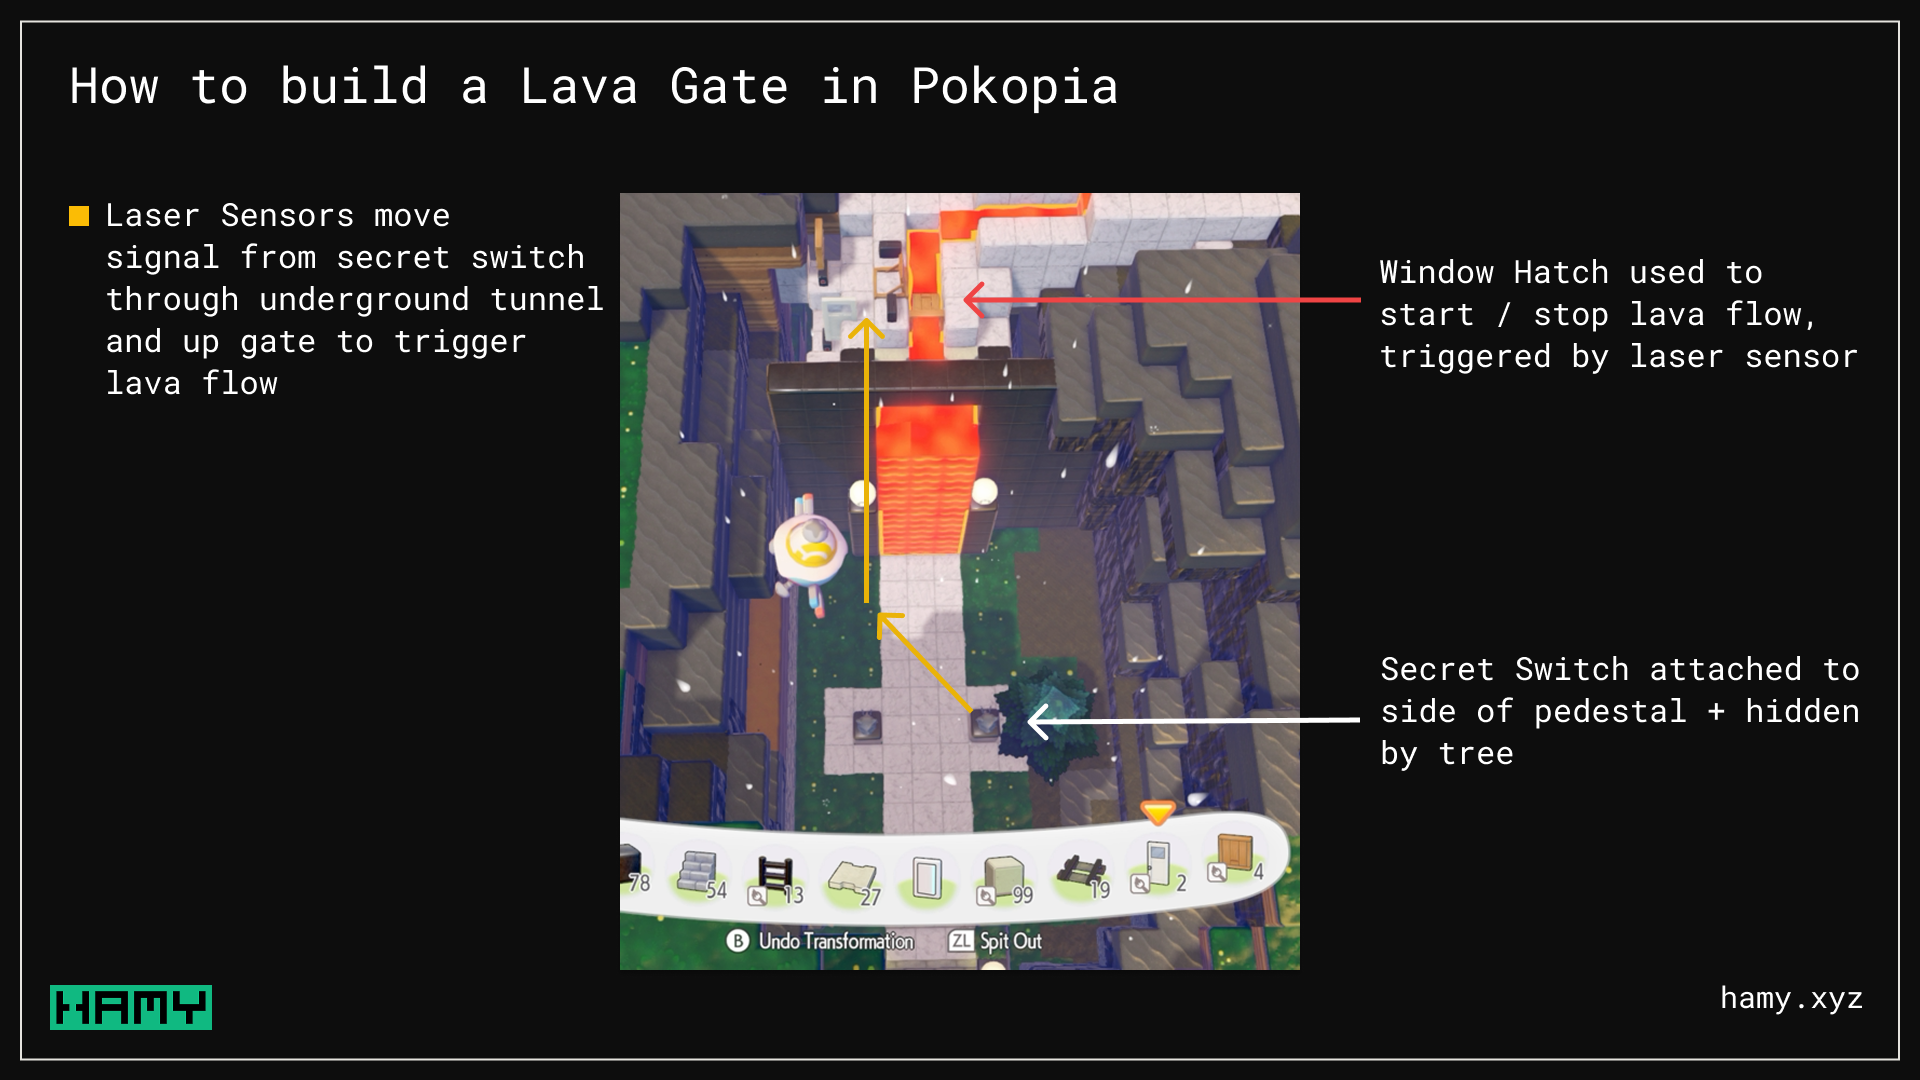
The way I built mine was:
- Run the signal down the left side of the wall using the repeating sensor x door combos.
- Put a switch behind the gate so easy to click it on the way out
- Continue that chain down below the wall / ground and then snake it forward to one of my statues which has a hidden switch on it
- Use planks / grates to allow easy walking over the liquid - liquid will go through but you can still walk on it!
Next
I've thoroughly enjoyed my time with Pokopia and am glad we have some advanced building mechanics to learn.
If you liked this post you might also like: