Using the railway network as a flatbed scanner
August 17th, 2026 — 4,600 words
Over the past few months, I've been working on using an industrial linear scanning camera to take very wide photos out of trains and ferries. Getting it working has been quite the challenge, but I think the results speak for themselves.
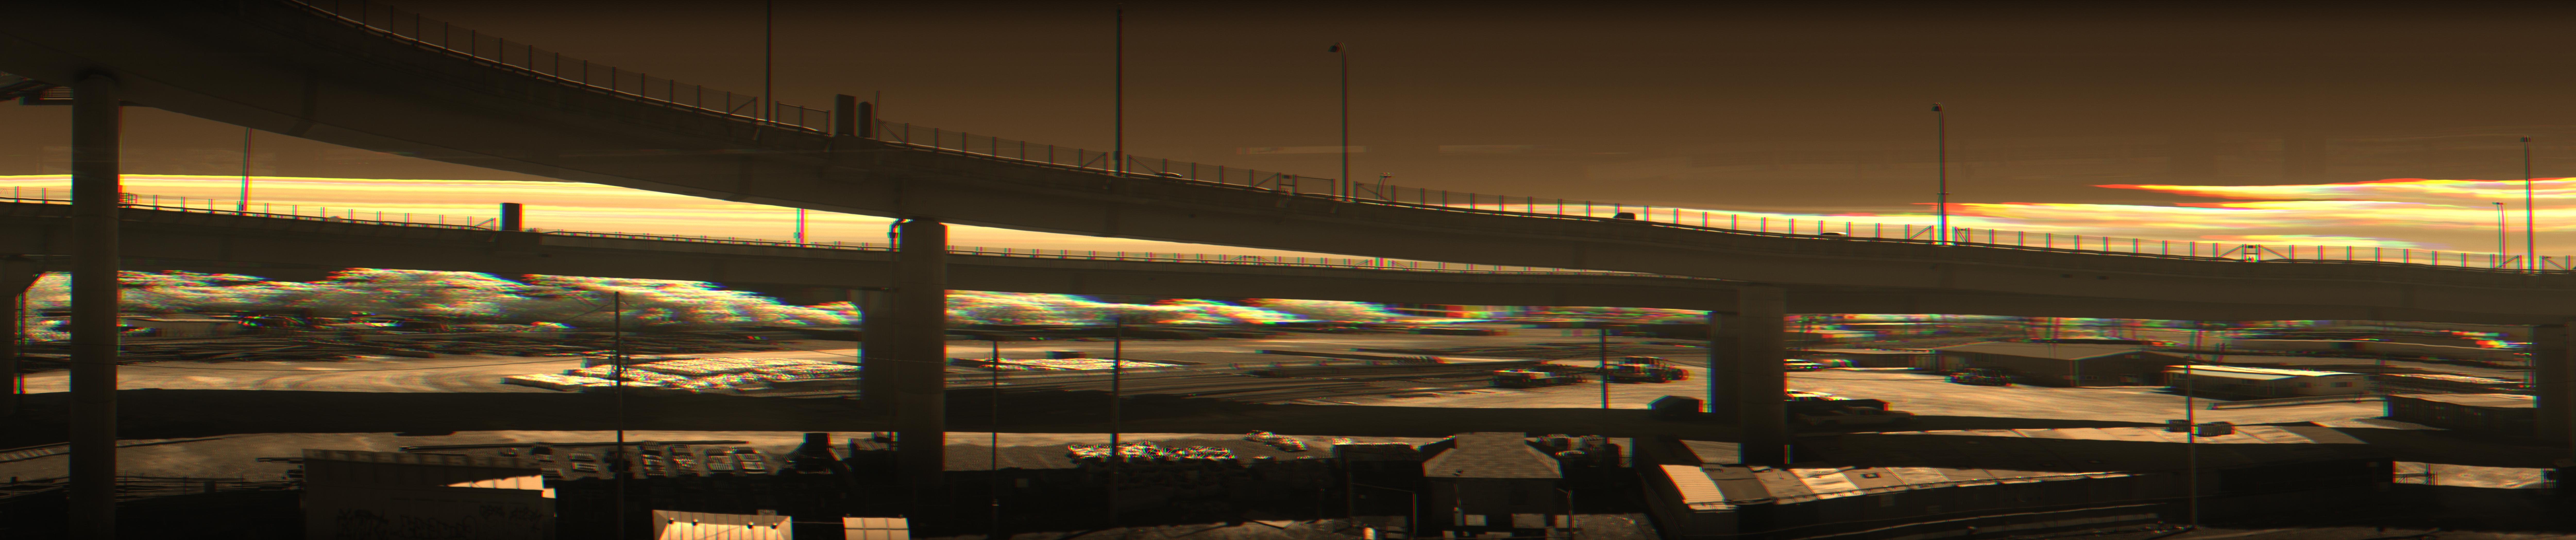
taken on the San Francisco to Oakland ferry in February 2026 (56,894x2,048 pixel grayscale image); scroll to zoom in and click and drag to move
More pictures are on display in the gallery.
I presented a talk on this project at EMFcamp 2026, which you can watch below or read on for the same story in more detail:
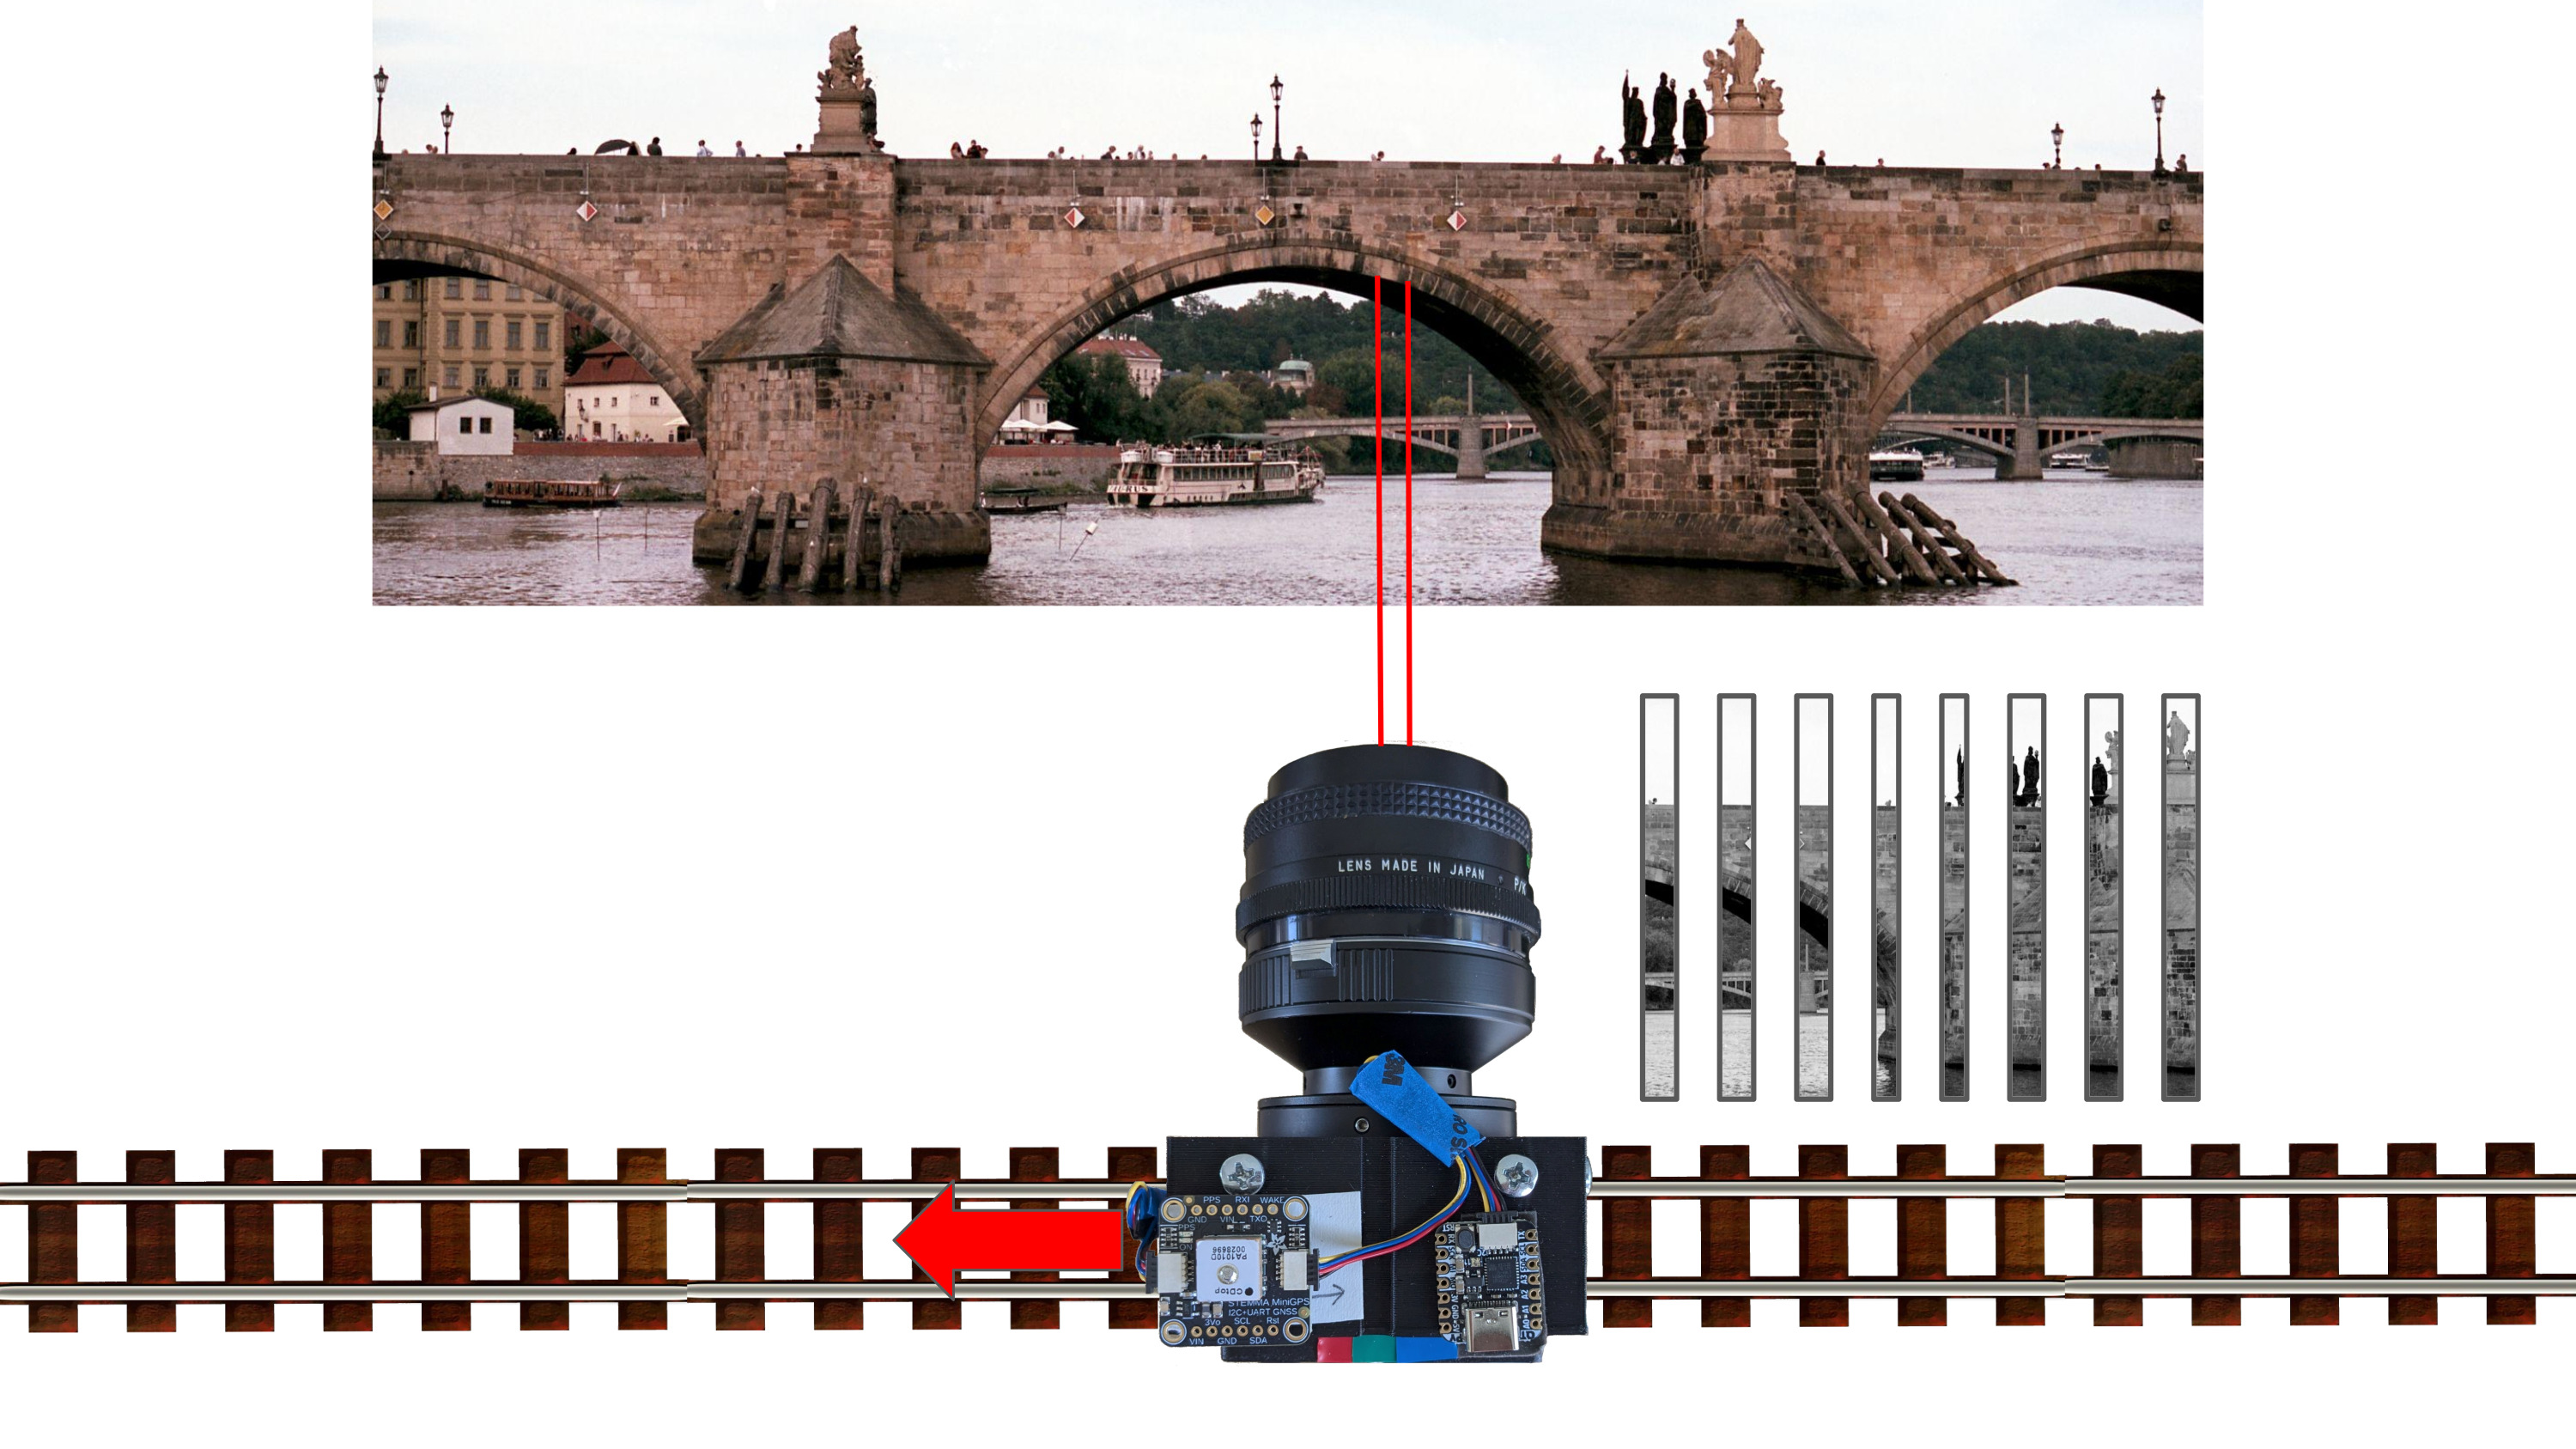
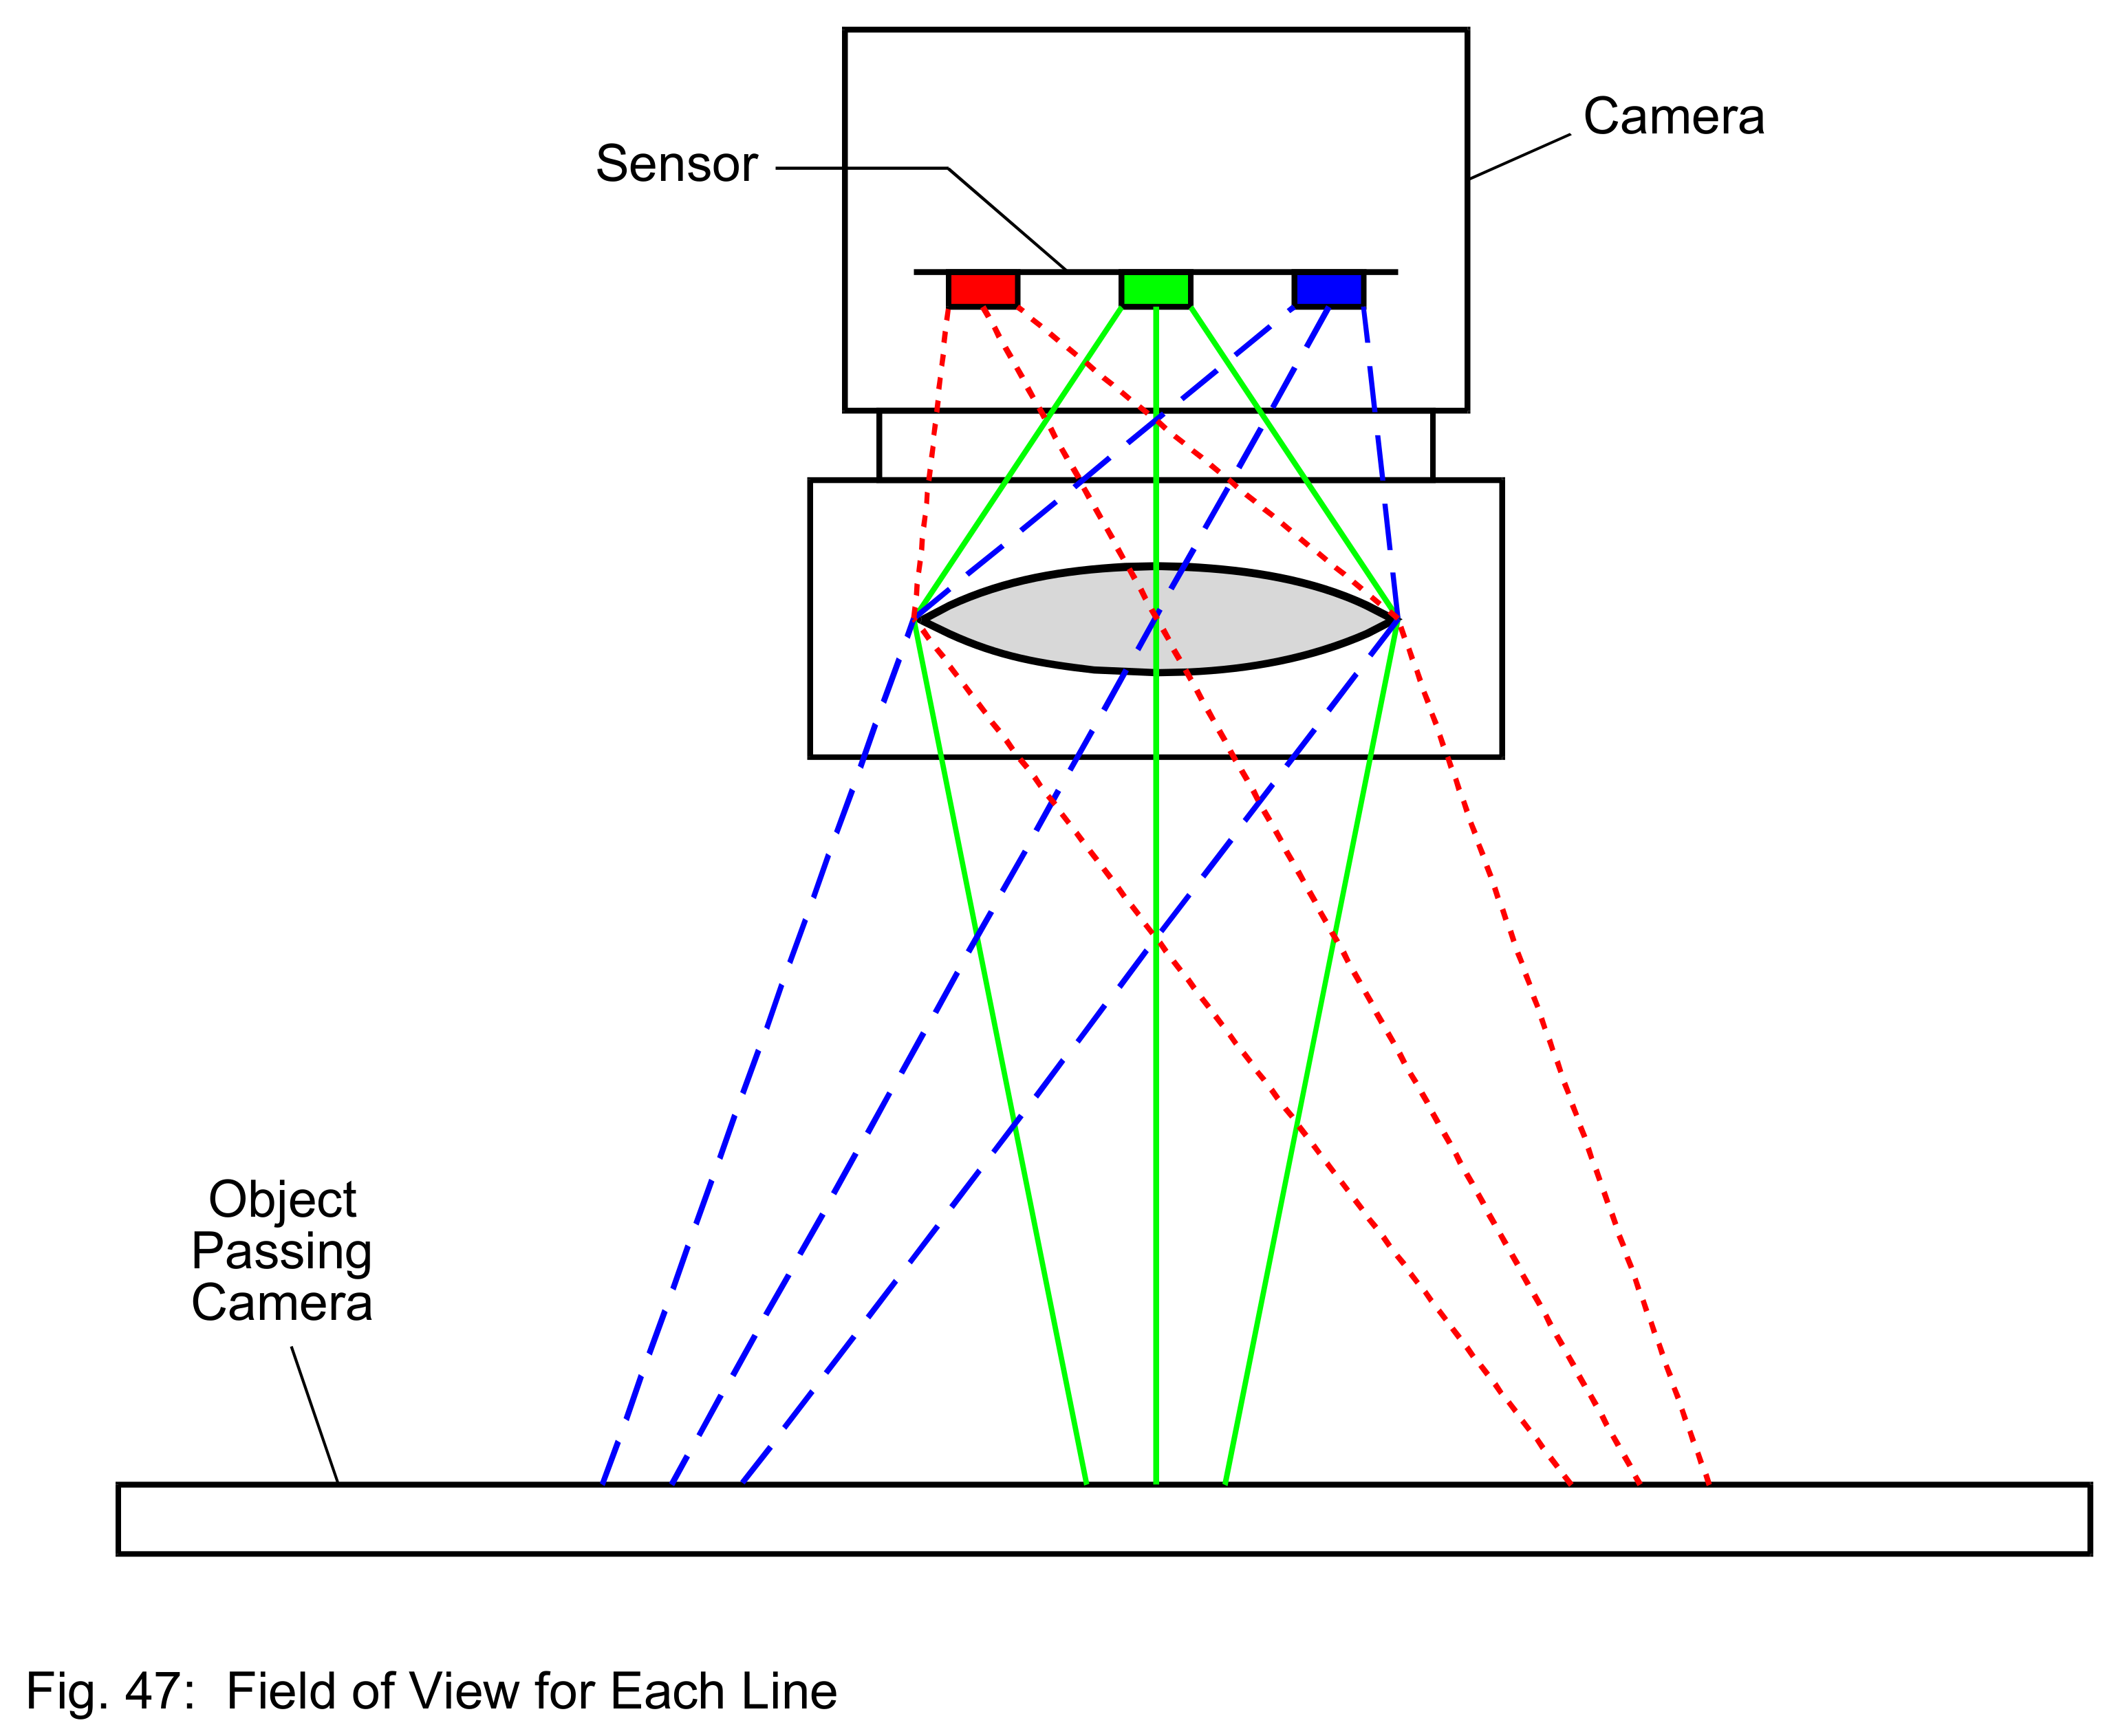
The camera is pointed out of a moving vehicle and is constantly capturing a single vertical line kinda like these grayscale ones in the diagram, but a lot thinner. As the camera moves, what exactly it sees is changing. If I capture the lines from the camera quickly enough and stitch them together, I can produce a complete-looking image. It's a bit more complicated than that and getting the results looking good was rather tricky, but that's the main idea behind it.
Back in the 1990s, digital camera sensor technology hadn't caught up to the size and effective resolution of medium and large format film, so digital scanning backs were developed. They capture a high-resolution image without needing a giant grid of pixels by moving a single line of pixels (or three lines for color) across the frame. In the intervening years, image sensors have gotten pretty big (there's even one that covers 4x5" large format nowadays), but this approach is still cheaper to build for large formats than a giant sensor.
I'd been thinking about building my own digital scanning back for my large format camera for a while, but I've never quite gotten around to it because building something to mount properly on my camera seemed too daunting. (Buying one could have been an option, but ones from the 1990s still go for thousands of dollars on ebay and require reconstructing a computing environment of a similar vintage to use.) Late last year, I was watching a video on Gigawipf's medium format scanning camera build and suddenly thought: "what if the entire camera moved and the subject didn't?" and decided to give it a shot.
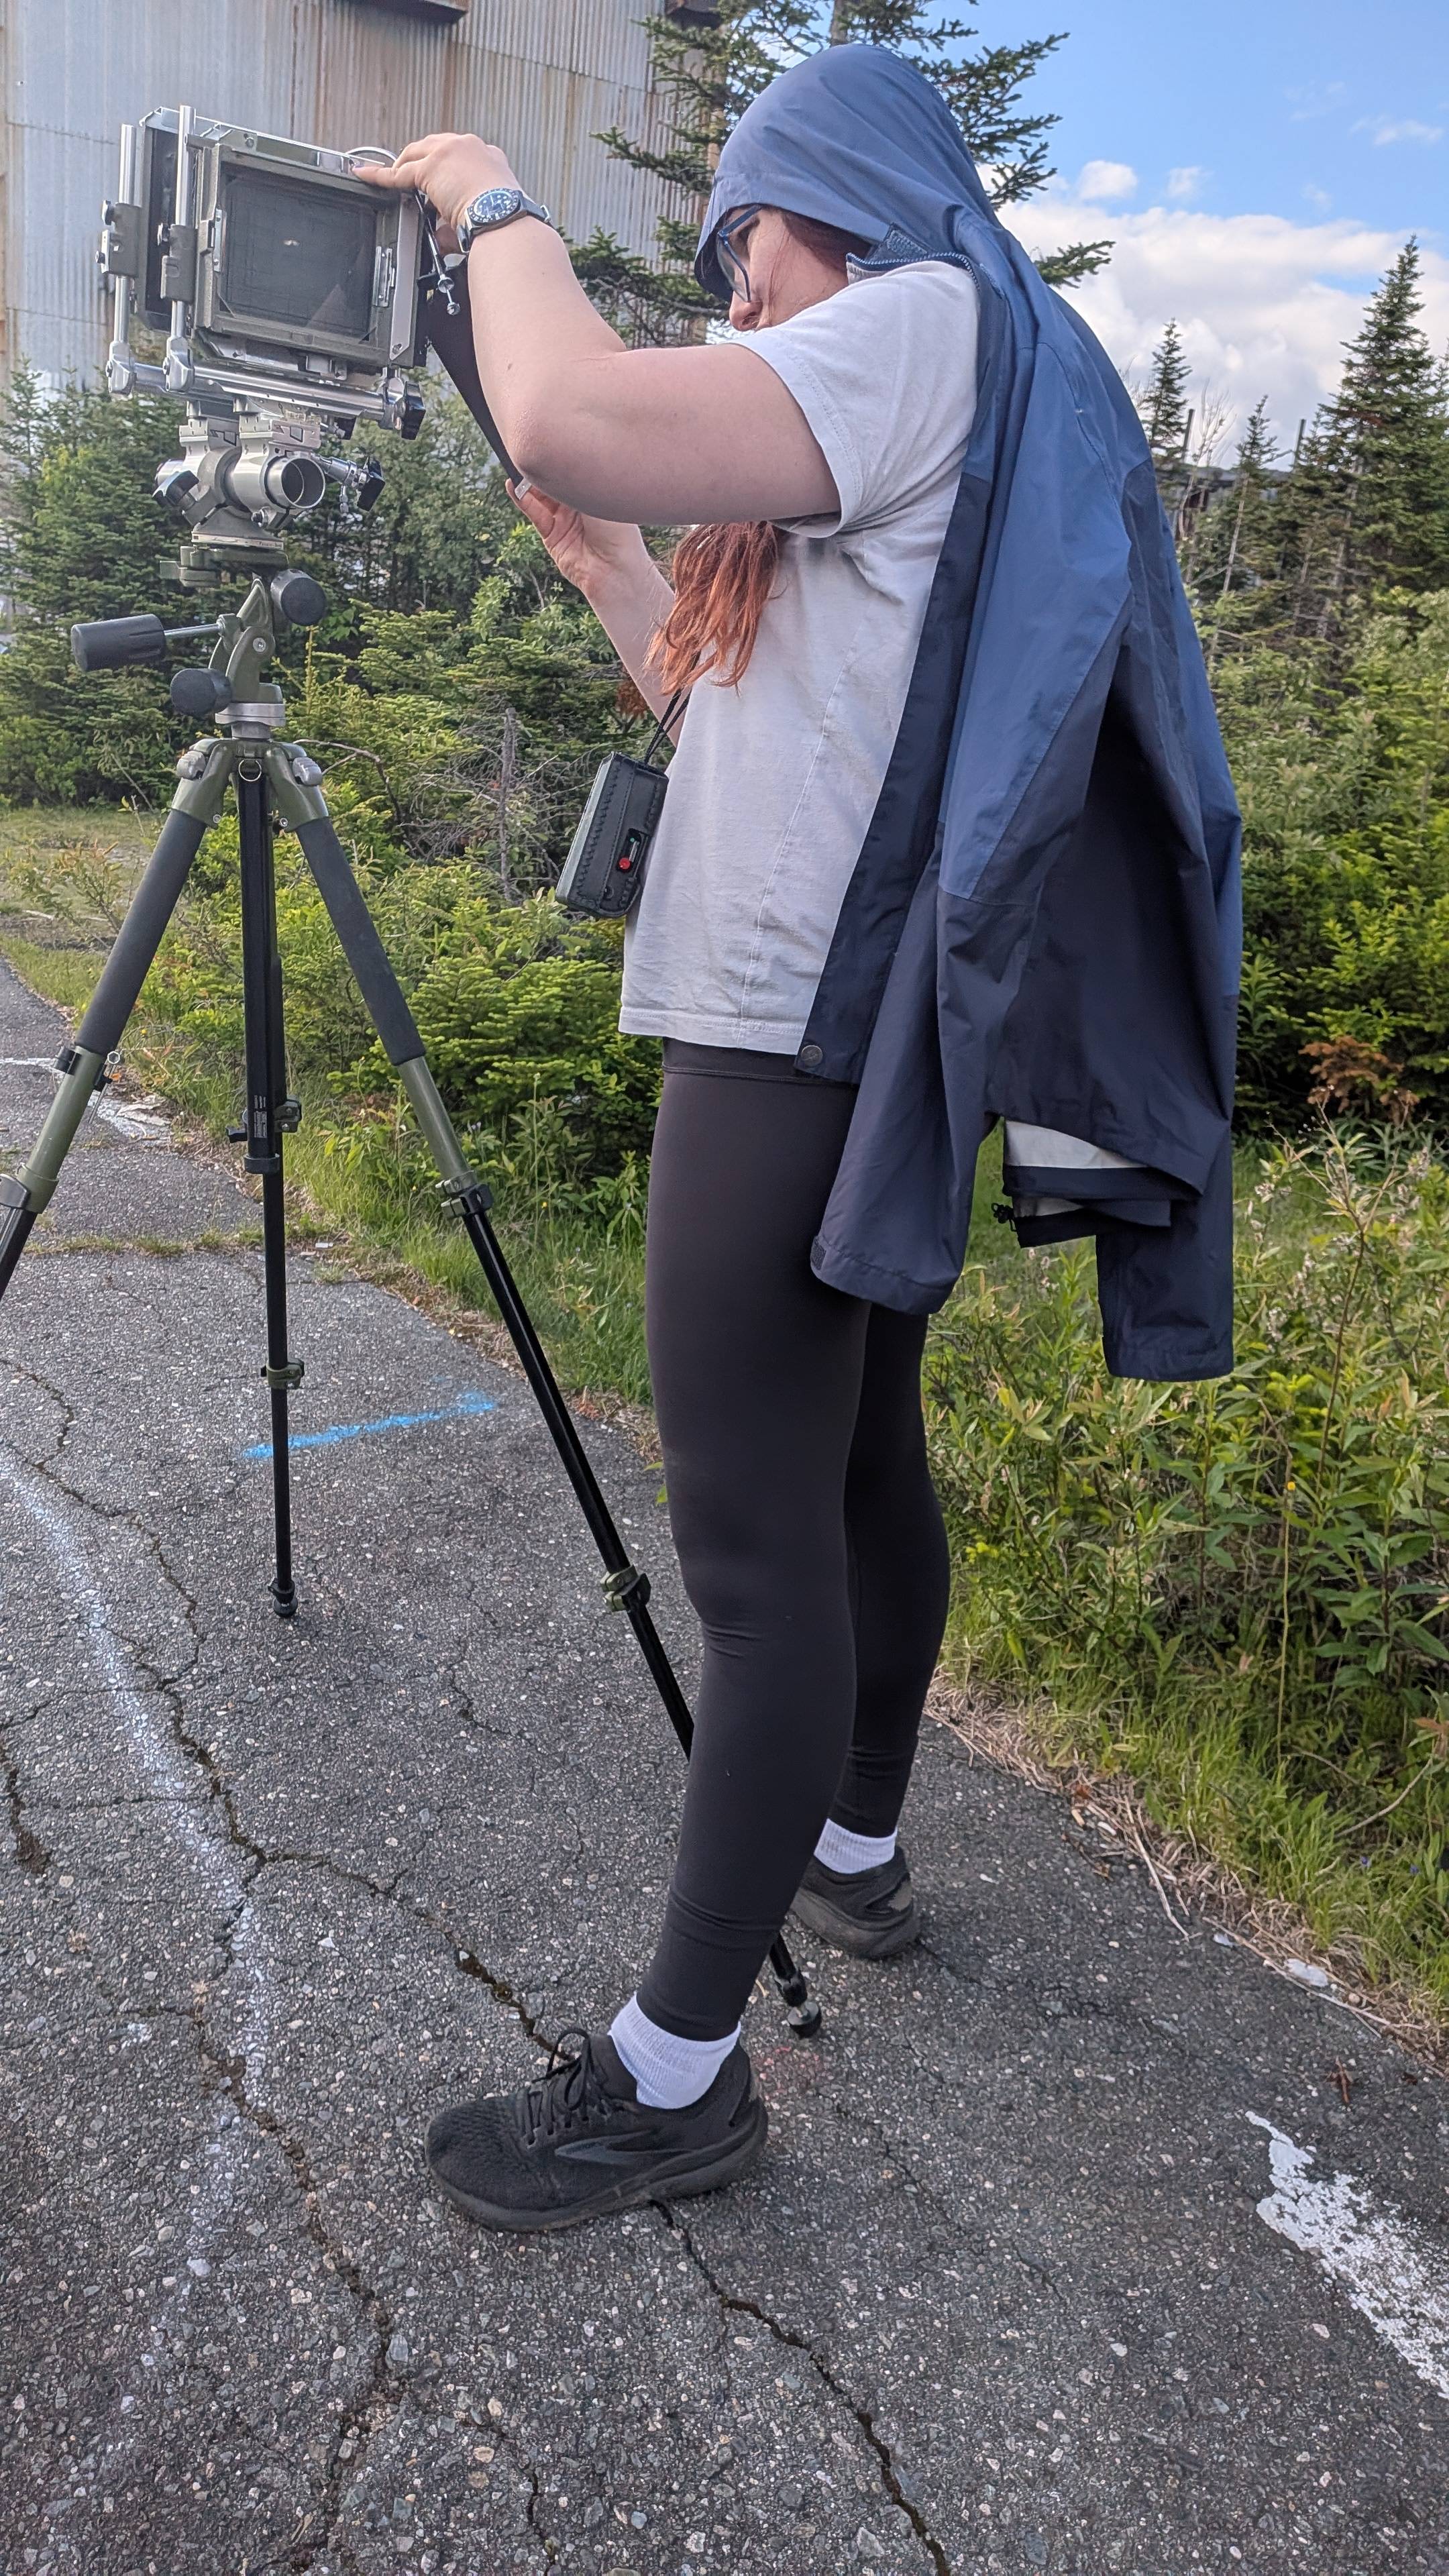
I found some previous photos in the same vein (the Scannoramic project, John Hikerbiker's experiment, Daniel Lawrence Lu's reversal of his stationary camera, and Martin Liebscher's very interesting film shots), but the results seemed like they could be improved upon. Surely taking the speed of motion into account and getting cleaner results wouldn't be too hard, right?
On the night I thought up this "big scanner" concept, I had to give it a shot. It was a bit late to go out and catch a train, so I scanned my sofa instead.
I set my phone on my office chair and slowly pushed it along as it captured a video. I then wrote some really slapdash code (which I am choosing not to share here to protect my readers) to grab the leftmost column (a "slit") of each frame and combine them into an image.
My comments included lyrics from "Future Me Hates Me" by The Beths, which became something of a self-fulfilling prophecy when I started writing a postprocessor for the next version of the camera loosely based on that code and cursed my decisions.
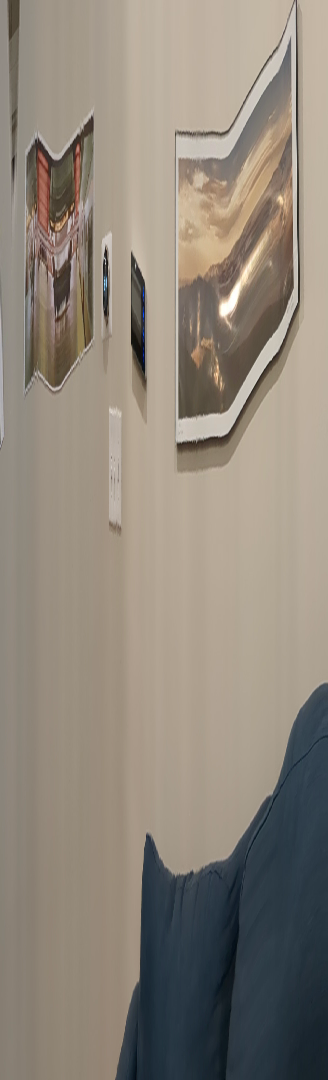
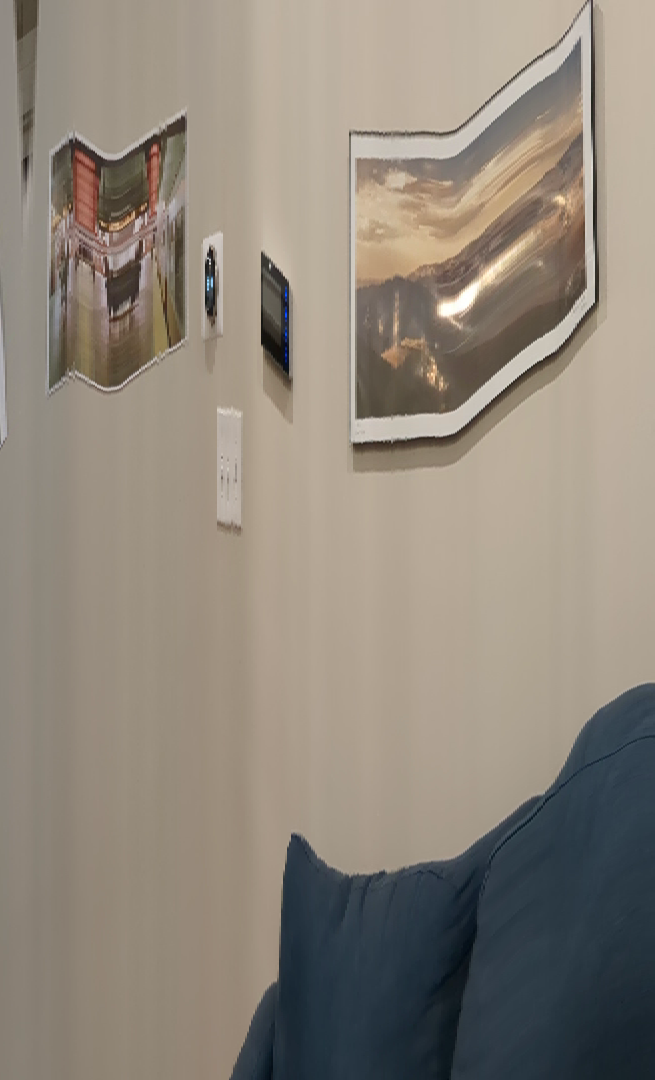
I knew from the start that I'd need to measure the speed somehow, but I was naïvely hoping that I wouldn't need to measure it that well and could simply fudge it. This image, however, shows that even small variations of speed matter. This was my first glimpse into how much of a pain dealing with speed would turn out to be.
For my next trick, I took a ride on the MBTA orange line. I taped my old phone to the seat to use its accelerometer and held my current phone to the window, making sure to turn the frame rate up all the way to 60 fps.
The accelerometer data wasn't very useful and was even less so when I took an integral to get velocity. 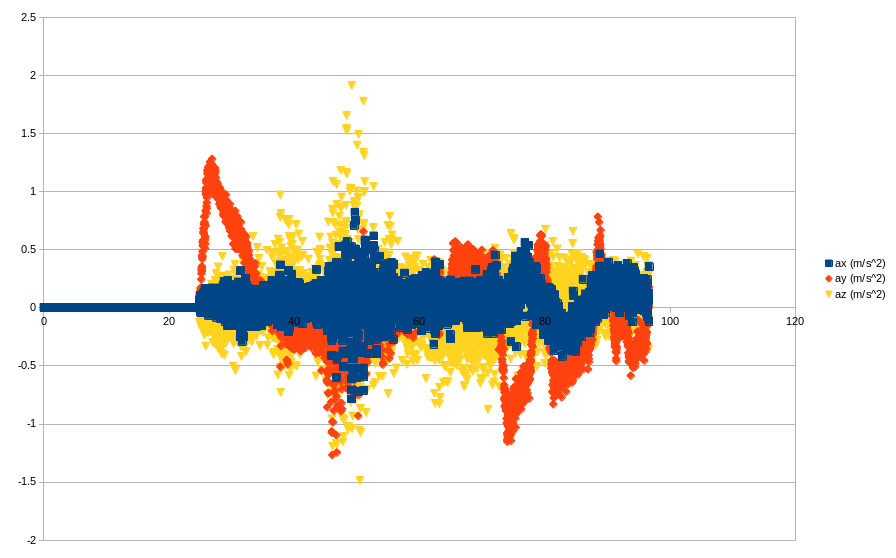
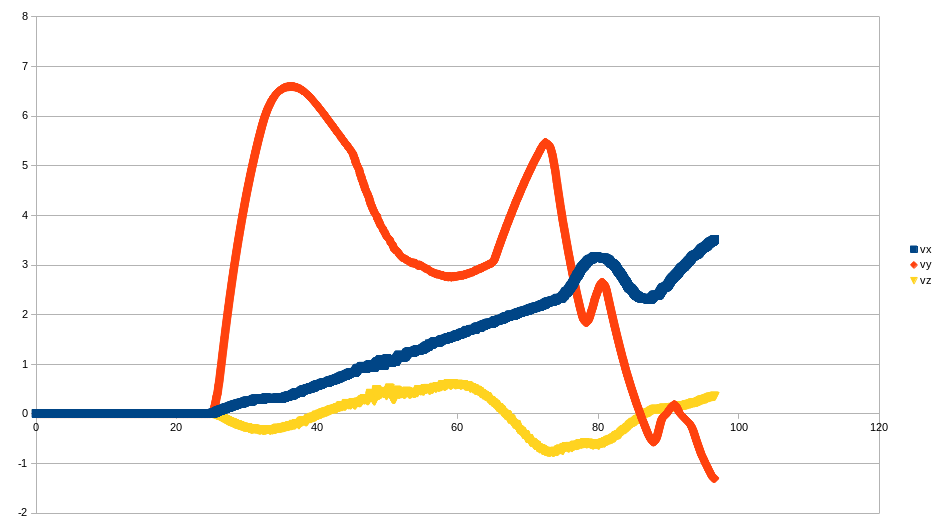
The result looks interesting, though, but I definitely need more lines if I want a properly intelligible image. 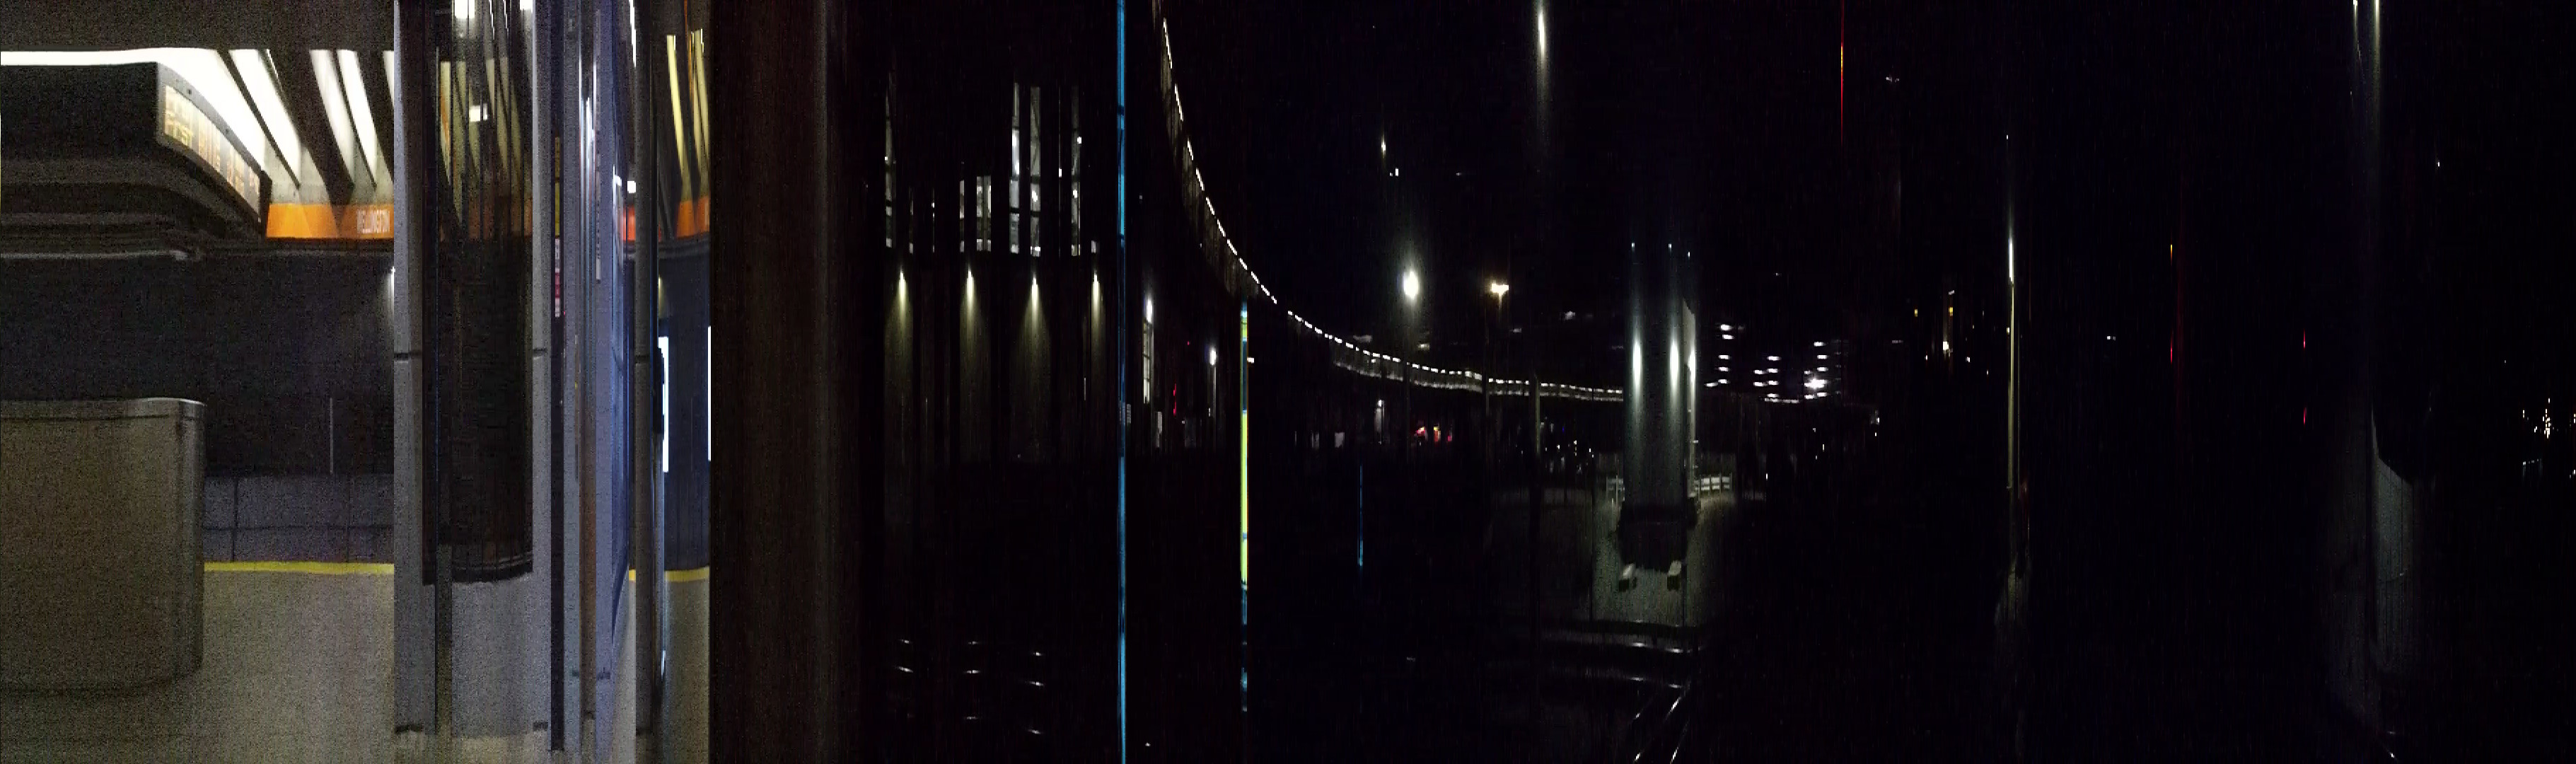
While I was getting ready for EMFcamp, I noticed another talk on the schedule by Tim Jacobs (better known online as mitxela) that was also about slit scan cameras and started to worry we'd both done the same thing. (He ran up to me after my talk to tell me he'd also worried this.) His talk started in the same way, with taking a slit from a video, but he ended up making really cool and trippy animations by going through every possible slit position for a given video.
My source for more lines per second ended up being the Basler ruL2048-19gm, designed to be pointed at fast-moving conveyor belts. The oddly-capitalized name comes from its ability to read out its 1x2048 pixel image sensor just shy of 19,000 times per second.
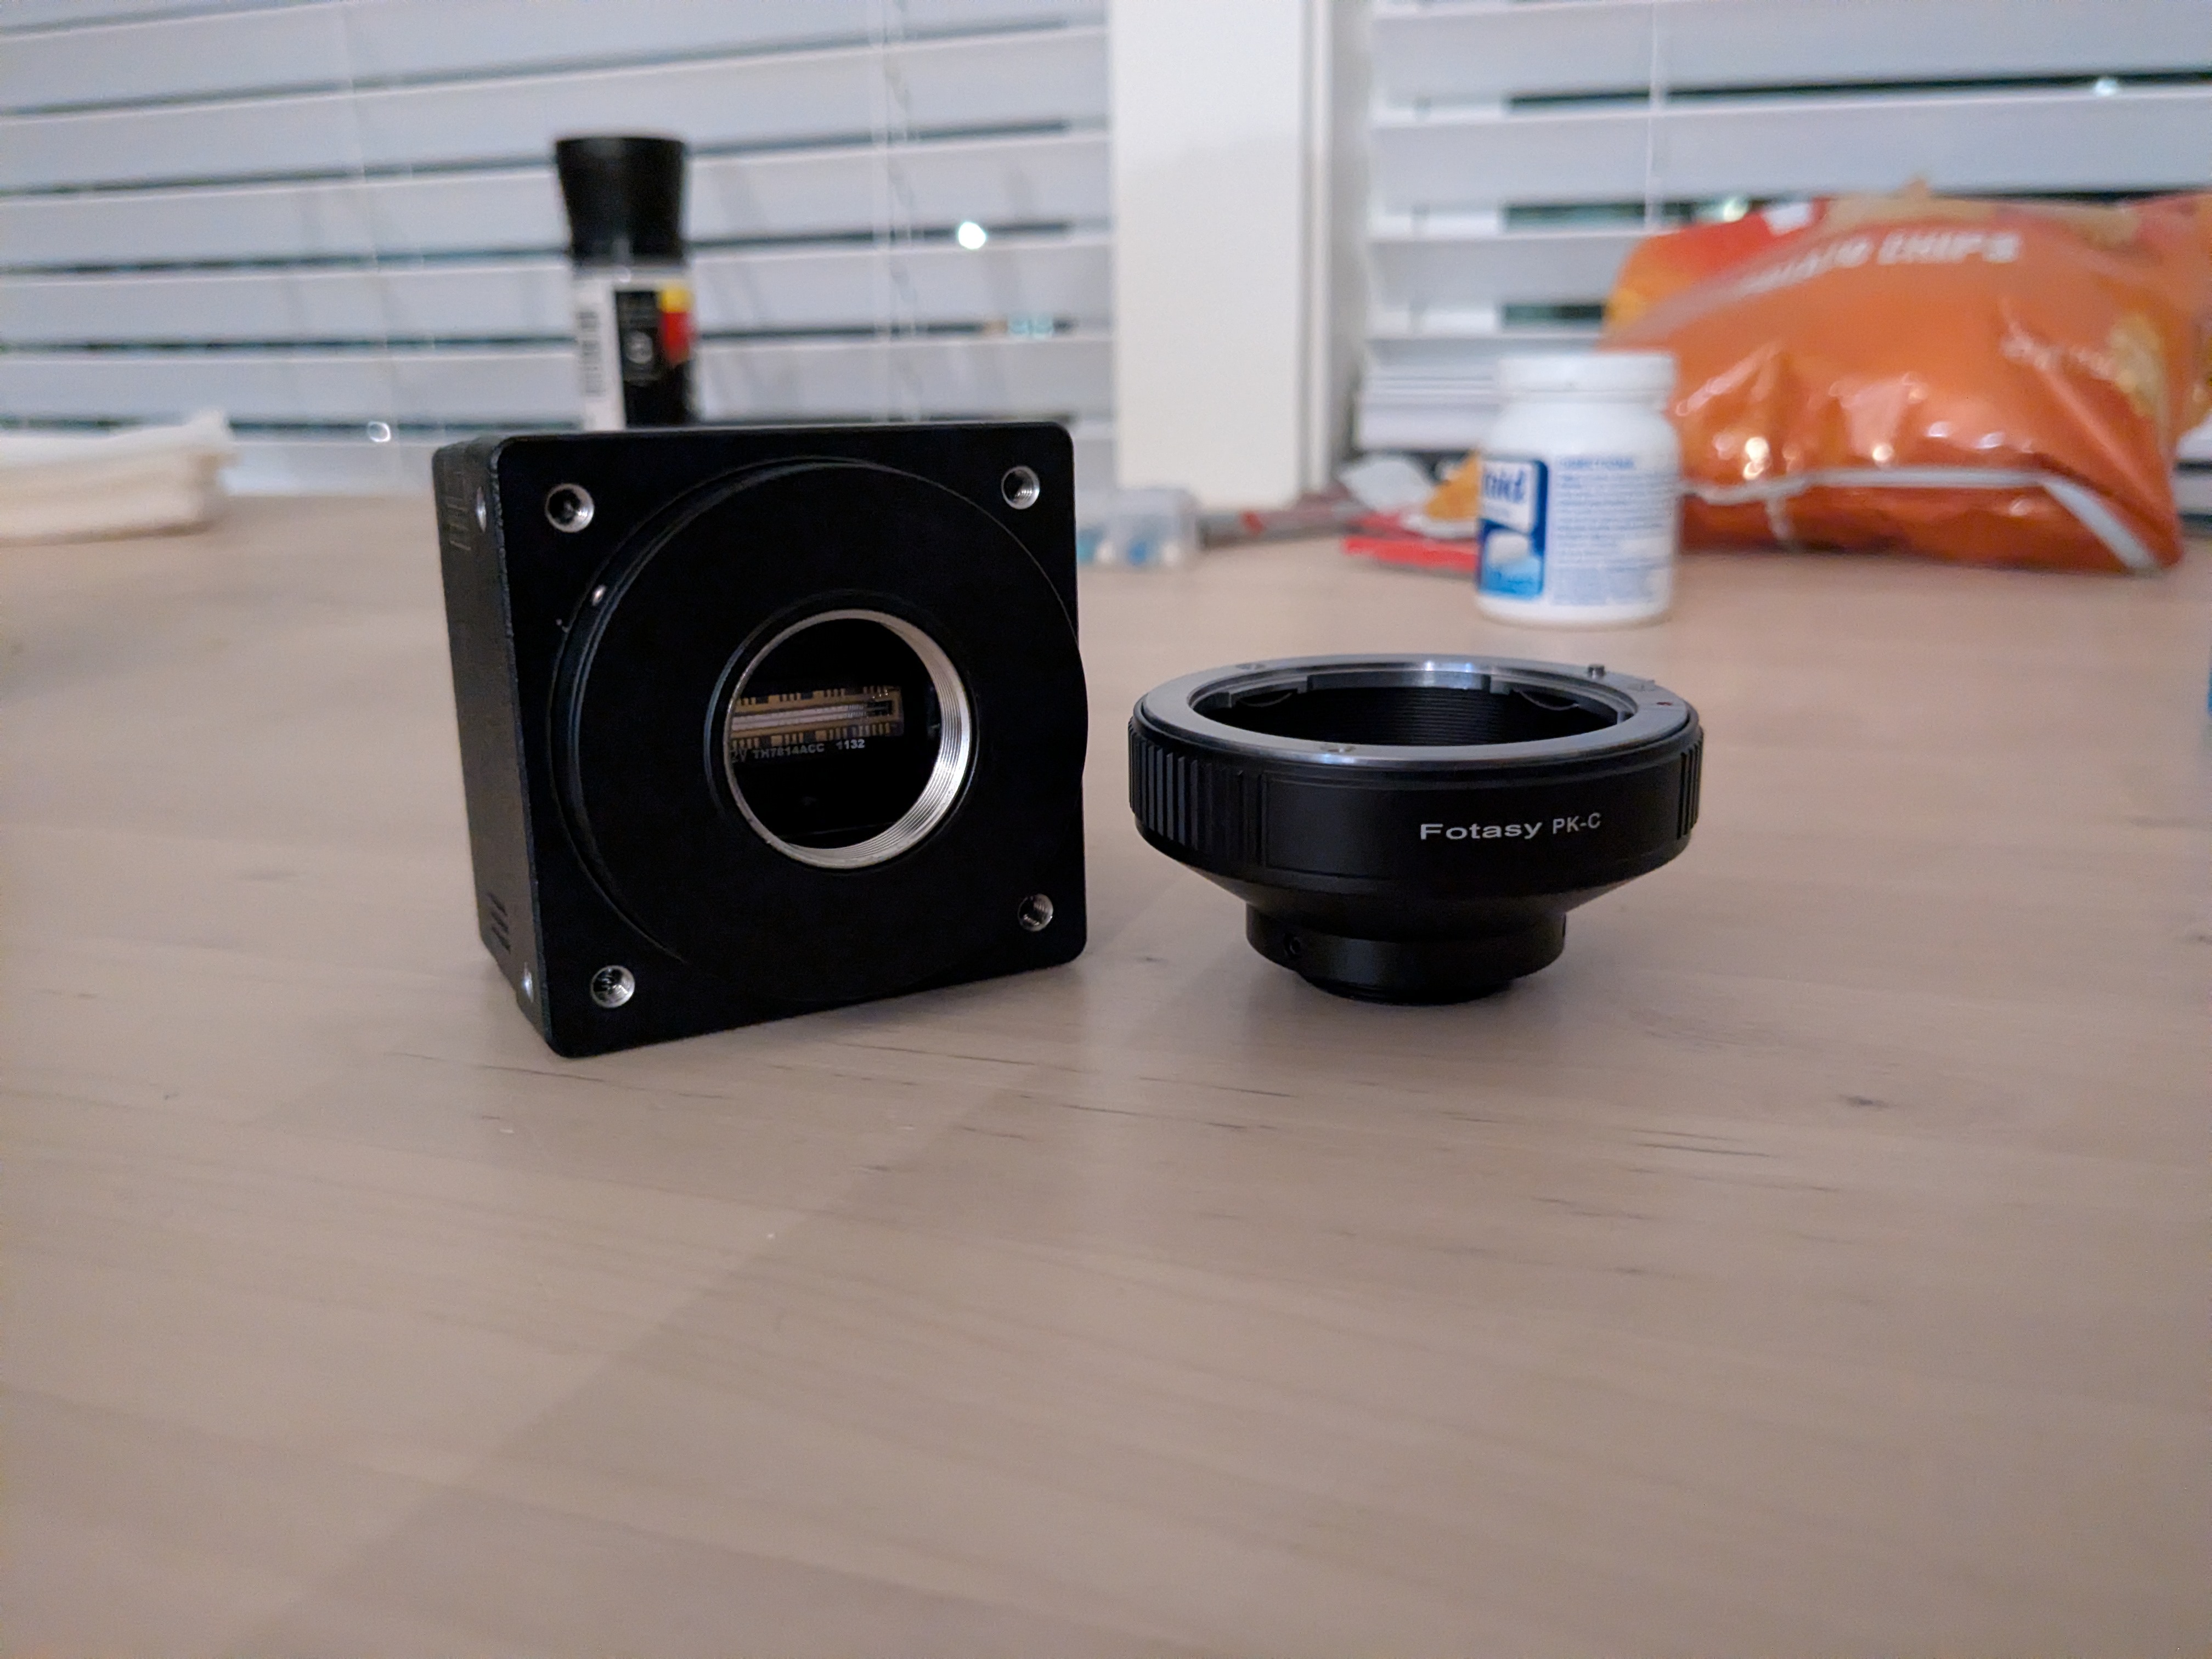
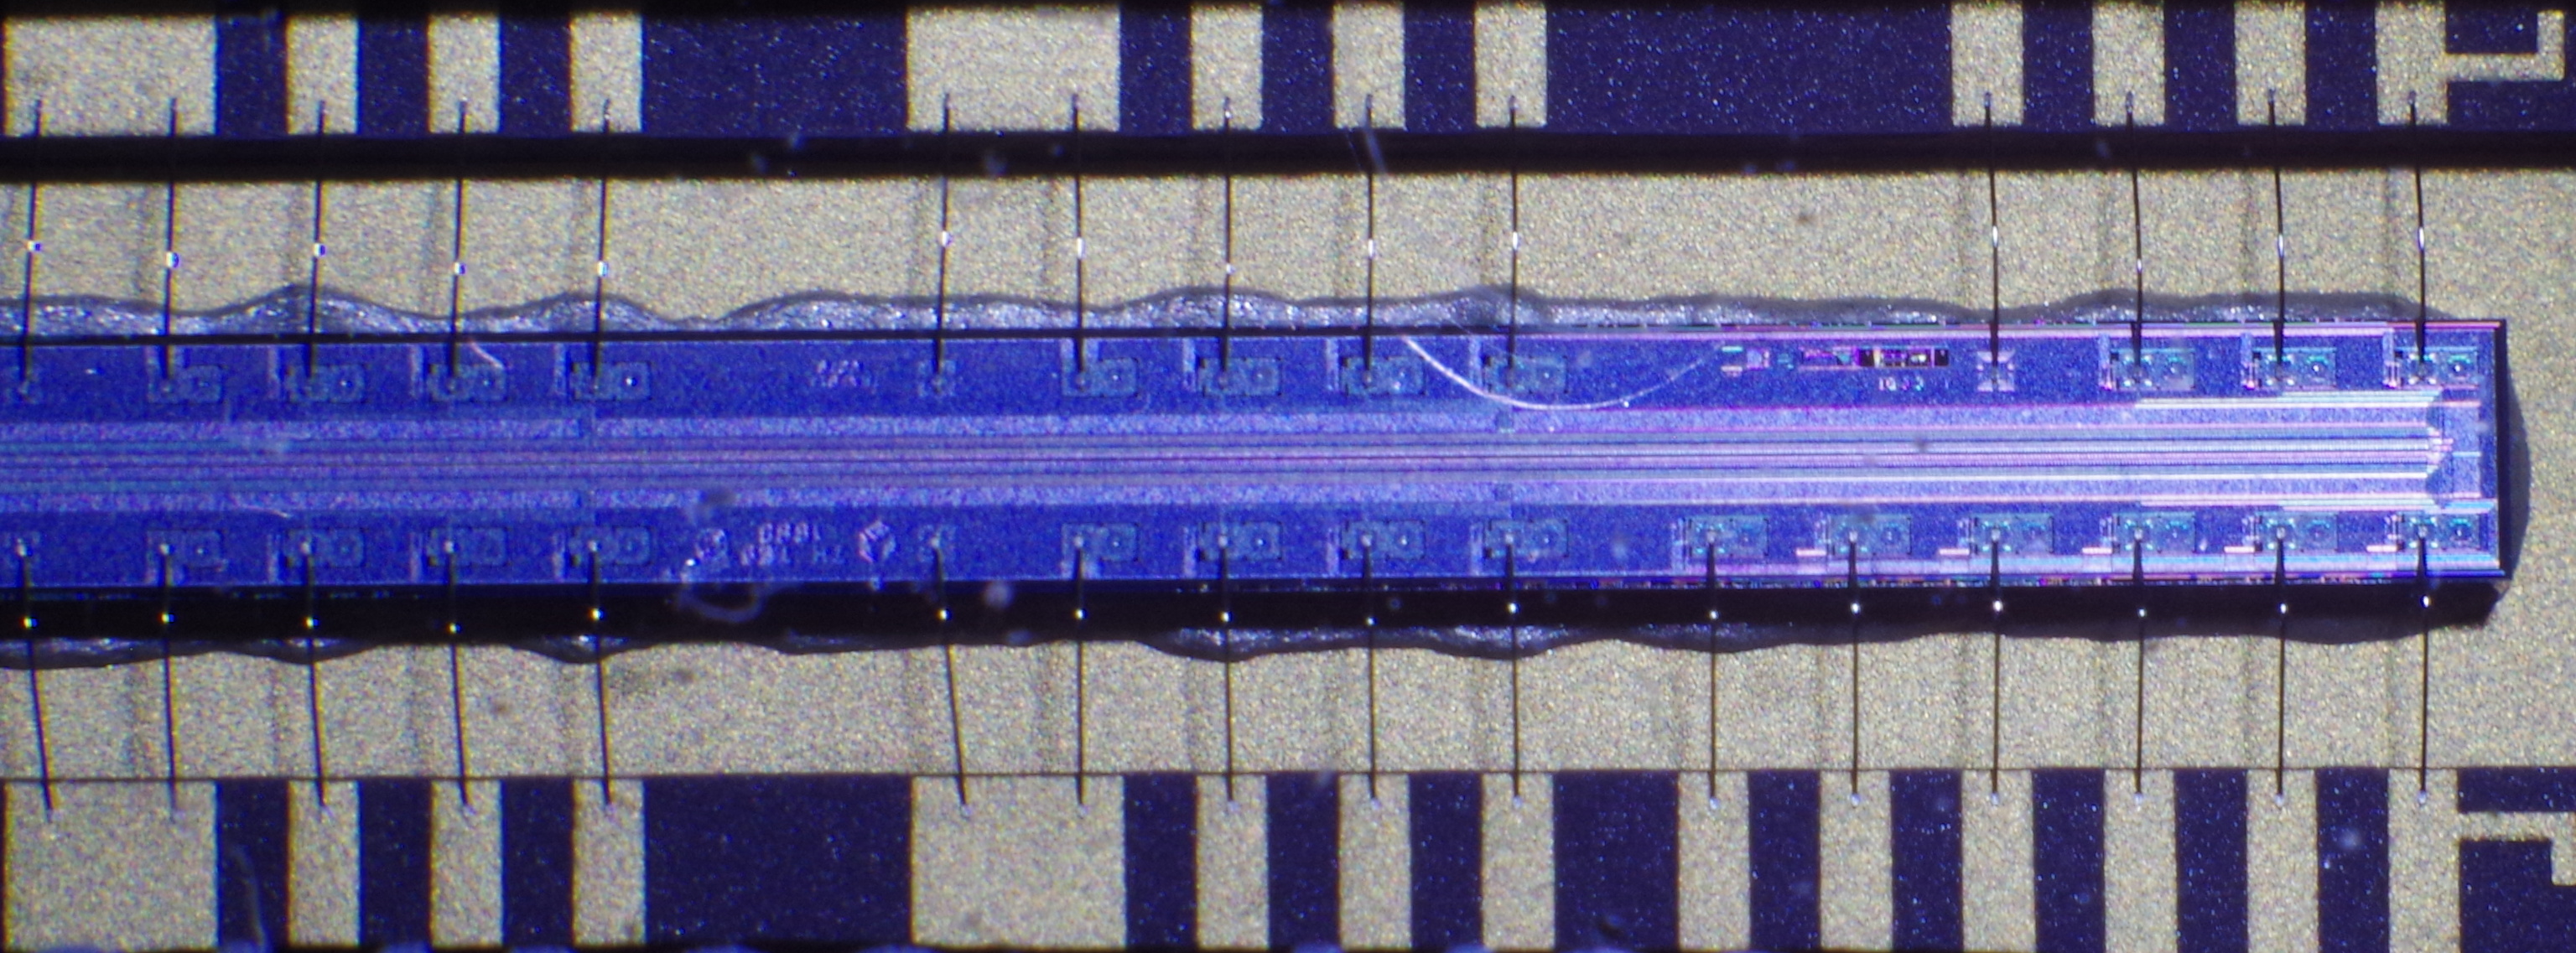
These capabilities come at a price, however; brand new, the manufacturer's lowest-spec current models go for around US$700. Thankfully for my wallet, I found mine on ebay for a tenth of that.
The price is also measured in light. since it's capturing so quickly (the slowest exposure time is 1/100s), it needs a lot of light. I can only shoot in the daytime, and all but the brightest stations and tunnels are off limits to me.
To my surprise, having dealt with vendorware before, Basler just let me download the SDK without a support contract or proof of purchase. The most recent version also still supports this camera from 2013, which is less surprising but is still convenient.
The camera communicates with the computer over a gigabit ethernet link and the software finds it automatically as long as the relevant interface is set up for APIPA addresses (169.254.0.0/16). I could set static addresses for both ends, but I'm only using one camera at a time, so I haven't been bothered to change it.
With surprisingly little swearing at the SDK, apart from some complaints about their use of shutter time rather than shutter speed and what a "frame" is on this camera, I put together a program that grabbed buffers of pixels and wrote them to disk.
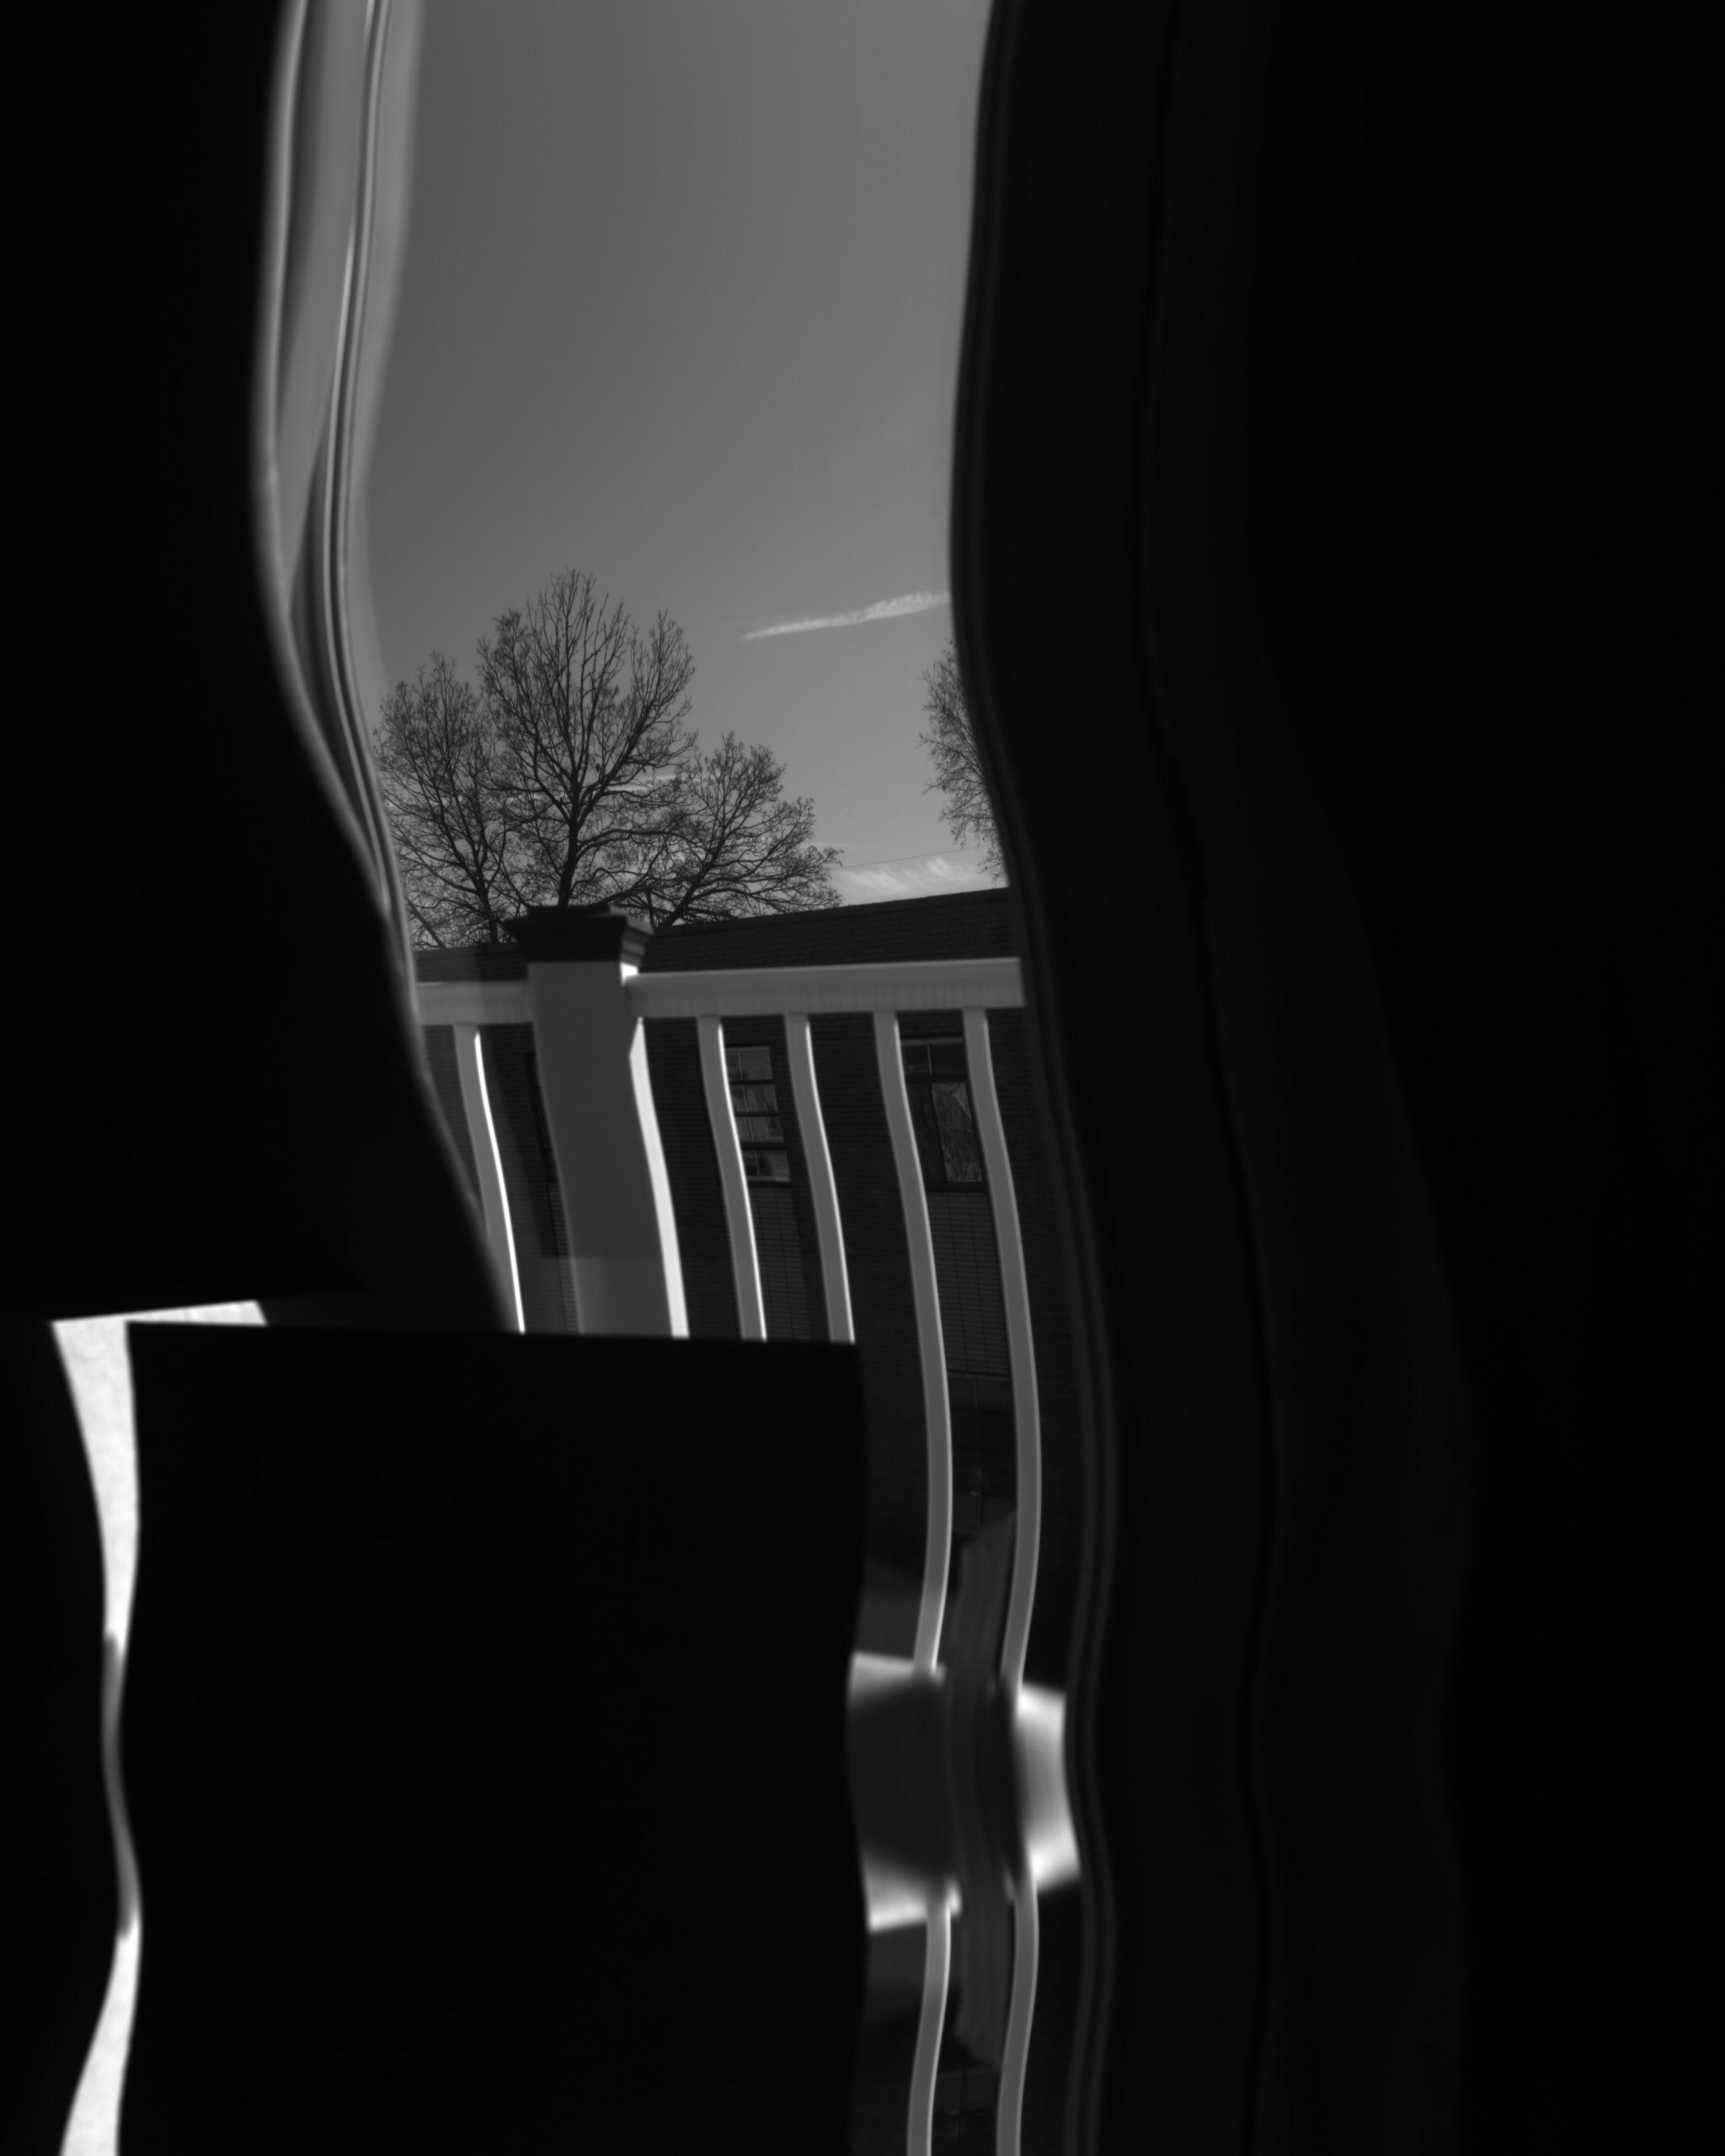
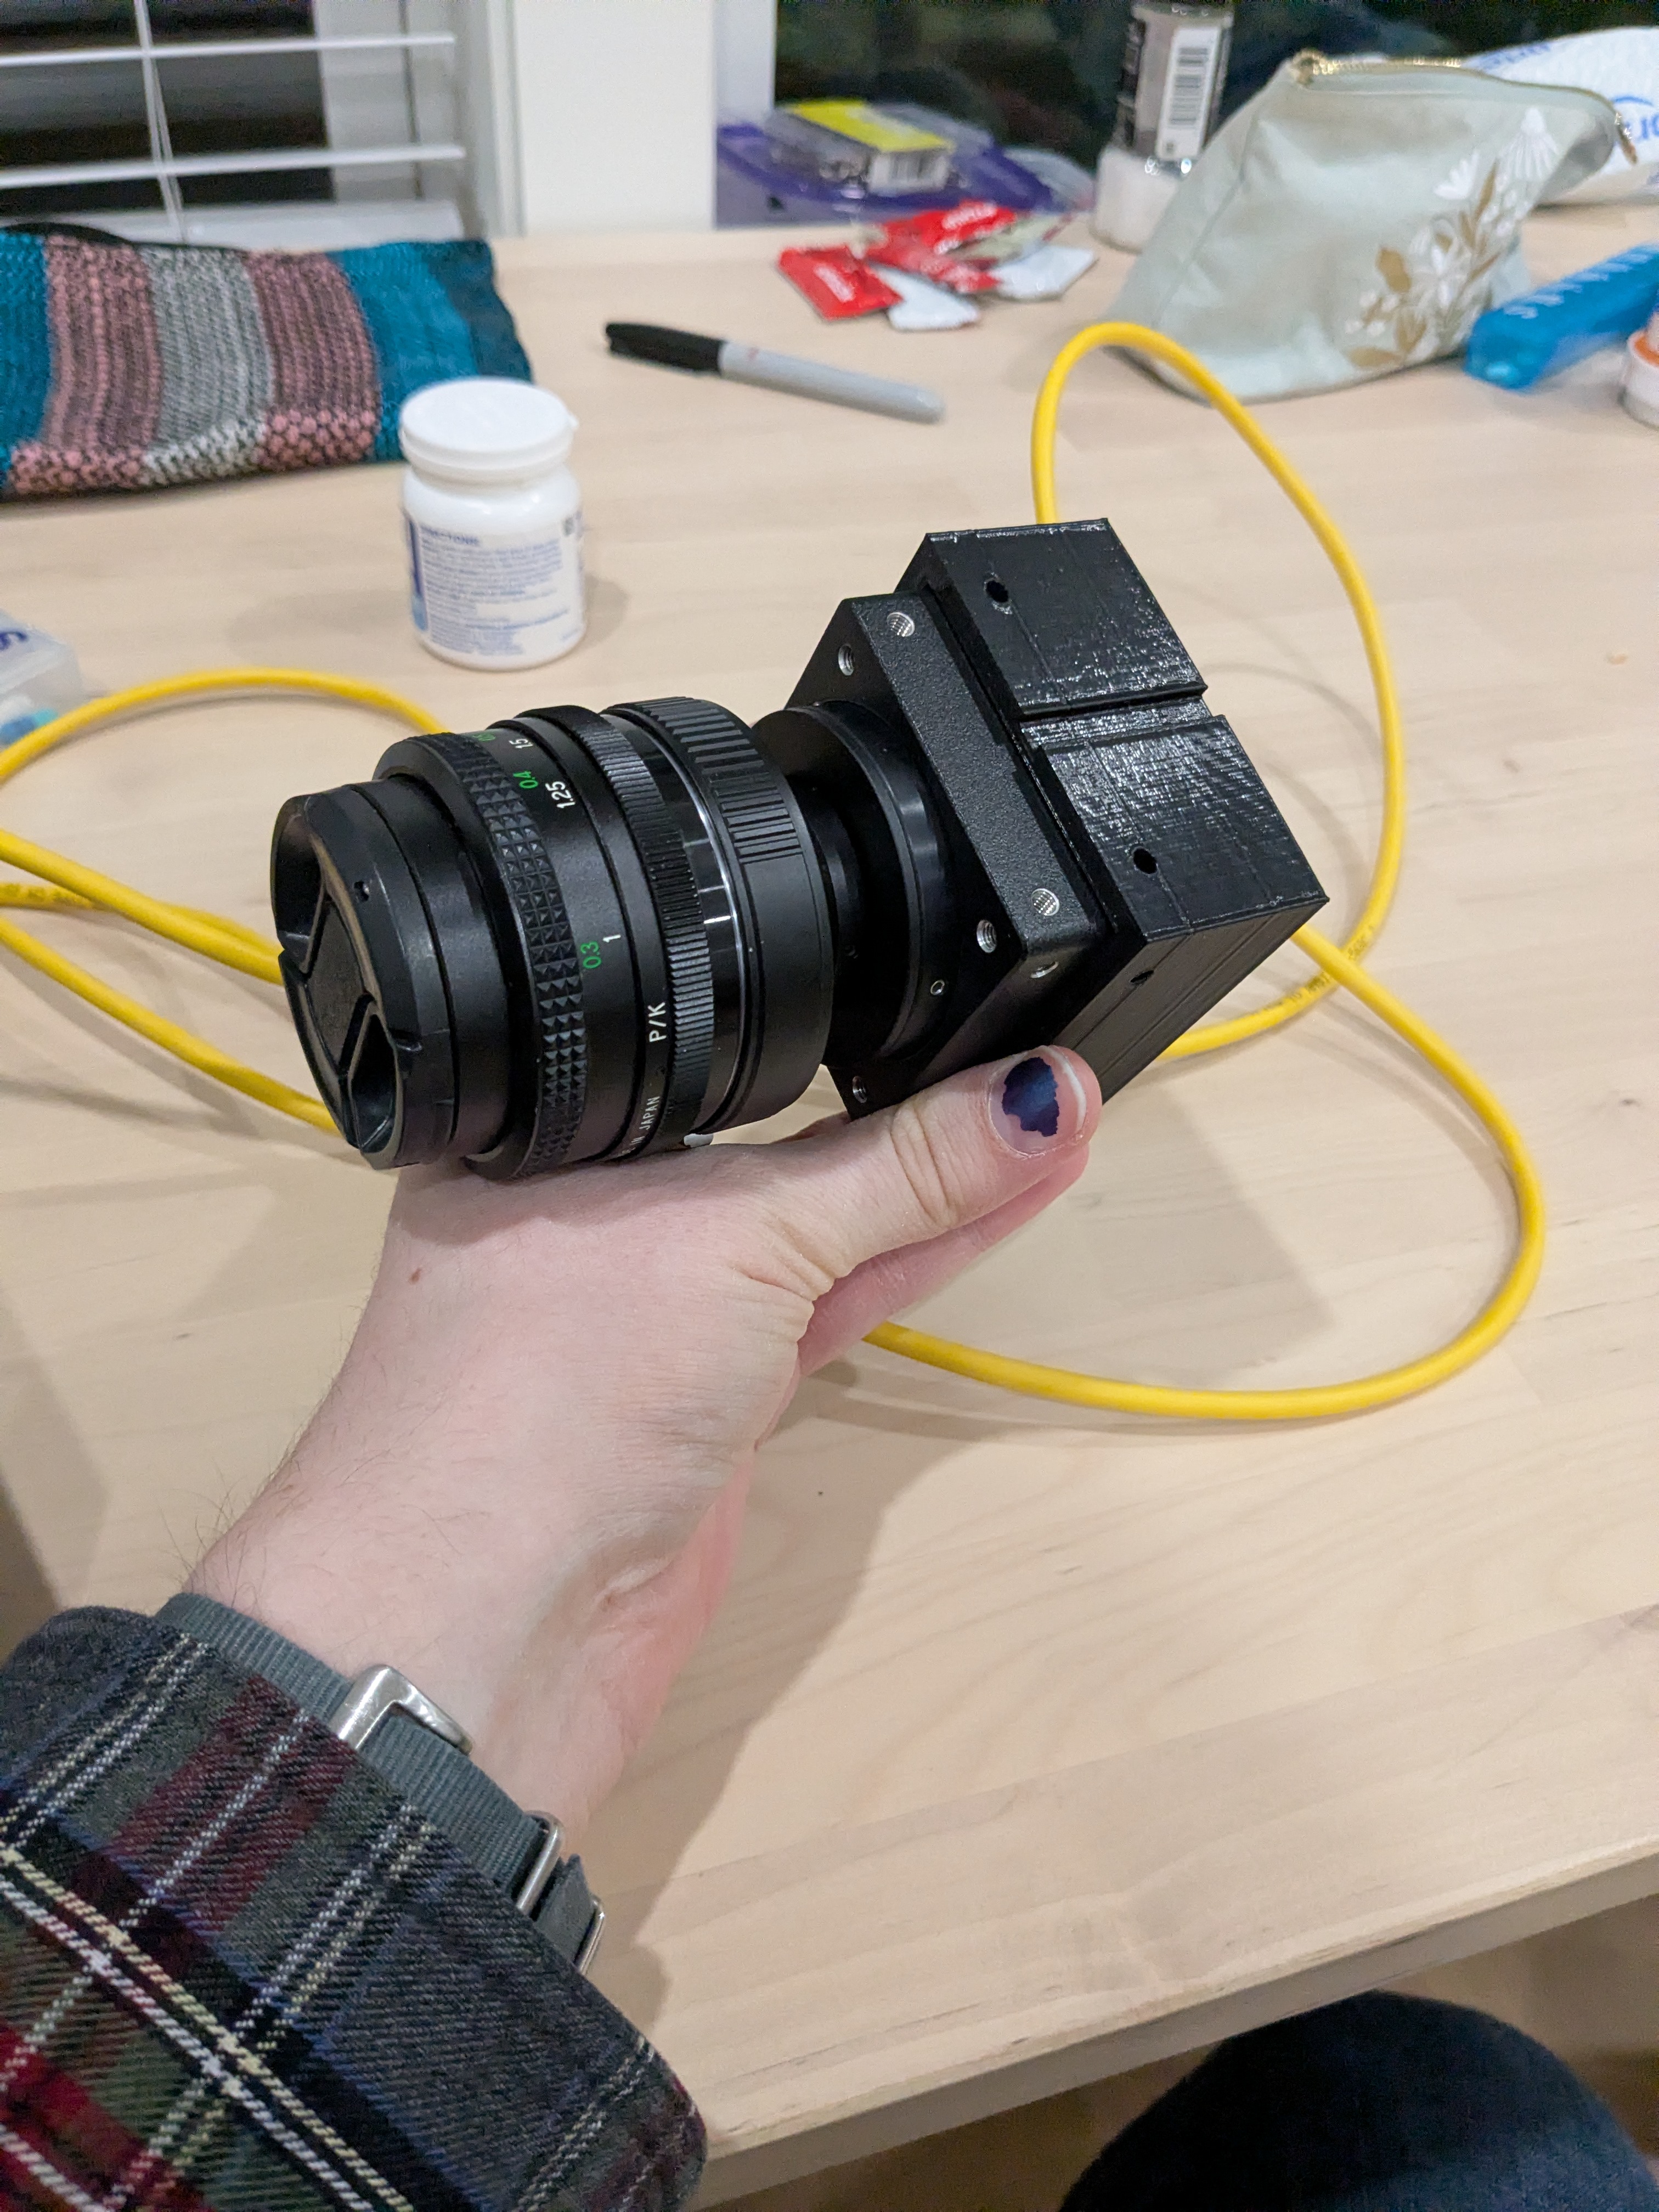
In order to take it on a train without needing to have three hands to hold it, I needed a way to mount it to a tripod. I ended up designing a rather utilitarian case with a heat-set insert in the bottom that my friend Brooke 3D-printed for me. Buying the parts for it gave me an excuse to finally make an order from McMaster-Carr and feel like a real engineer.
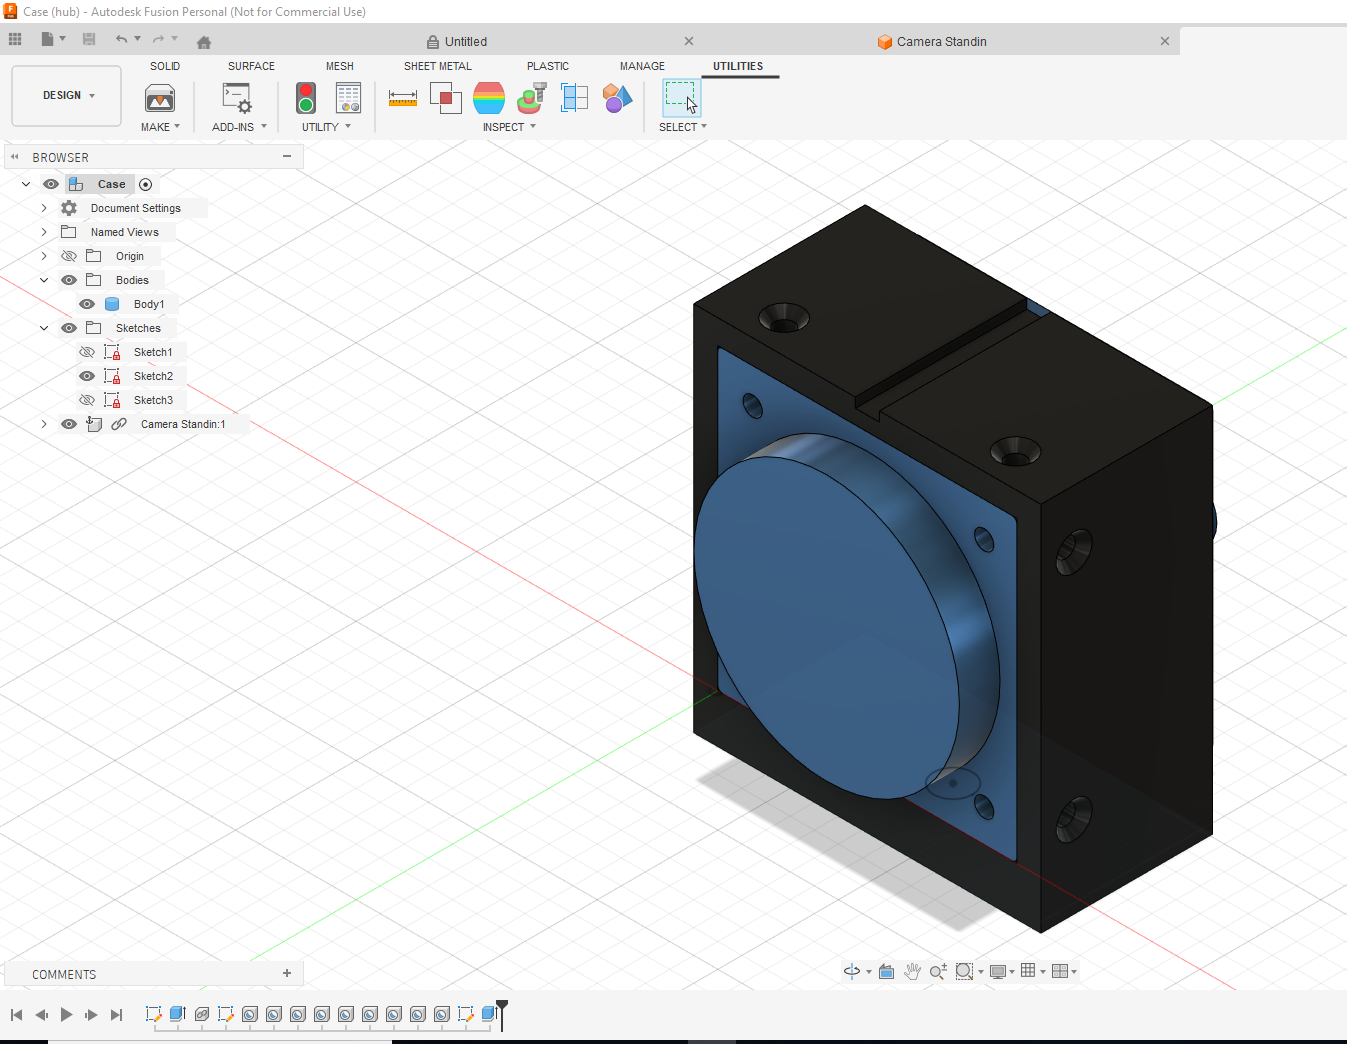
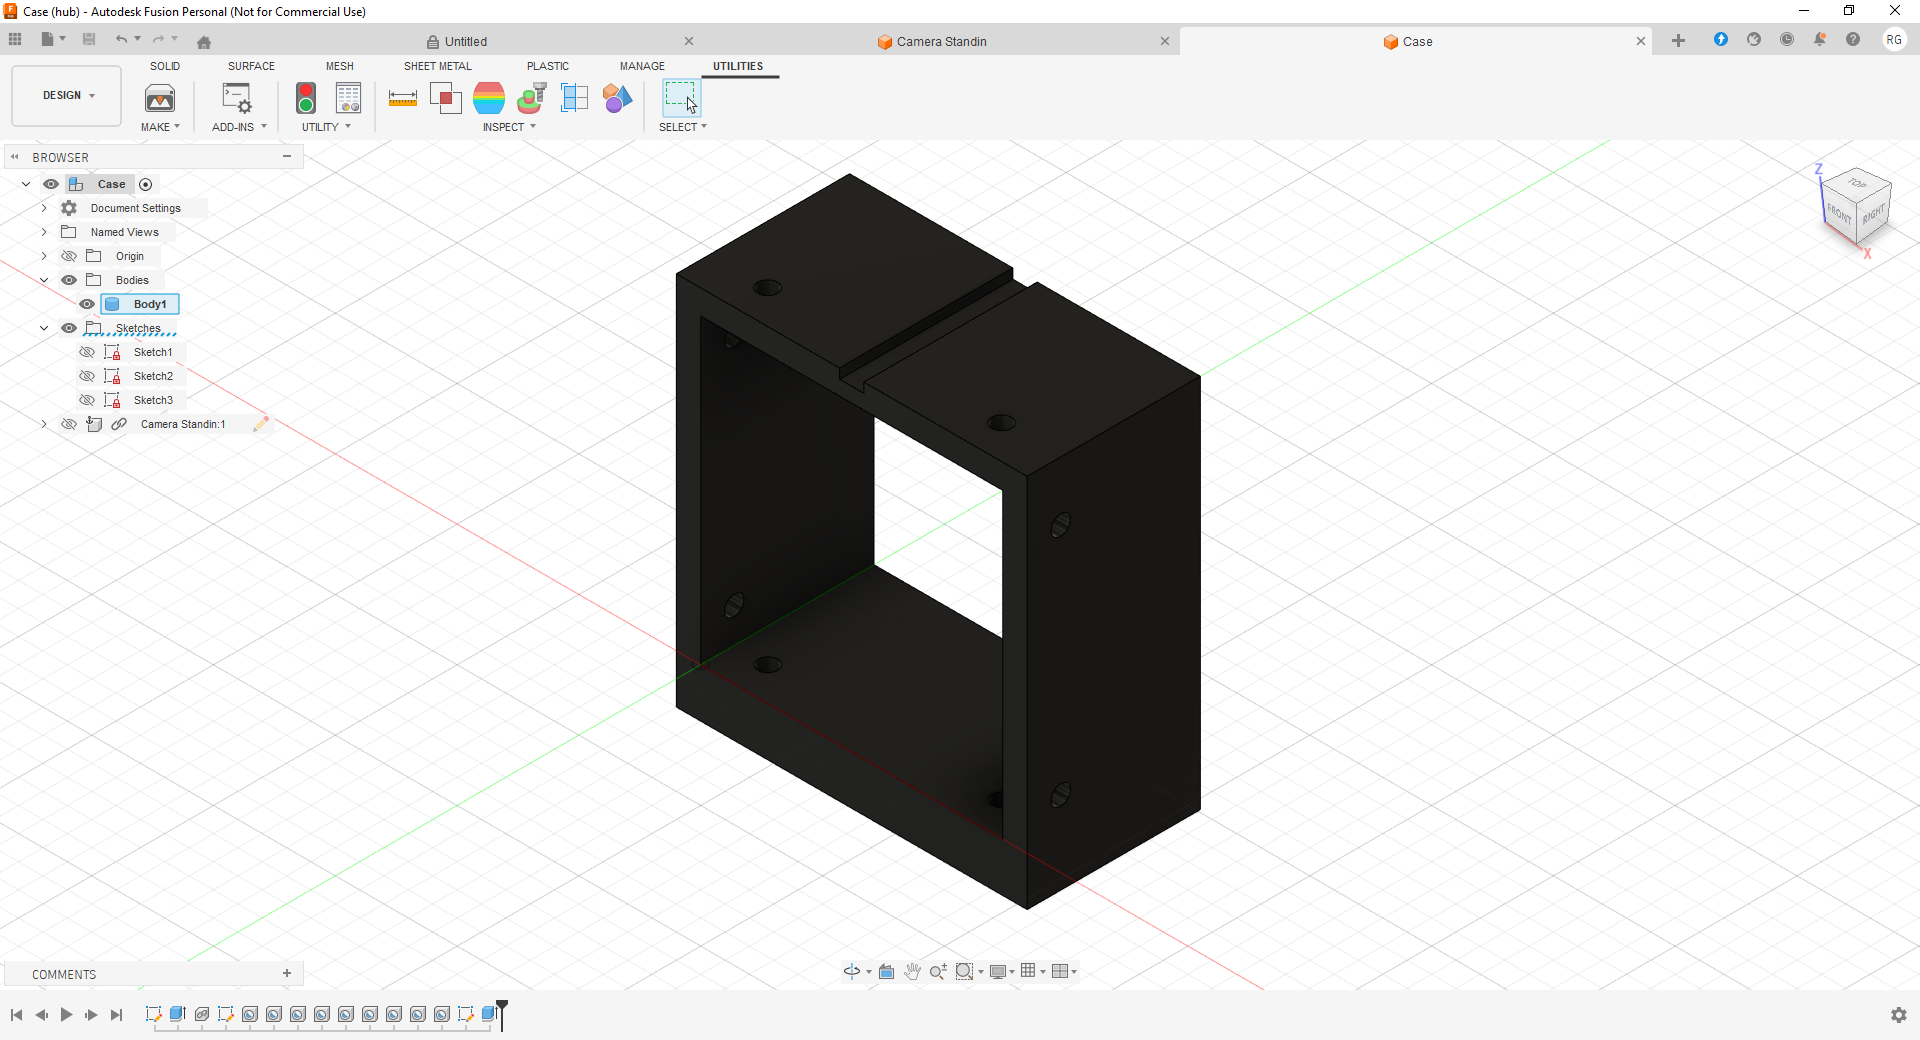
My first attempt didn't come out because it turns out there's these things called "manufacturing tolerances" that I completely forgot about.
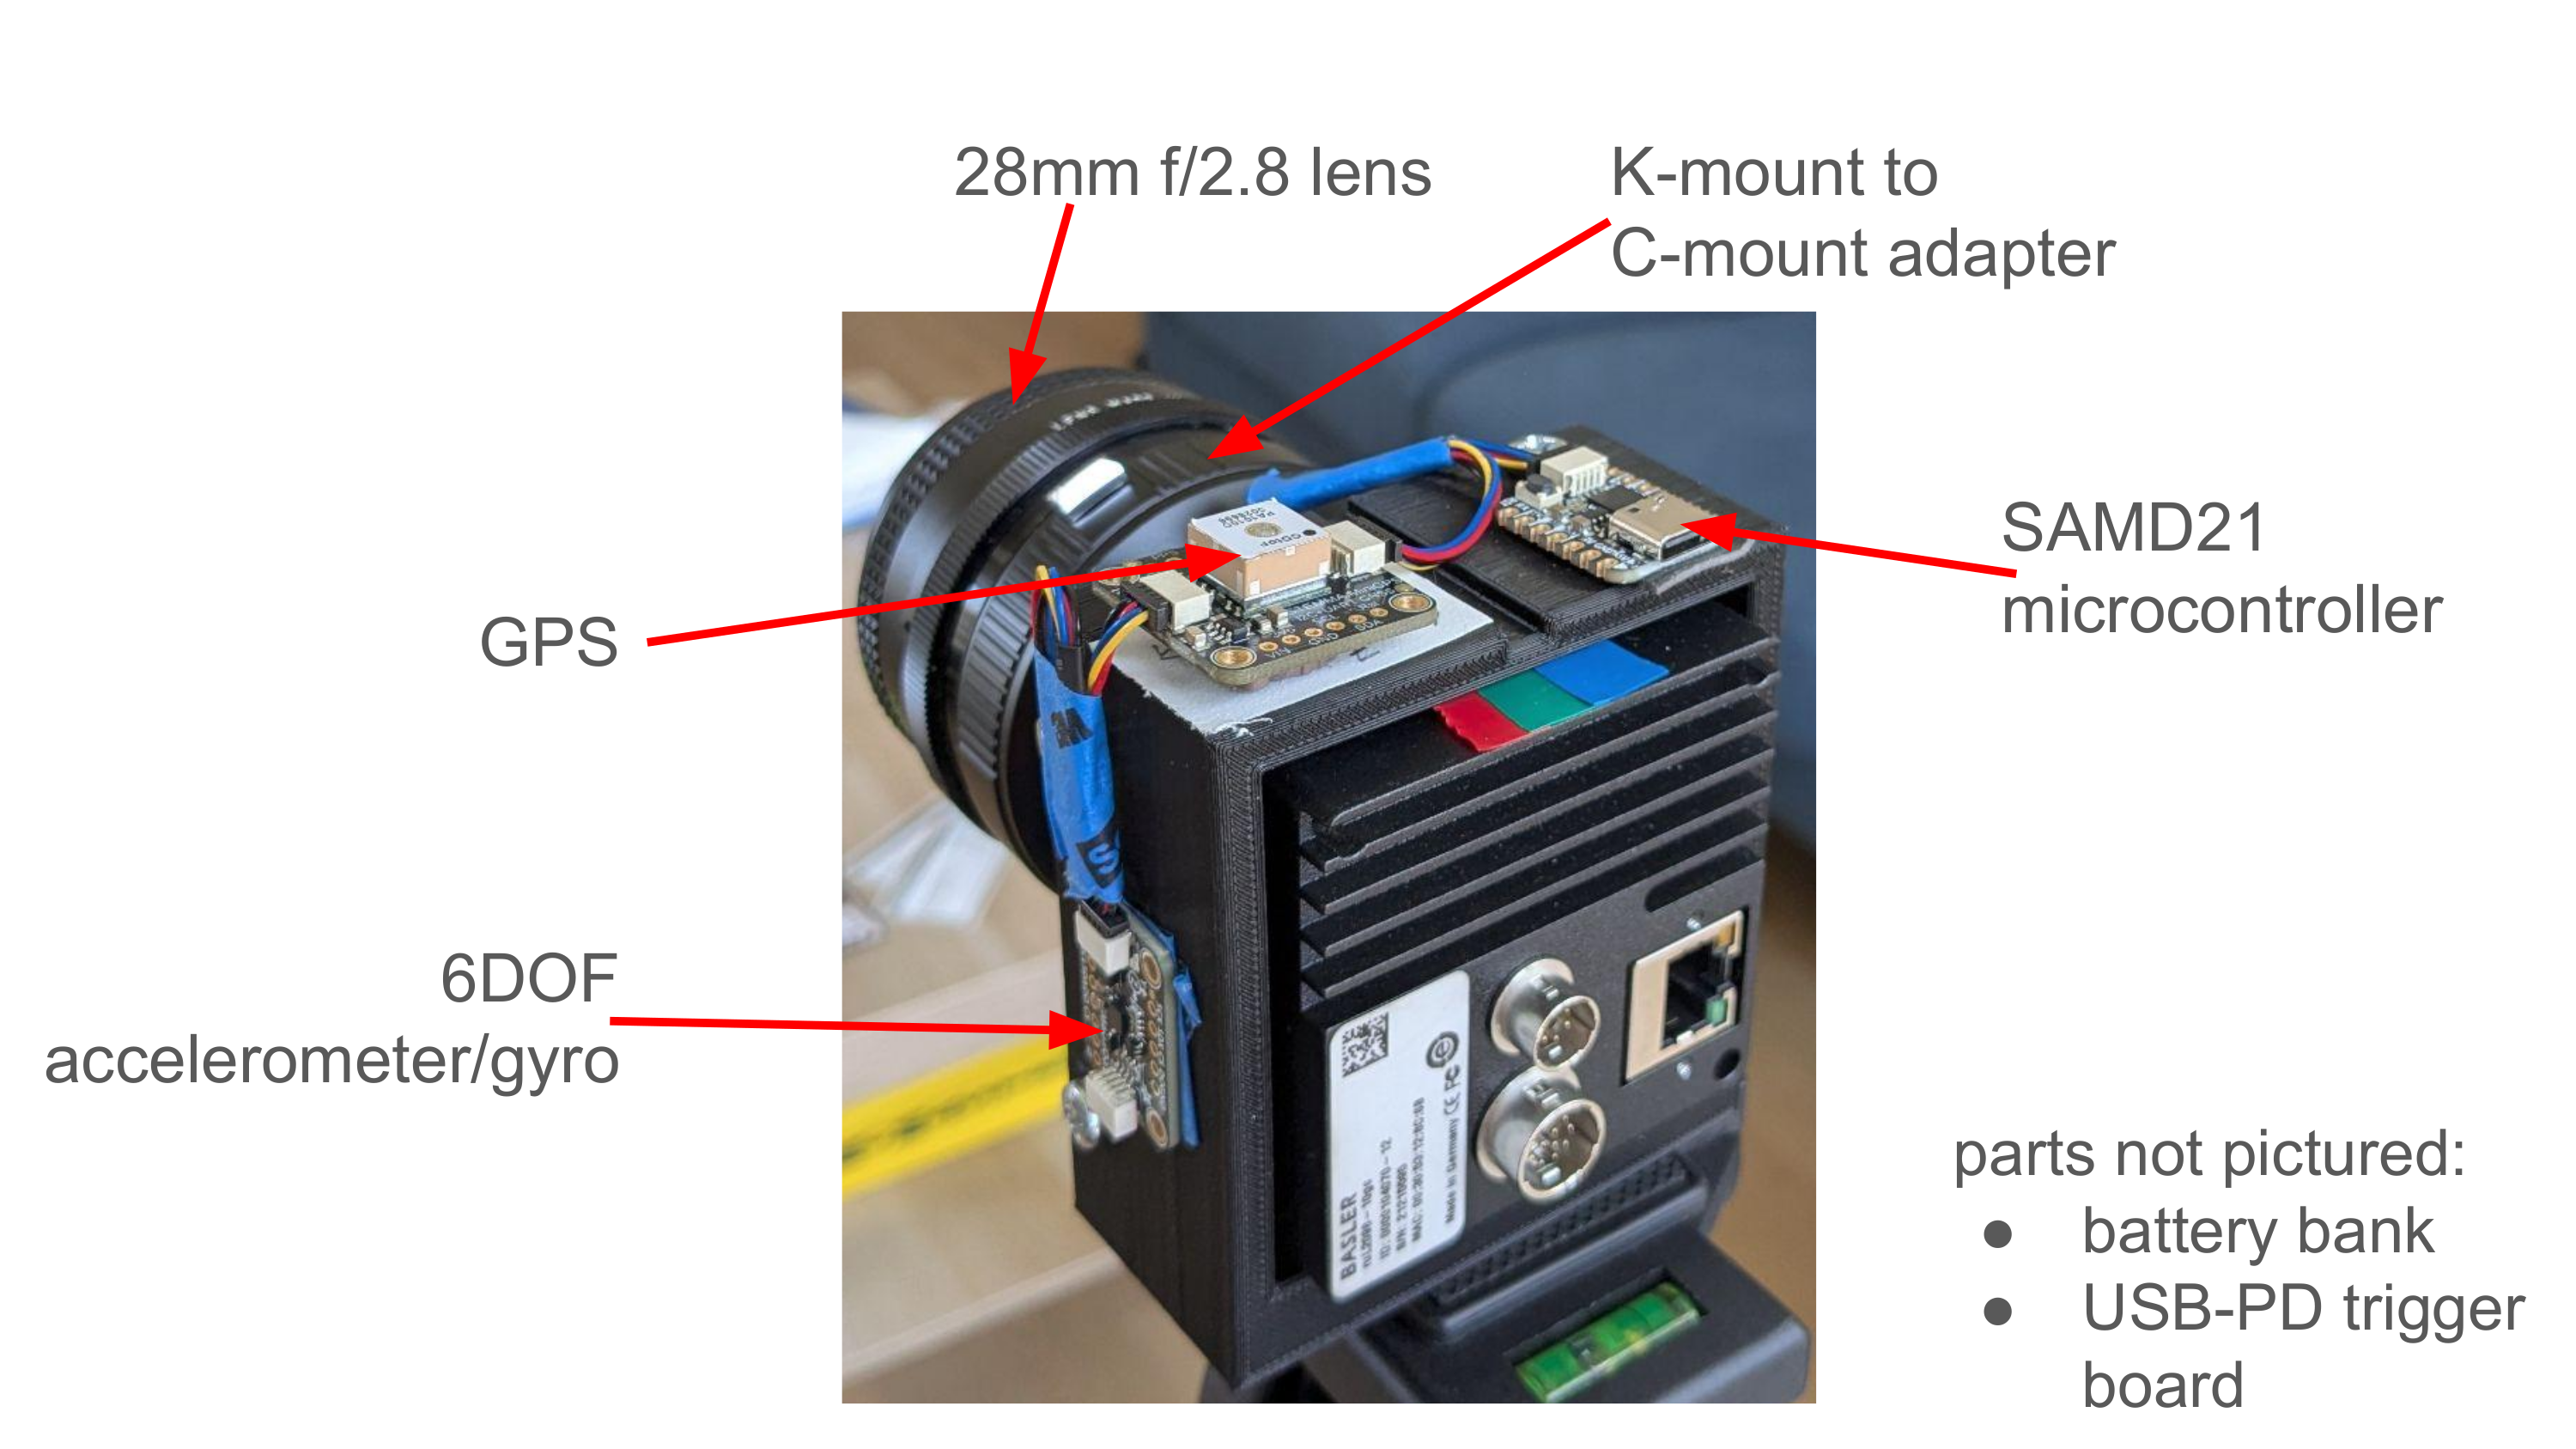
- 6 degree of freedom accelerometer/gyro, which can be used with some maths to to get the speed
- GPS, which didn't end up working as well as I'd hoped because the trains in Boston are a bit too good at blocking GPS signals
- SAMD21 microcontroller to shunt the data back off to the laptop
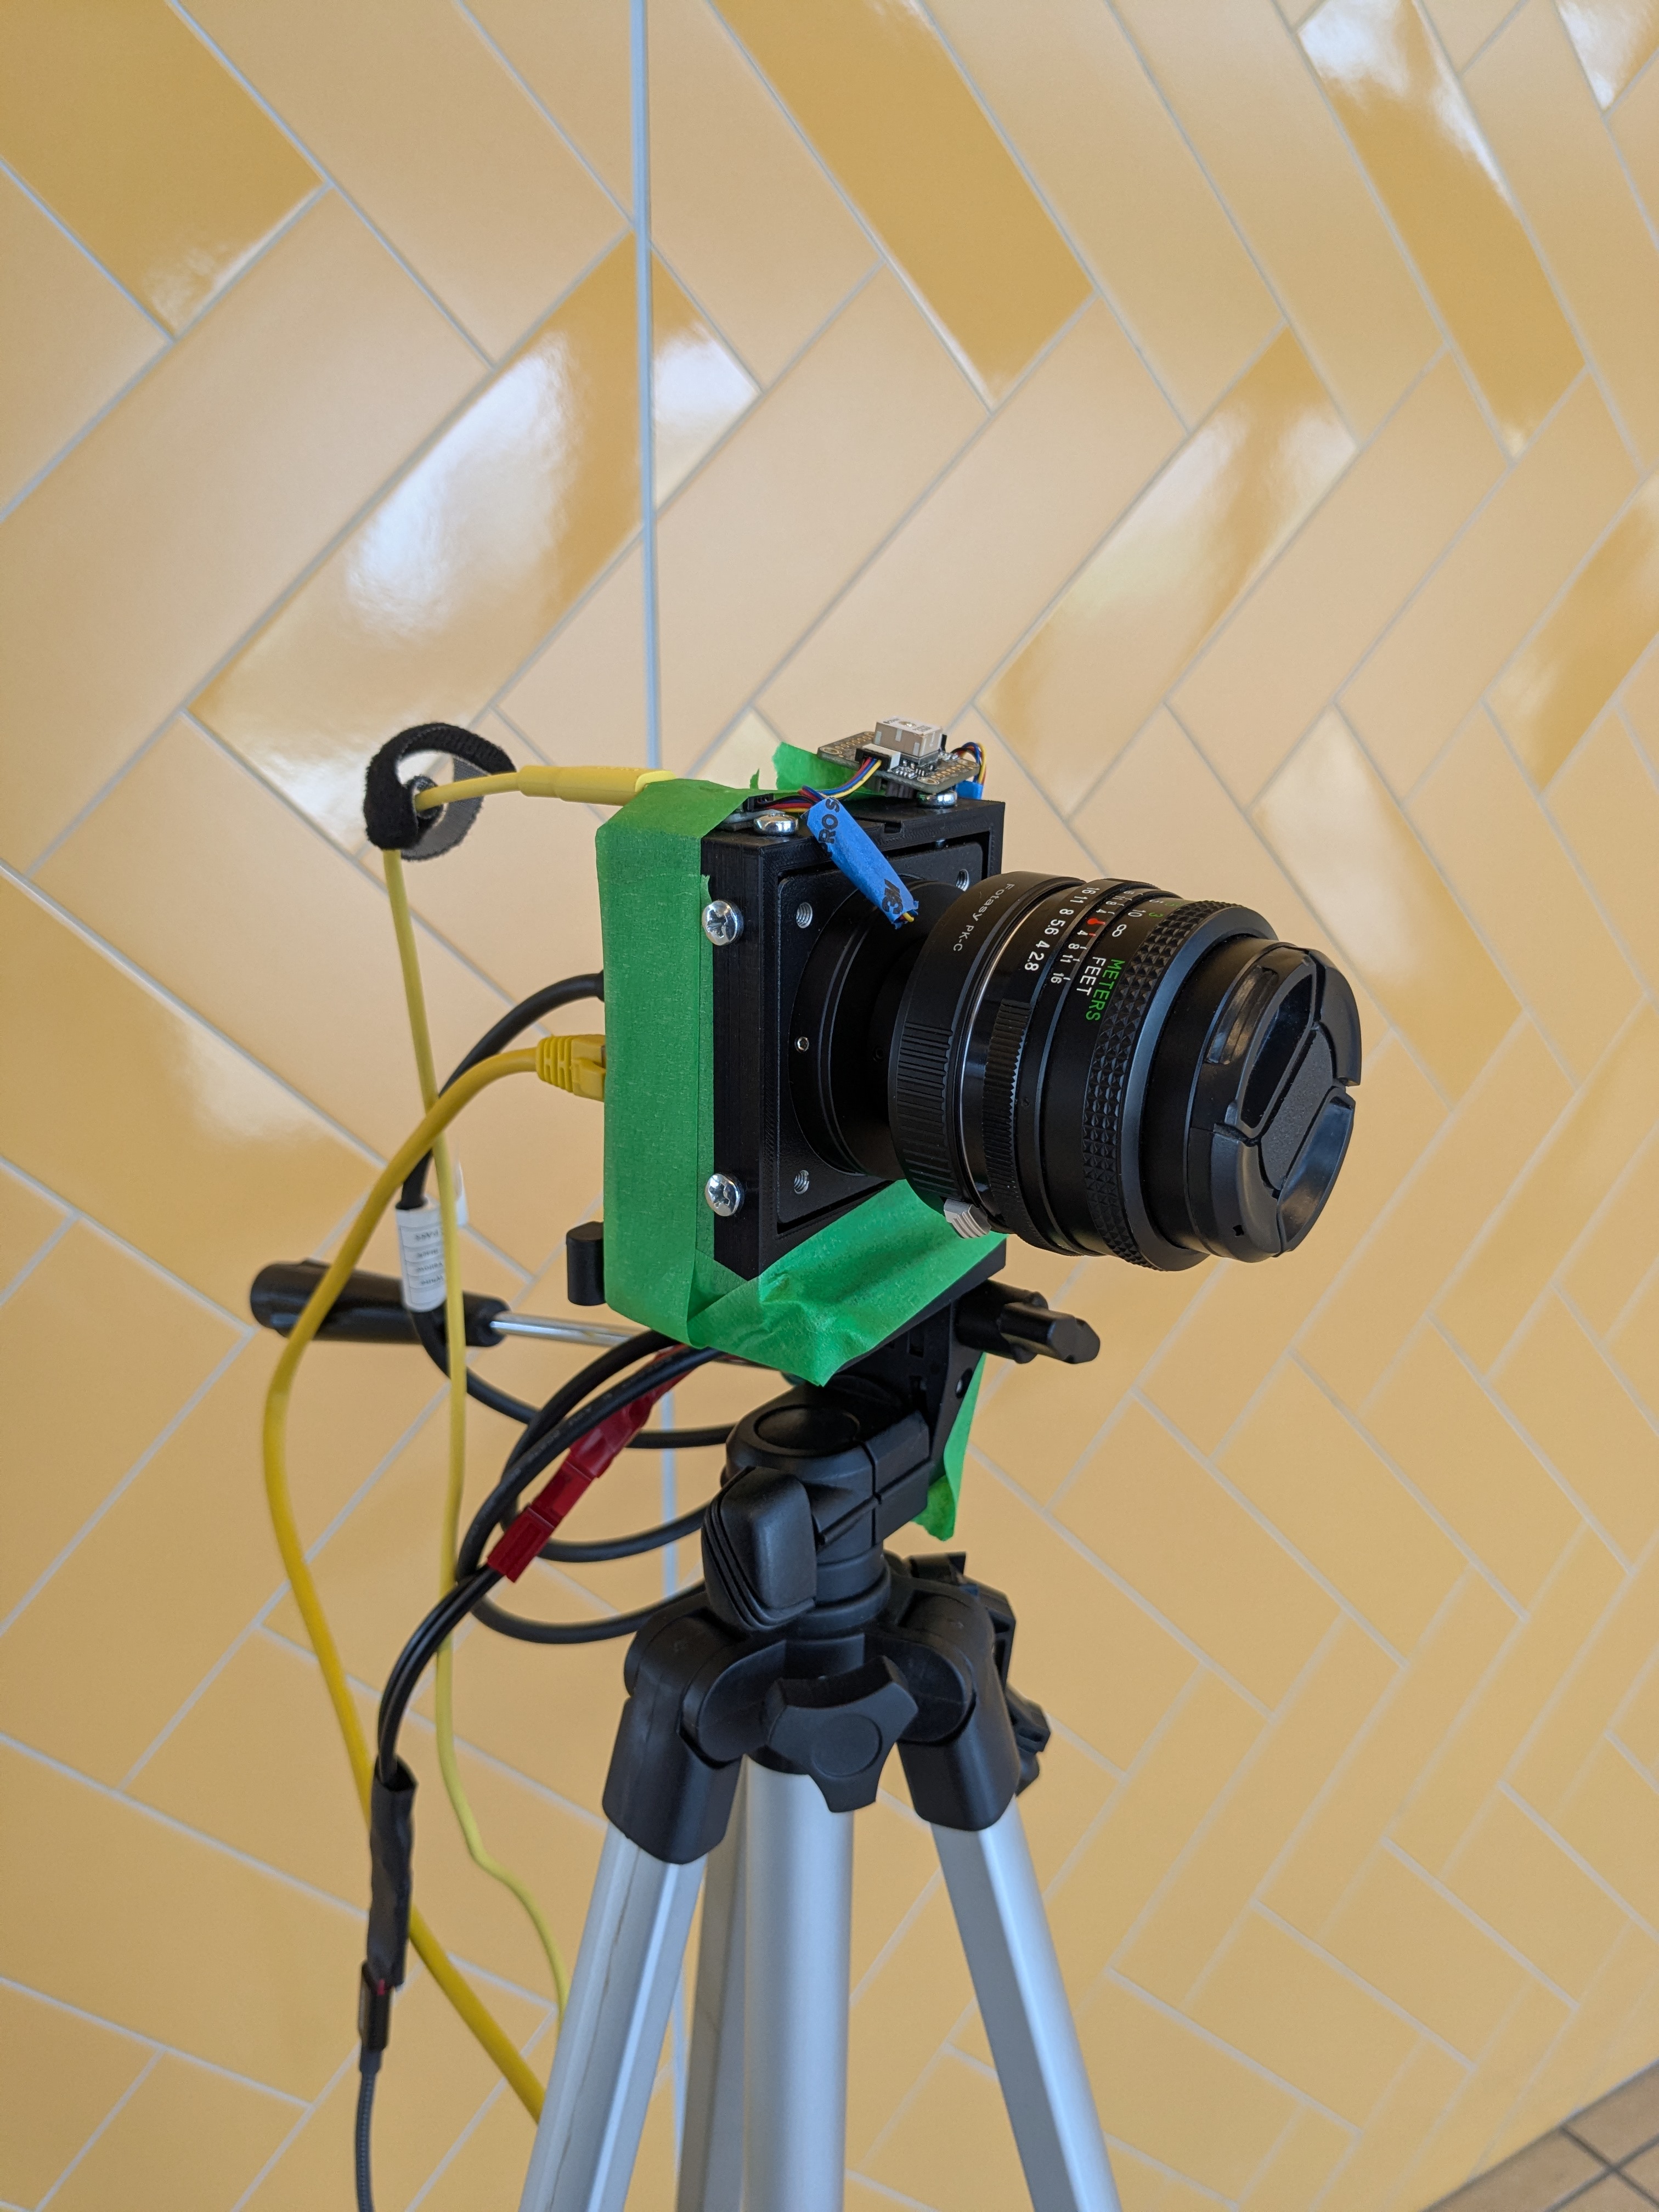
The lens on the front is a Vivitar 28mm f/2.8 that I already had for a more normal camera, with an adapter from Pentax K to the C-mount screw on the camera. Since some of the things I'm trying to shoot with it are kinda tall, its field of view worked out pretty well.
The whole thing is powered off a USB-C battery bank and there's also ethernet and USB cables running to my laptop, so it's a bit of a cable spaghetti monster when in action.
With the sensors attached, I could finally give them a try.
Once I had everything assembled, it was time to take it on a train.



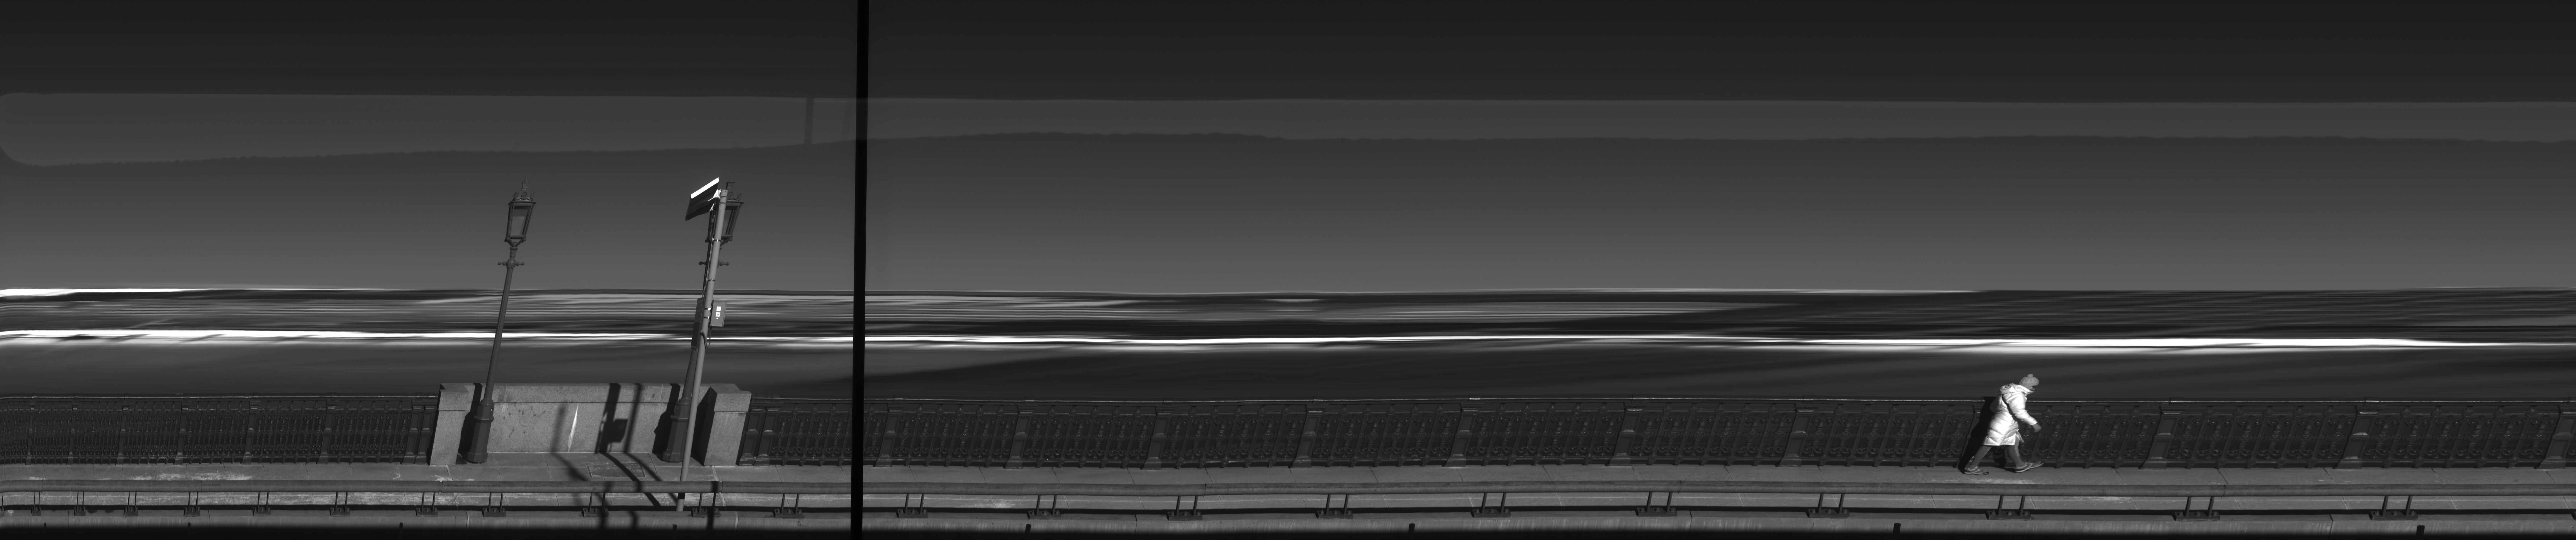
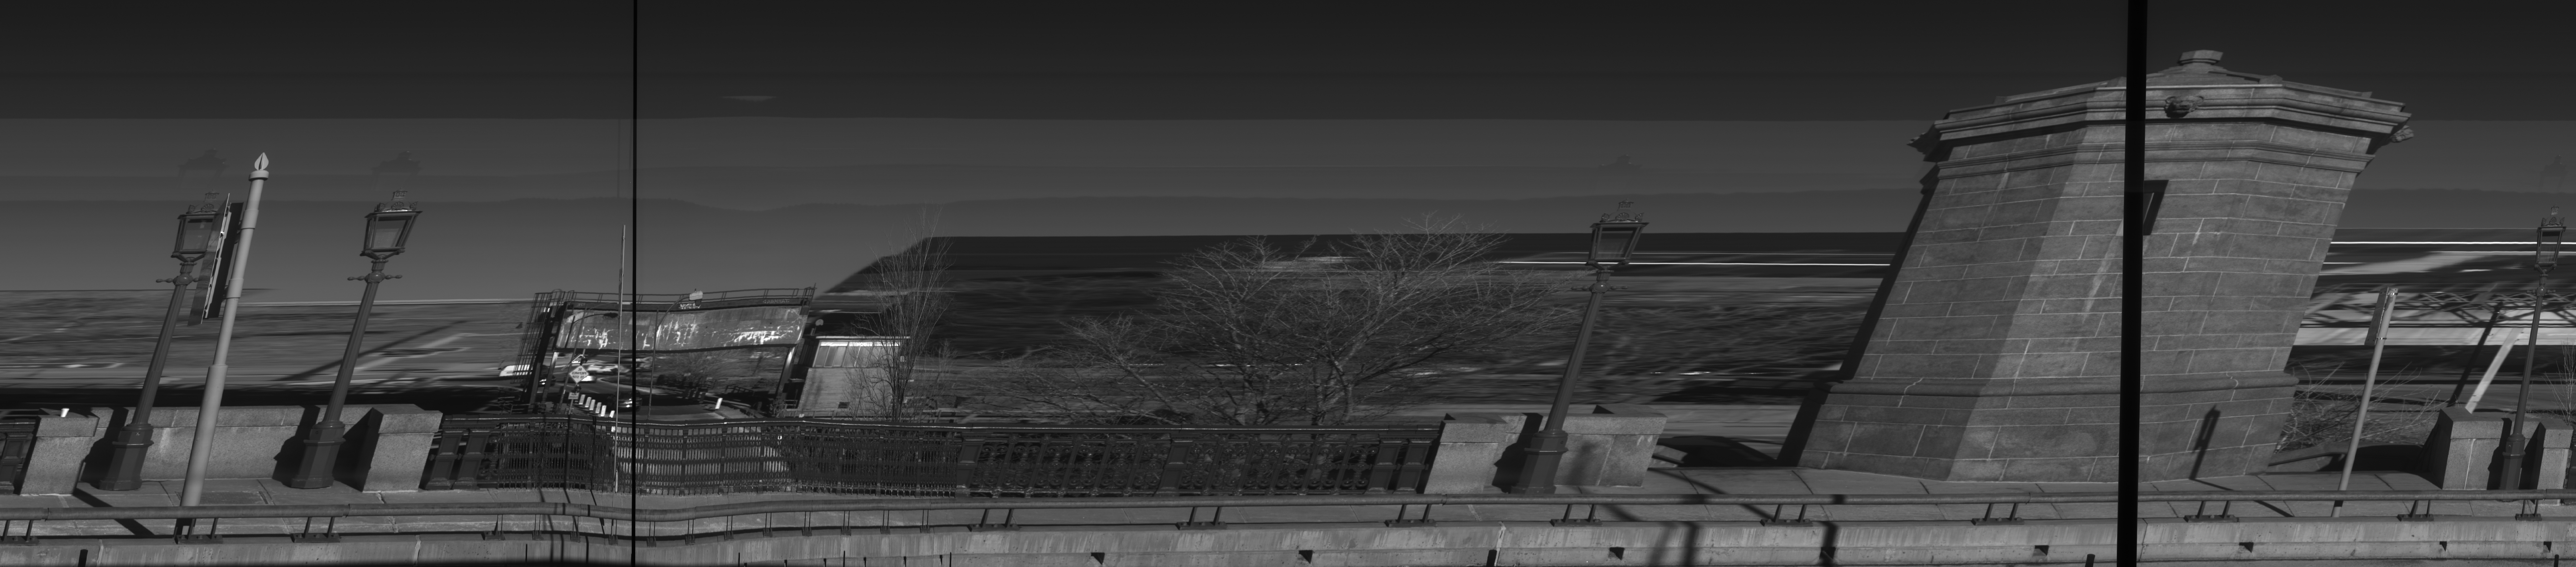
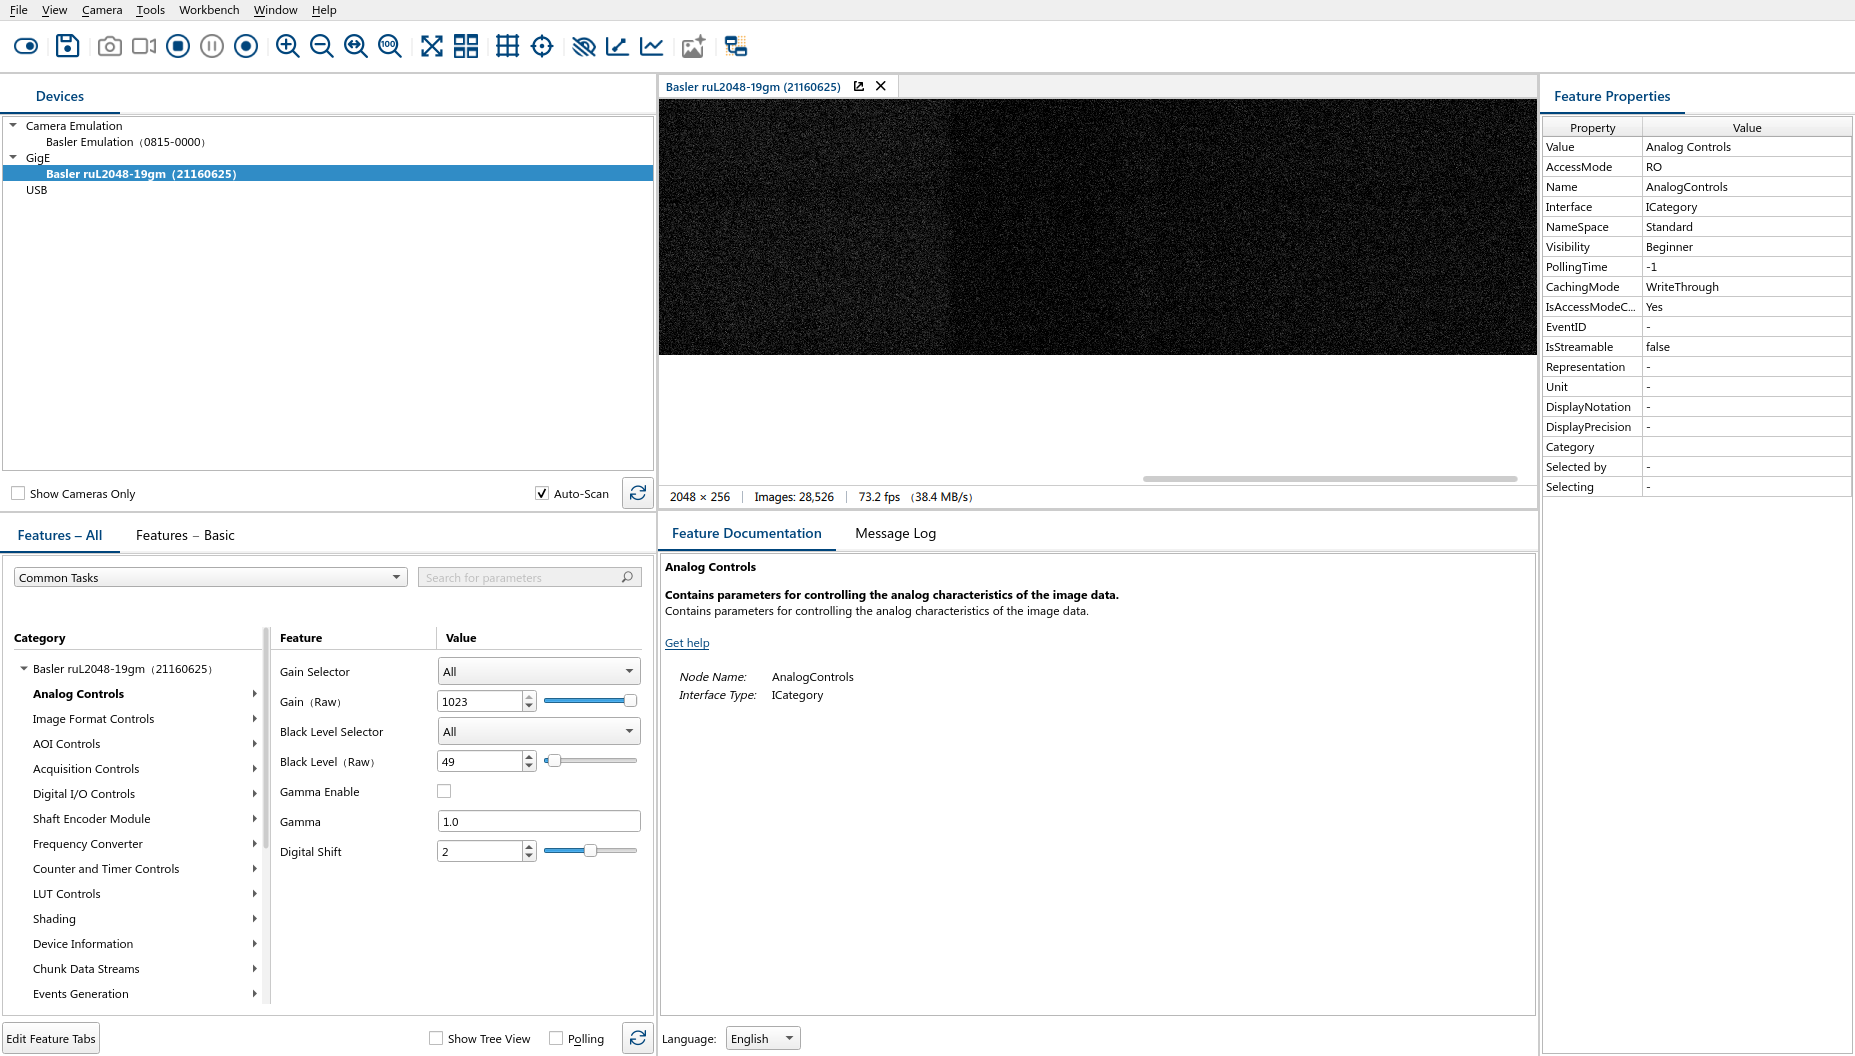
My first attempt at a GUI of my own used OpenCV highgui, which didn't really work for this. It requires a 1 ms delay after each frame, which is fine for slower cameras, but would cause me to miss 4 entire lines (250 μs each at the shutter speeds I'm usually using) every display frame (256 lines).
I ended up using Dear ImGUI instead, which worked nicely with the frame acquisition loop I already had. Out of the approximately two dozen backends the library supports, I picked GLFW ("girl love for workgroups", to quote a message from a friend at the time) and OpenGL3, probably because of the "girl love" quip, although I'm not certain.
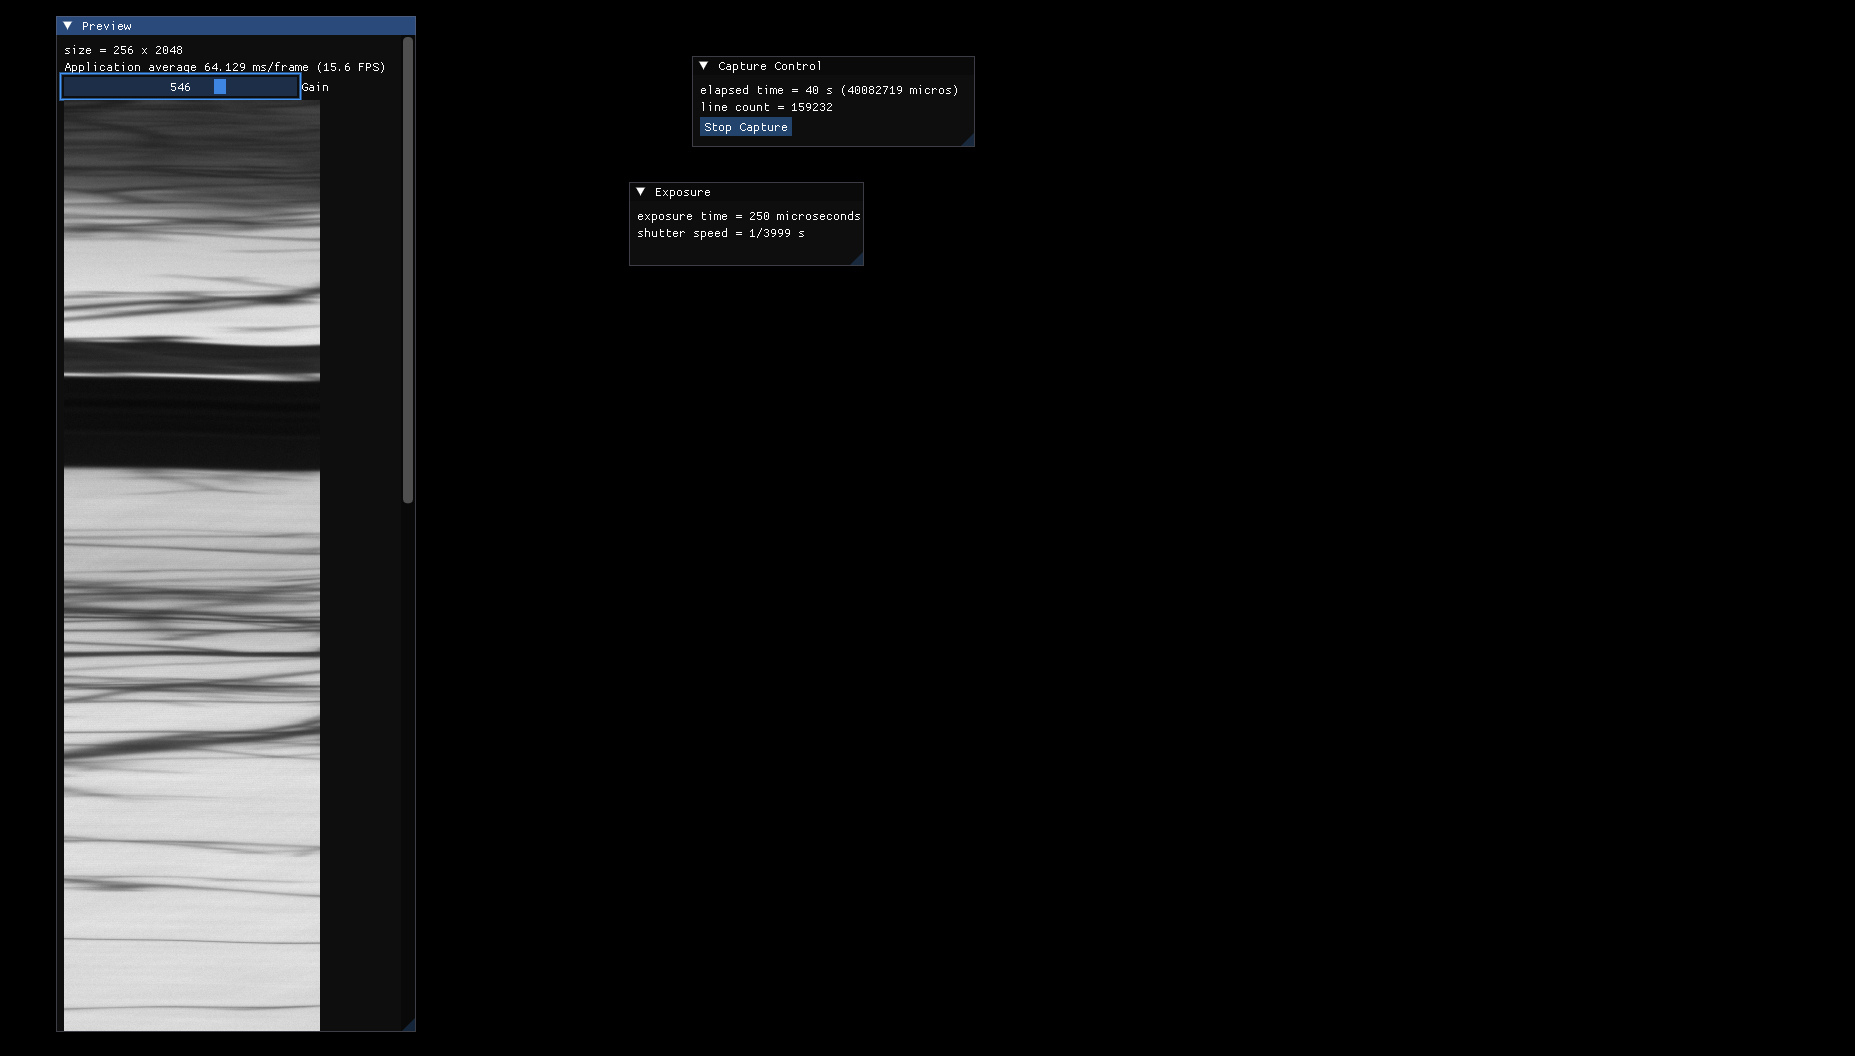
Getting the accelerometer data proved to be something of a pain. my first version sent readings as text over serial, which turned out to be very computationally intensive on the microcontroller. (Converting floating point numbers to strings and then assembling strings is very expensive, even on a relatively powerful SAMD21 microcontroller that has thirty-two entire bits.) I decided to move the conversions over to my laptop, which has the processing power to handle them with ease, but this came with problems of its own.
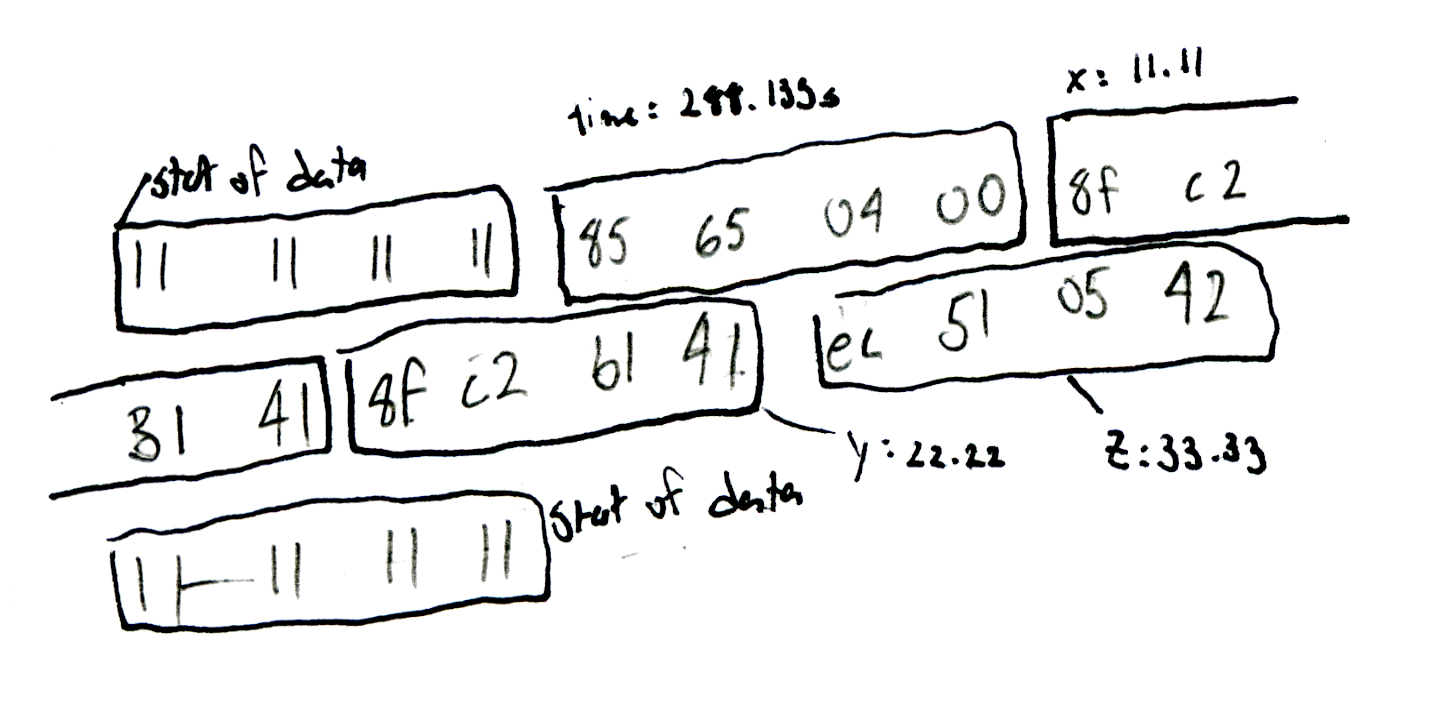
The accelerometer measurements were sent as raw floating point numbers, but GPS data was still in NMEA sentences and switching between them required sending fixed byte sequences and hoping that nothing got misinterpreted as those sequences. (Nothing in a NMEA sentence should come across as 0x11 0x11 0x11 0x11, my accelerometer data start sequence, but it's not completely impossible for accelerometer data to contain 0x22 0x22 0x22 0x22, my NMEA string start sequence.)
I also ran into issues where not flushing the serial port at the right time ruined an entire day's shots. Thankfully, I was capturing on the Mattapan Line in Boston, and I can pretty easily go back and try again. 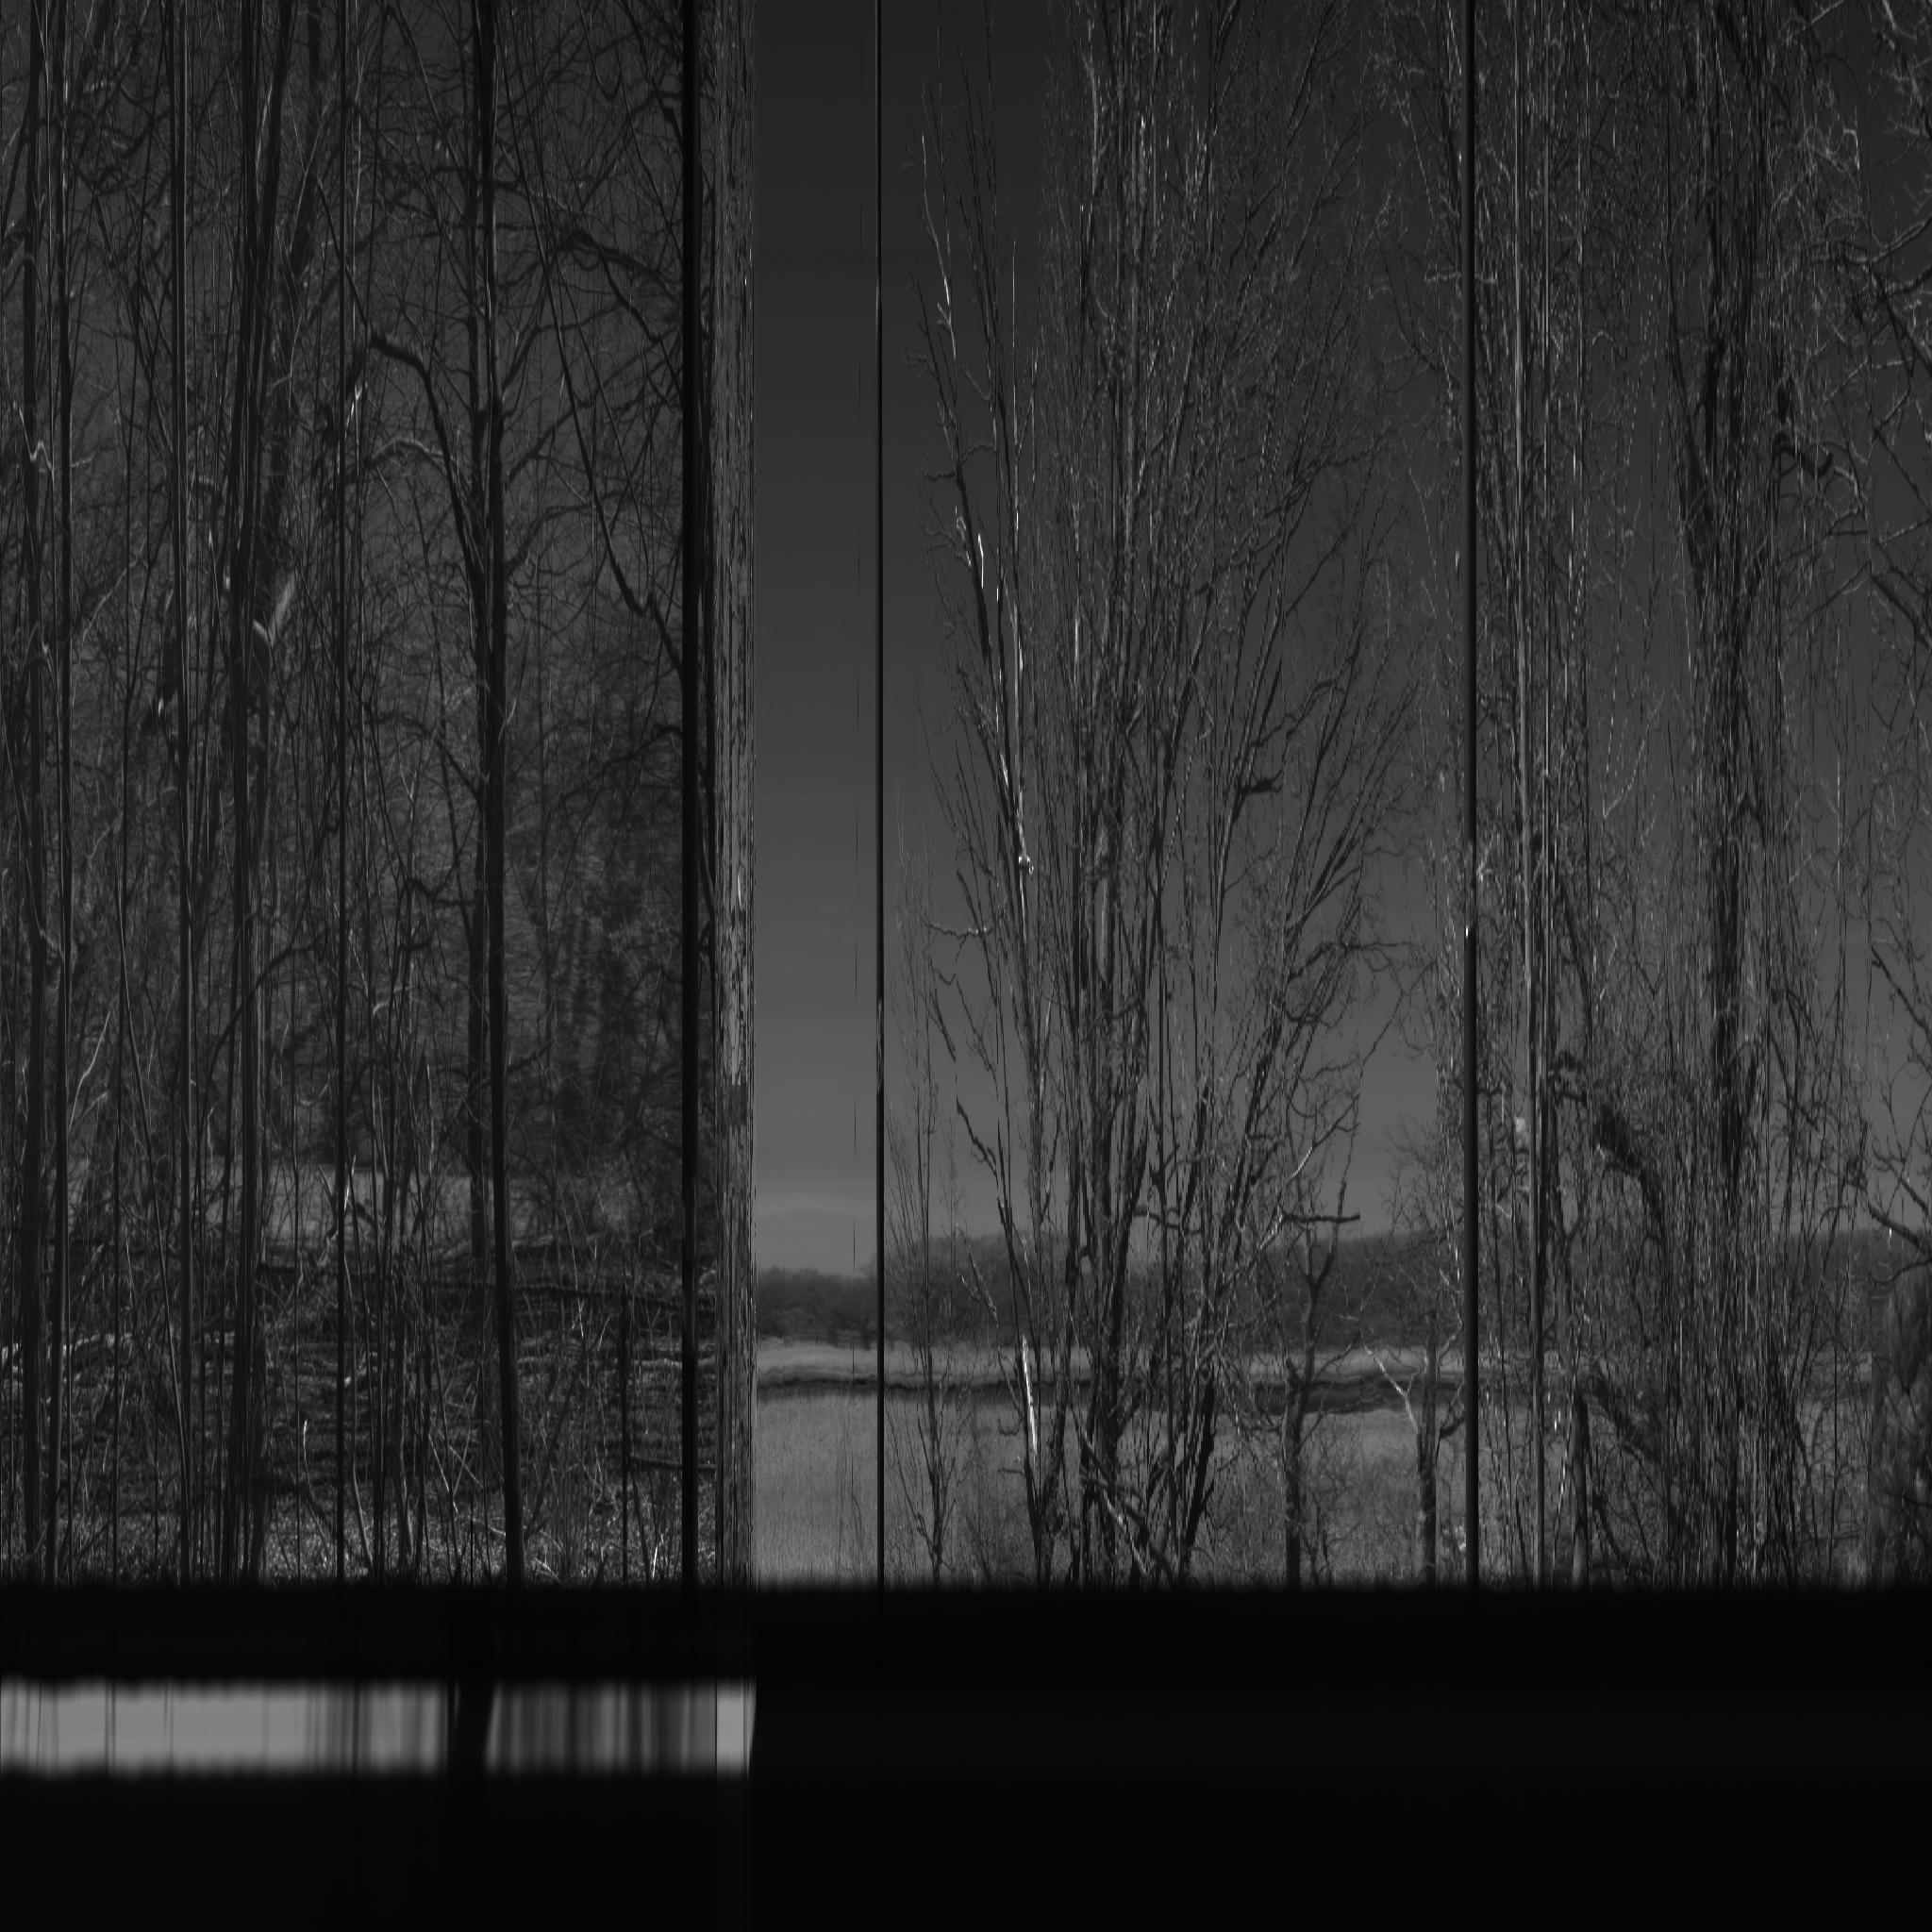
The fully assembled camera looks like a suspicious mess, and the witch using it doesn't look much less so.
Despite Boston's history of police overreaction to harmless electronics projects, I worry the least about being arrested on the MBTA. People here tend to mind their own business and have never called the cops on me. The police also don't ride the trains much, preferring to harass people in stations instead.
I'm less used to how things work in other cities, so I only take the camera out when riding with a friend to look out for trouble (and sometimes to listen to dispatch radio).
On my trip to Montréal, I was stopped by security in Gare Centrale and informed that tripods weren't allowed and asked, au franglais, whether I was recording or taking a picture. Rather than try to answer that philosophical question in a language I don't speak, I just said "désolé" a few times and put away the tripod, which seemed to be sufficient.
The pictures I took in Montréal are here in the gallery (images 2 and 3) if you'd like to see them.
Capturing image and accelerometer data turned out to be the easy part compared to postprocessing and making the images actually look good.
The camera captured somewhere around 4,000 lines per second, so I had more lines than I needed in every capture and had to pick which ones actually matter.
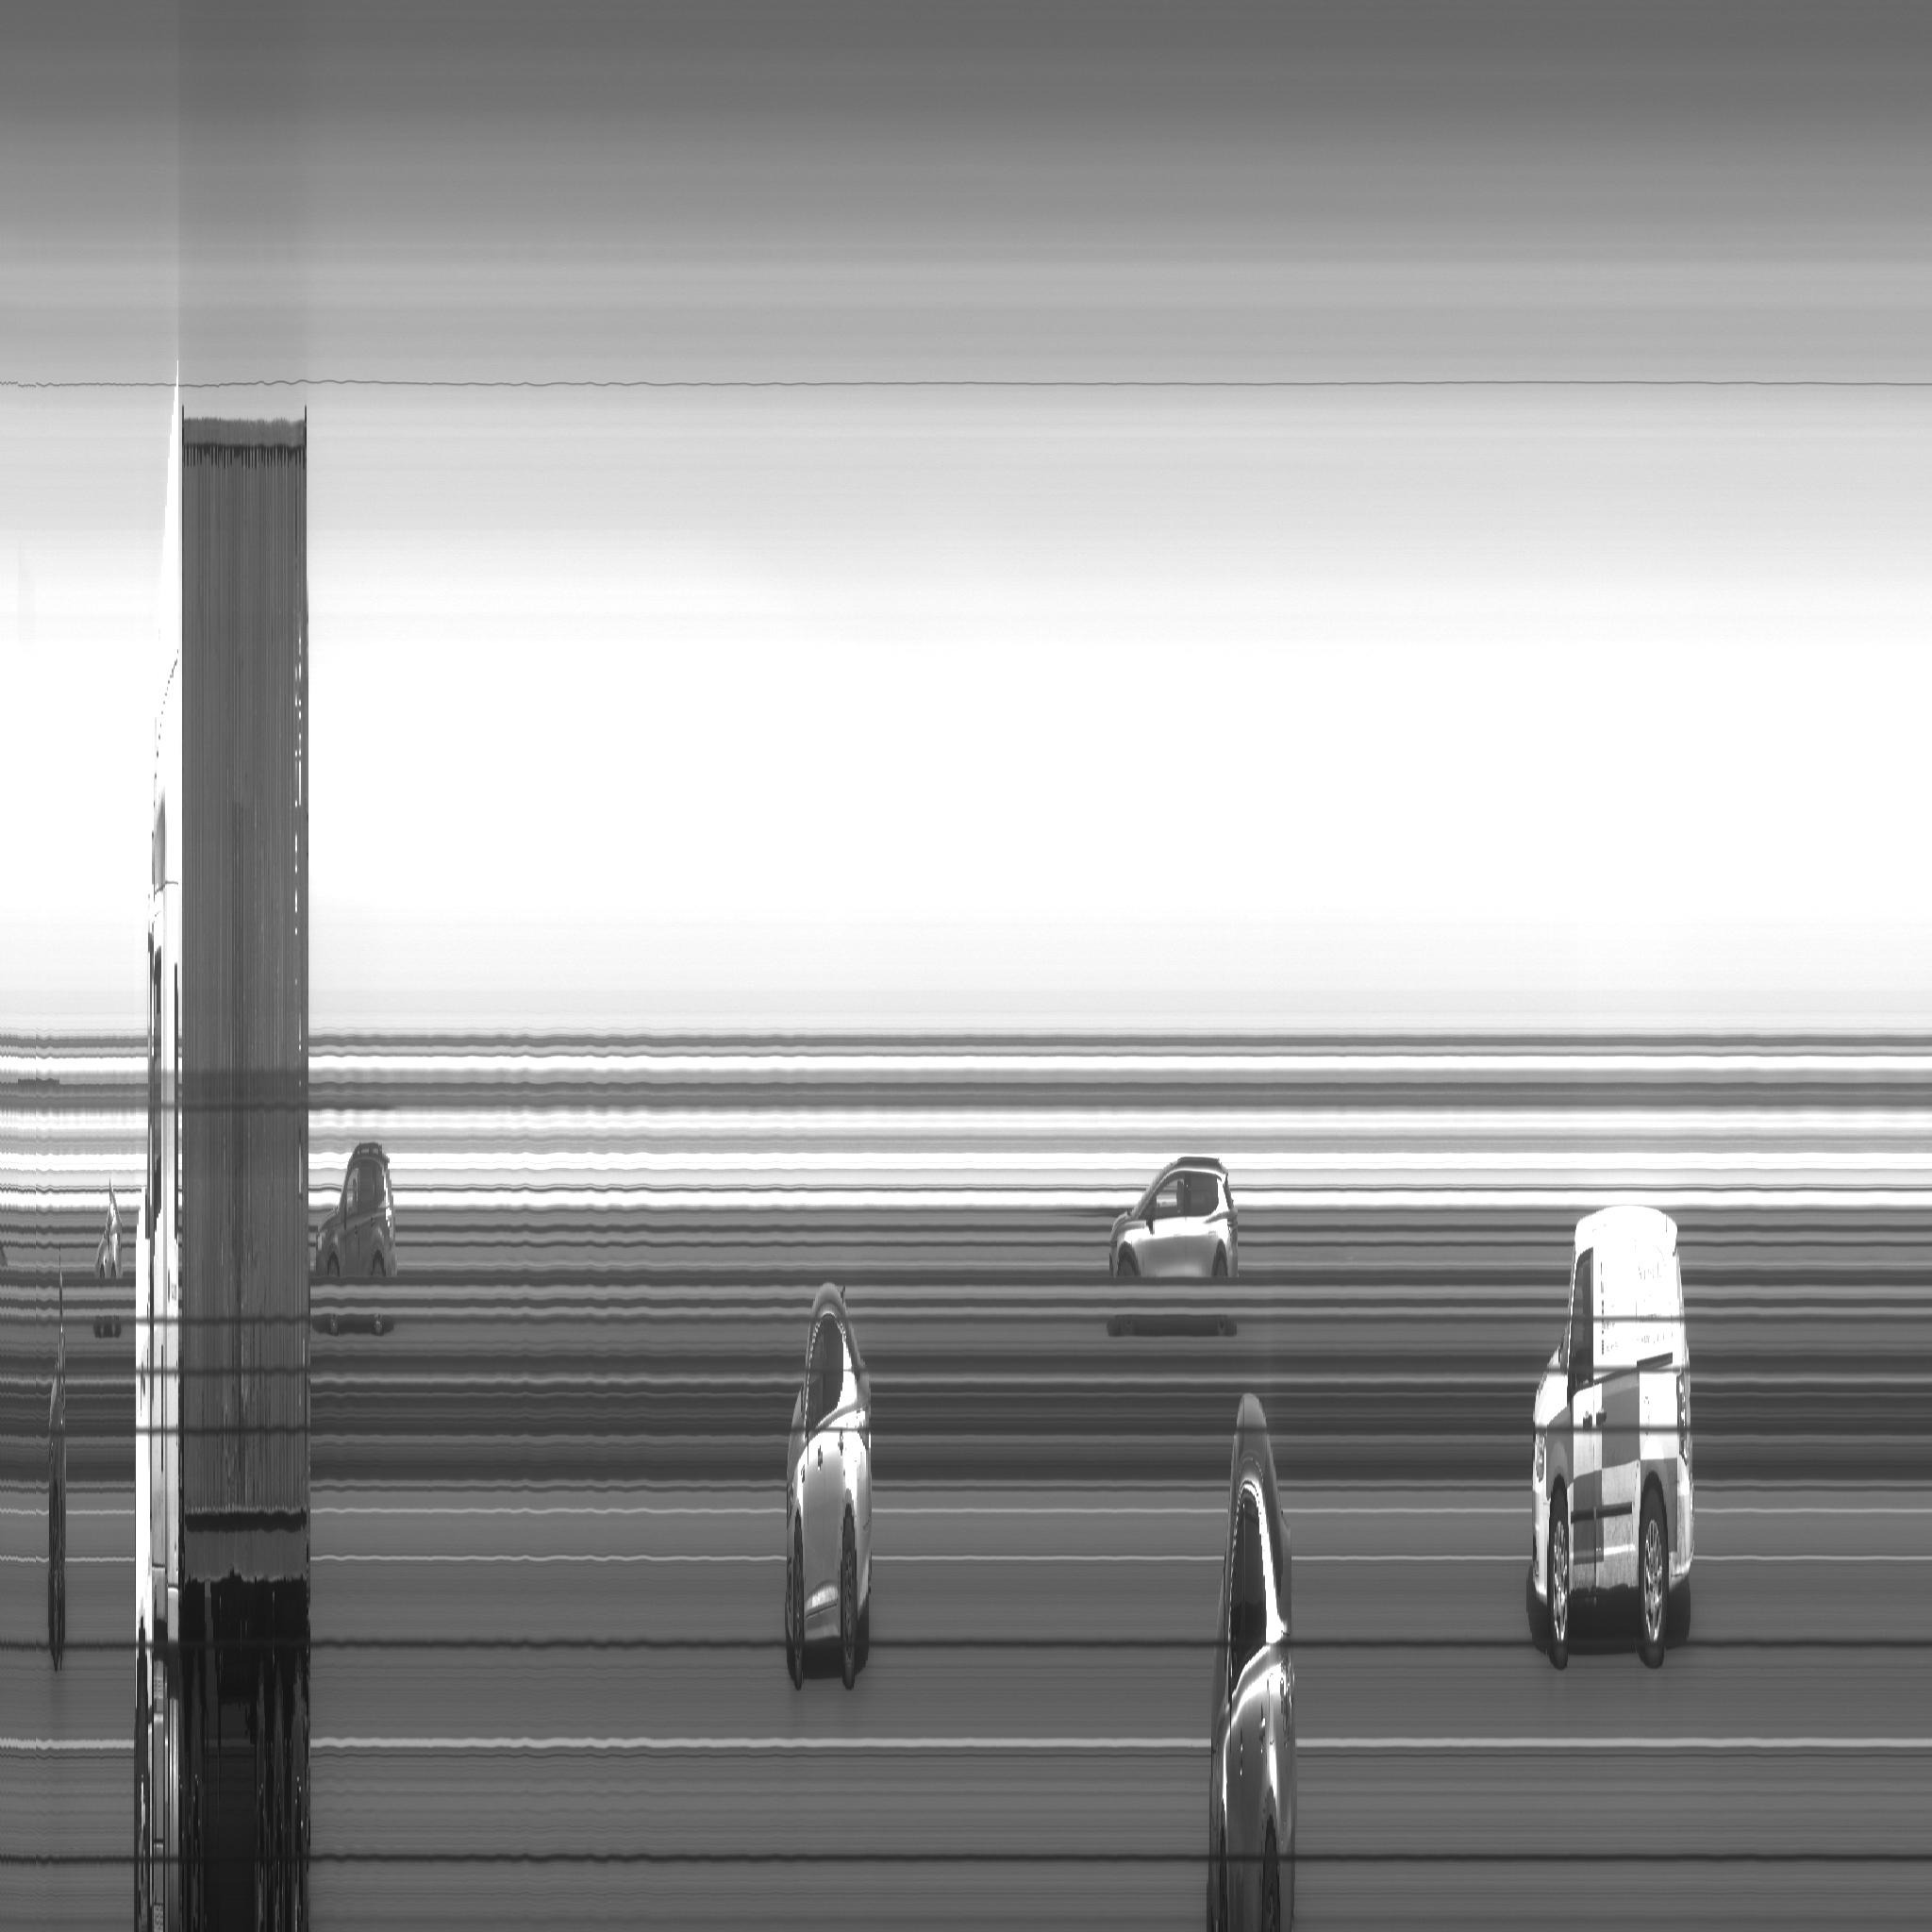
To decide which lines to use, I ended up using the speed, as measured by an accelerometer, but this came with several problems.
Firstly, accelerometers don't actually measure speed. They measure acceleration, the rate of change of velocity. By taking an integral, I can get velocity, but that's relative to an initial value. I can usually assume that the starting speed is at a station and is thus zero, but I can't be certain of that. If it isn't zero, I have no good way of knowing the correct value and just have to guess until I find one that smells right.
Secondly, as shown in this diagram, the accelerometer I'm using is only measuring so quickly. The camera is grabbing lines maybe 4 times faster than it, so every few lines have to share a speed value. It also isn't very consistent because my microcontroller code isn't as fast as it could be, so this could cause irregularities in the final image. How many acceleration measurements there are or aren't also changes how accurate the integral is, which creates more problems. 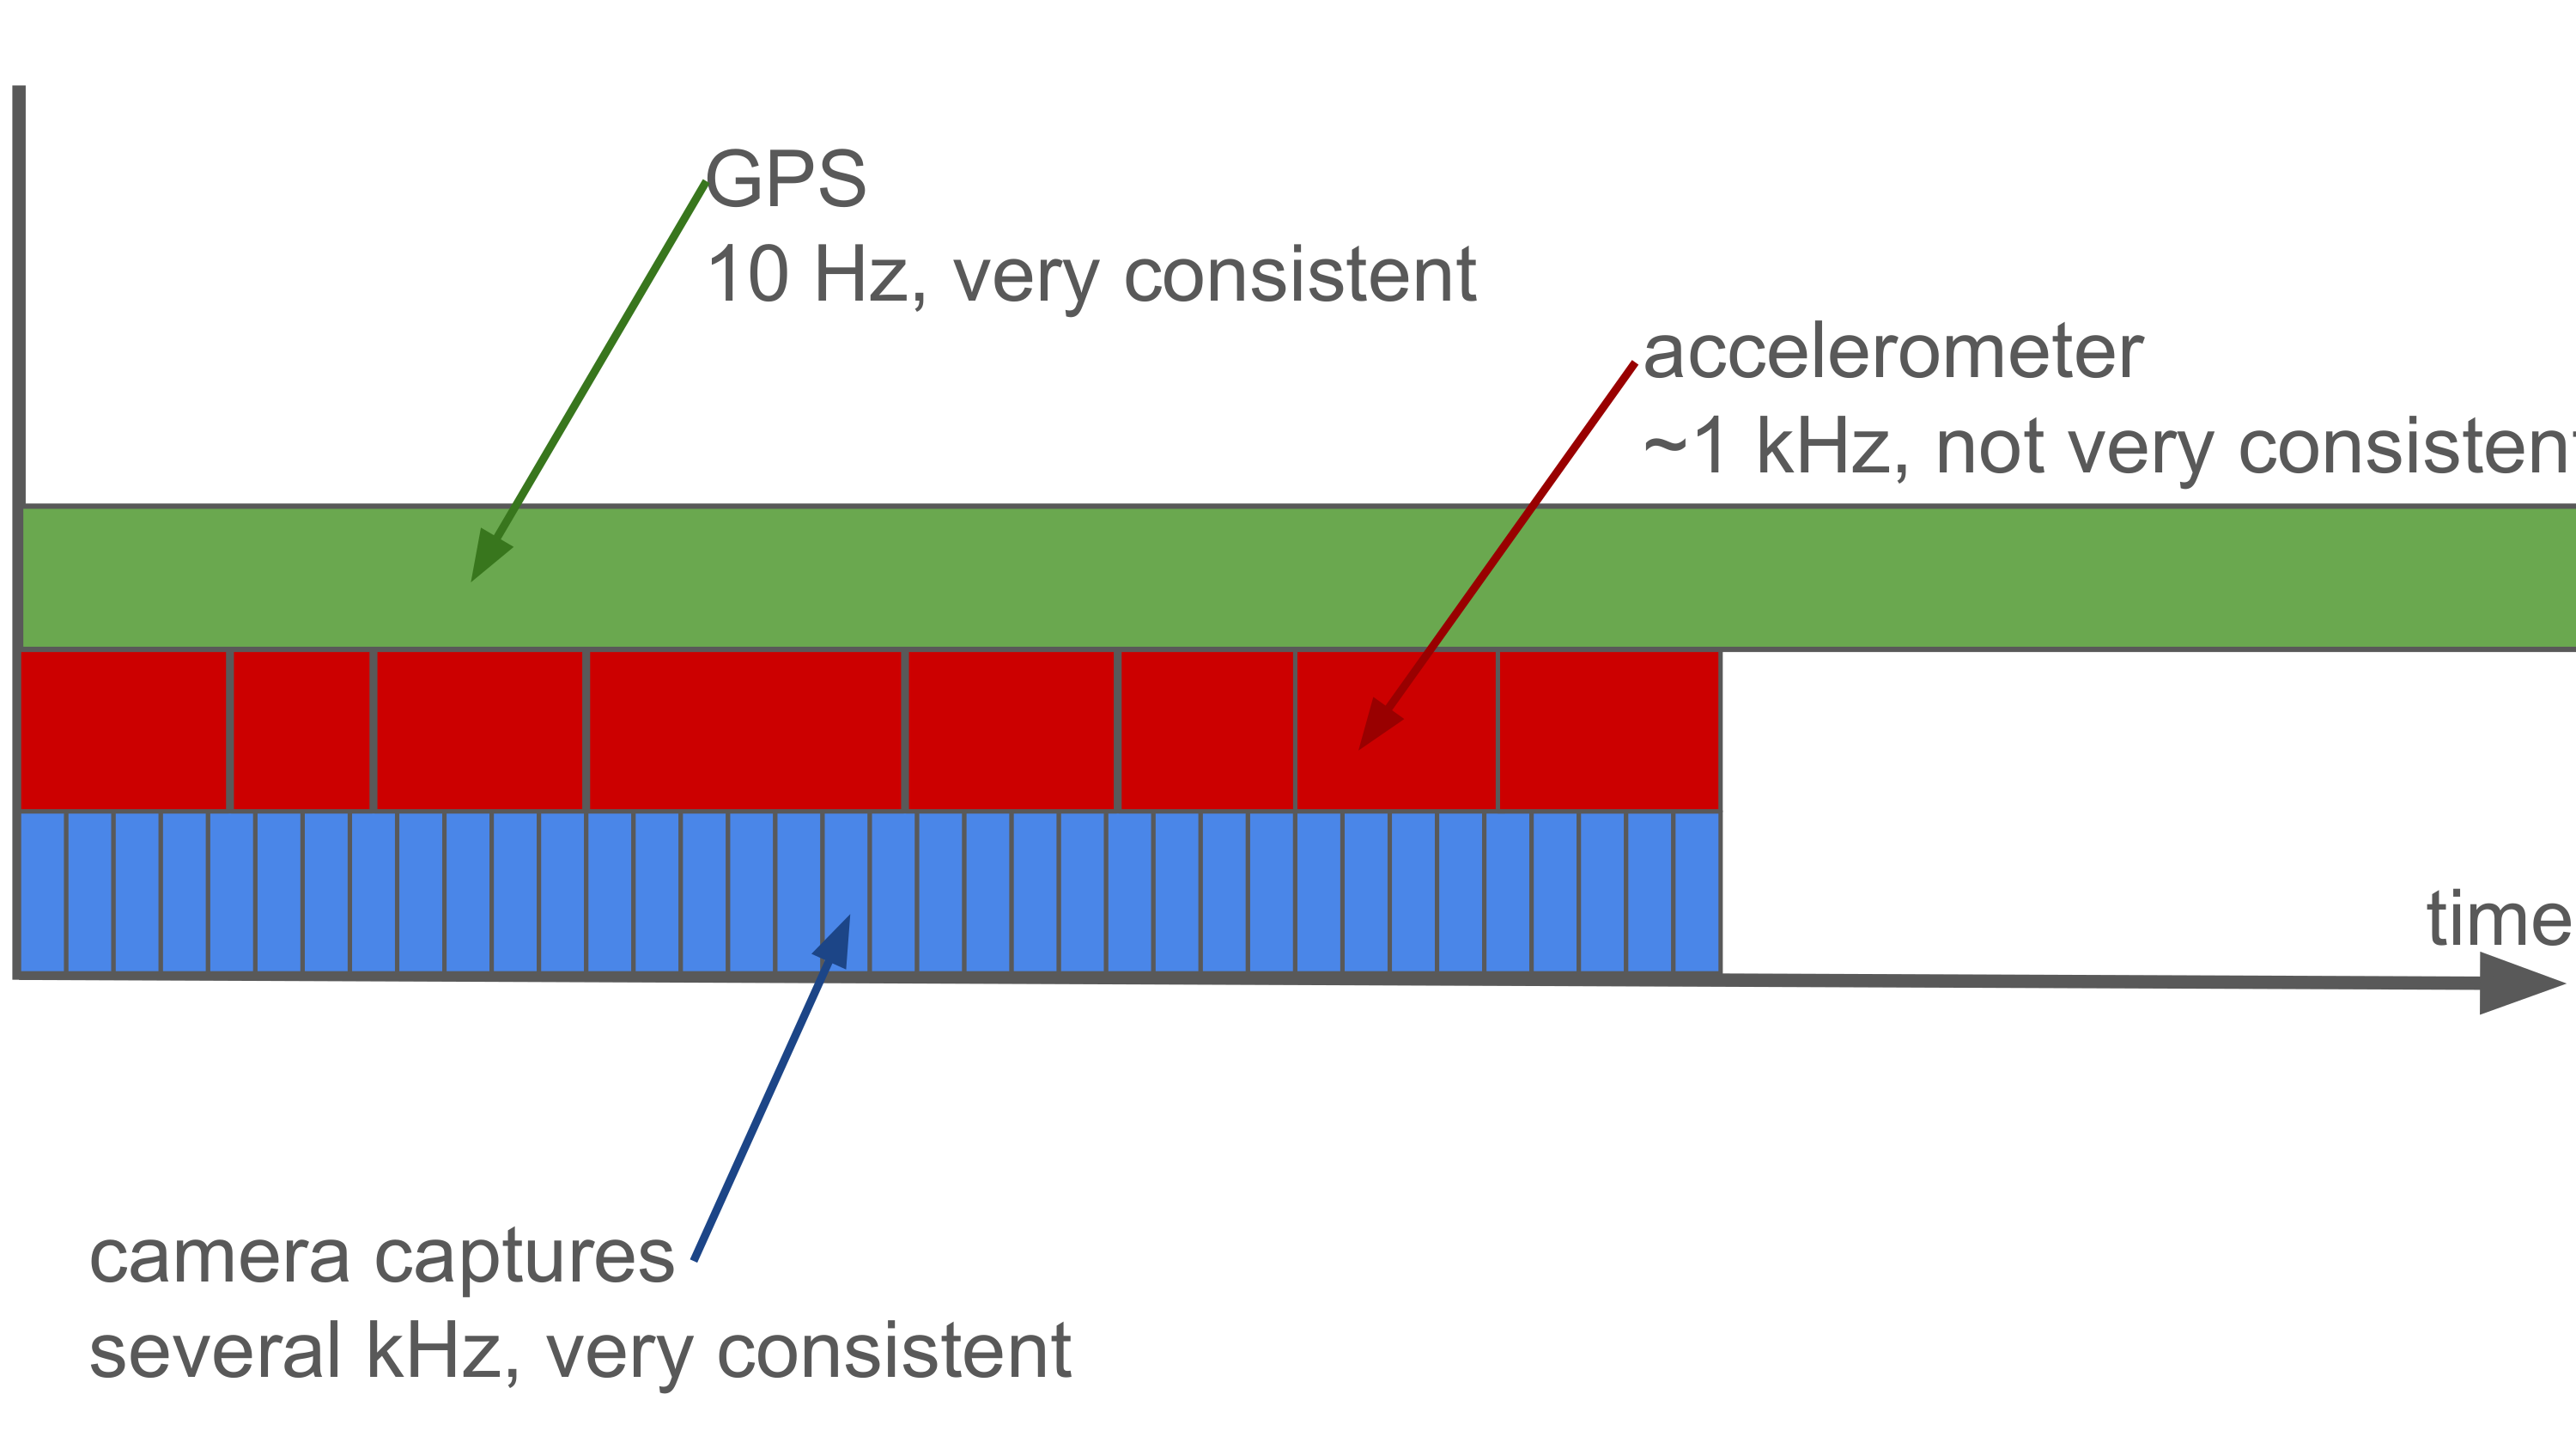
You might remember that I mentioned putting a GPS receiver on the camera earlier, and while I did do that, it wasn't very useful. It didn't get a signal on most of the trains I tried it on, and when it did manage to get one, it only read 10 times a second, which covers 400 entire lines out of the camera. If it worked a bit more consistently, it could be useful for correcting for integration error using a Kálmán filter, but that’s a problem for when I have better GPS data.
Even if my speed measurement is perfect, I still have the problem of parallax, where things closer to the camera appear to move faster than things further away. This is independent of optical focus, which I usually set at infinity.
10 distance units per pixel
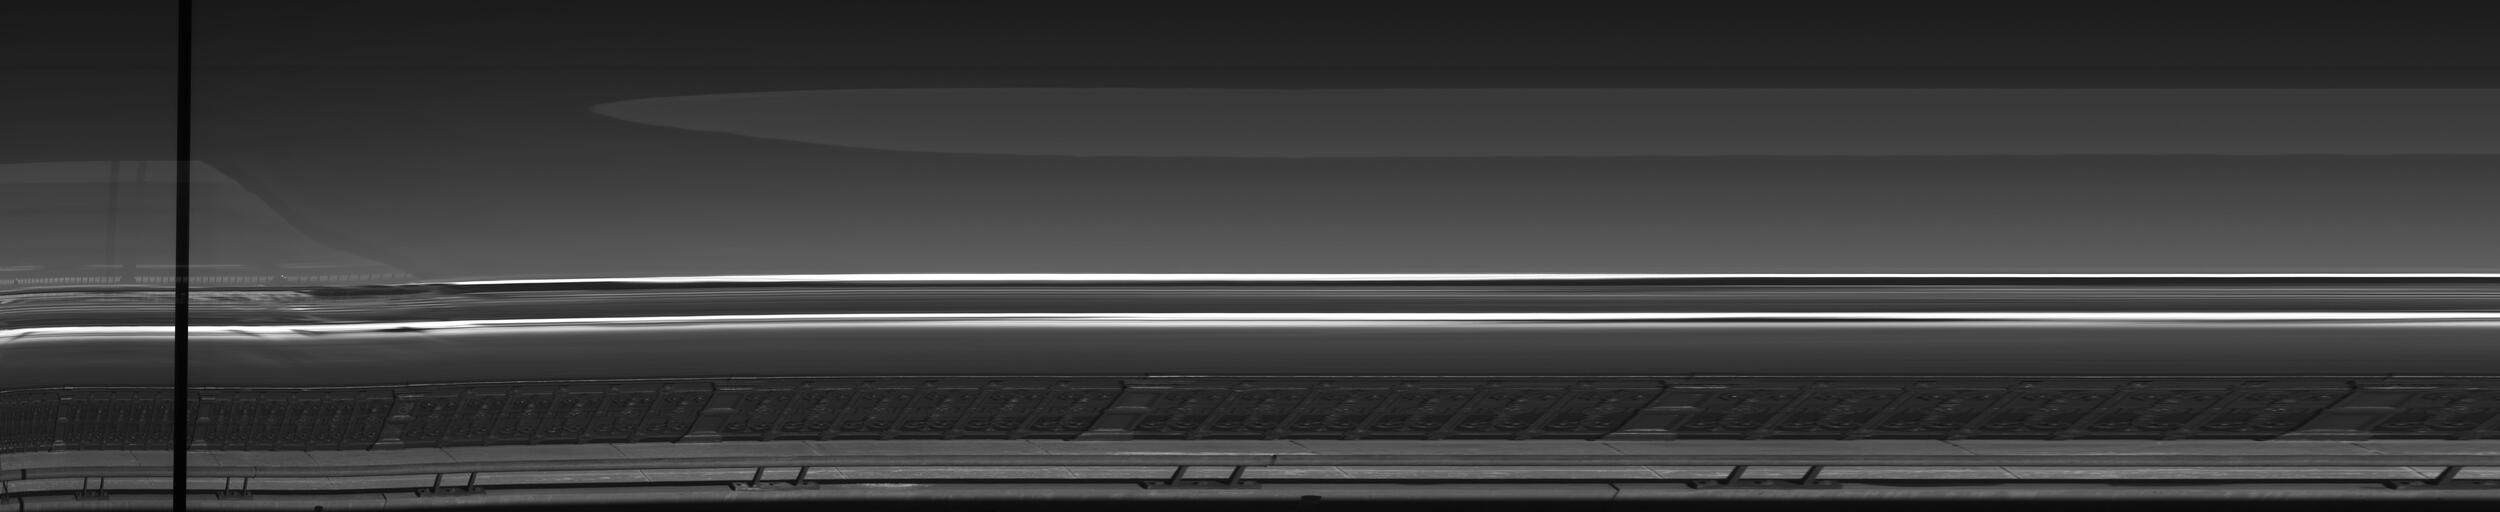
This problem can be dealt with by changing how much distance each pixel represents. Lower values emphasize things closer to the camera more, while higher ones make the background more visible. You can give this a try by moving the slider!
Each of these images is same size (10,000 pixels wide by 2048 tall, scaled to fit your browser) and each includes everything from the previous by virtue of covering more of the capture. The units are arbitrary and don't measure real distance (I could make it actual meters per pixel, but I don't see a point to that.)
The camera and software have no idea what I want to "focus" on, so I make the artistic decision and manually pick that for each segment of the image and stitch the segments together to get the pictures in the gallery. I tested different values for distance per pixel and starting velocity of each segment and then stuck them together in GNU IMP to produce the final images. The assembled images often became too big for the 65,535x65,535 maximum size of a JPEG file, so I used the good old TIFF format. (The PNG specification allows similarly large images in theory, but the software I had to hand seems to like big TIFFs better than big PNGs.)
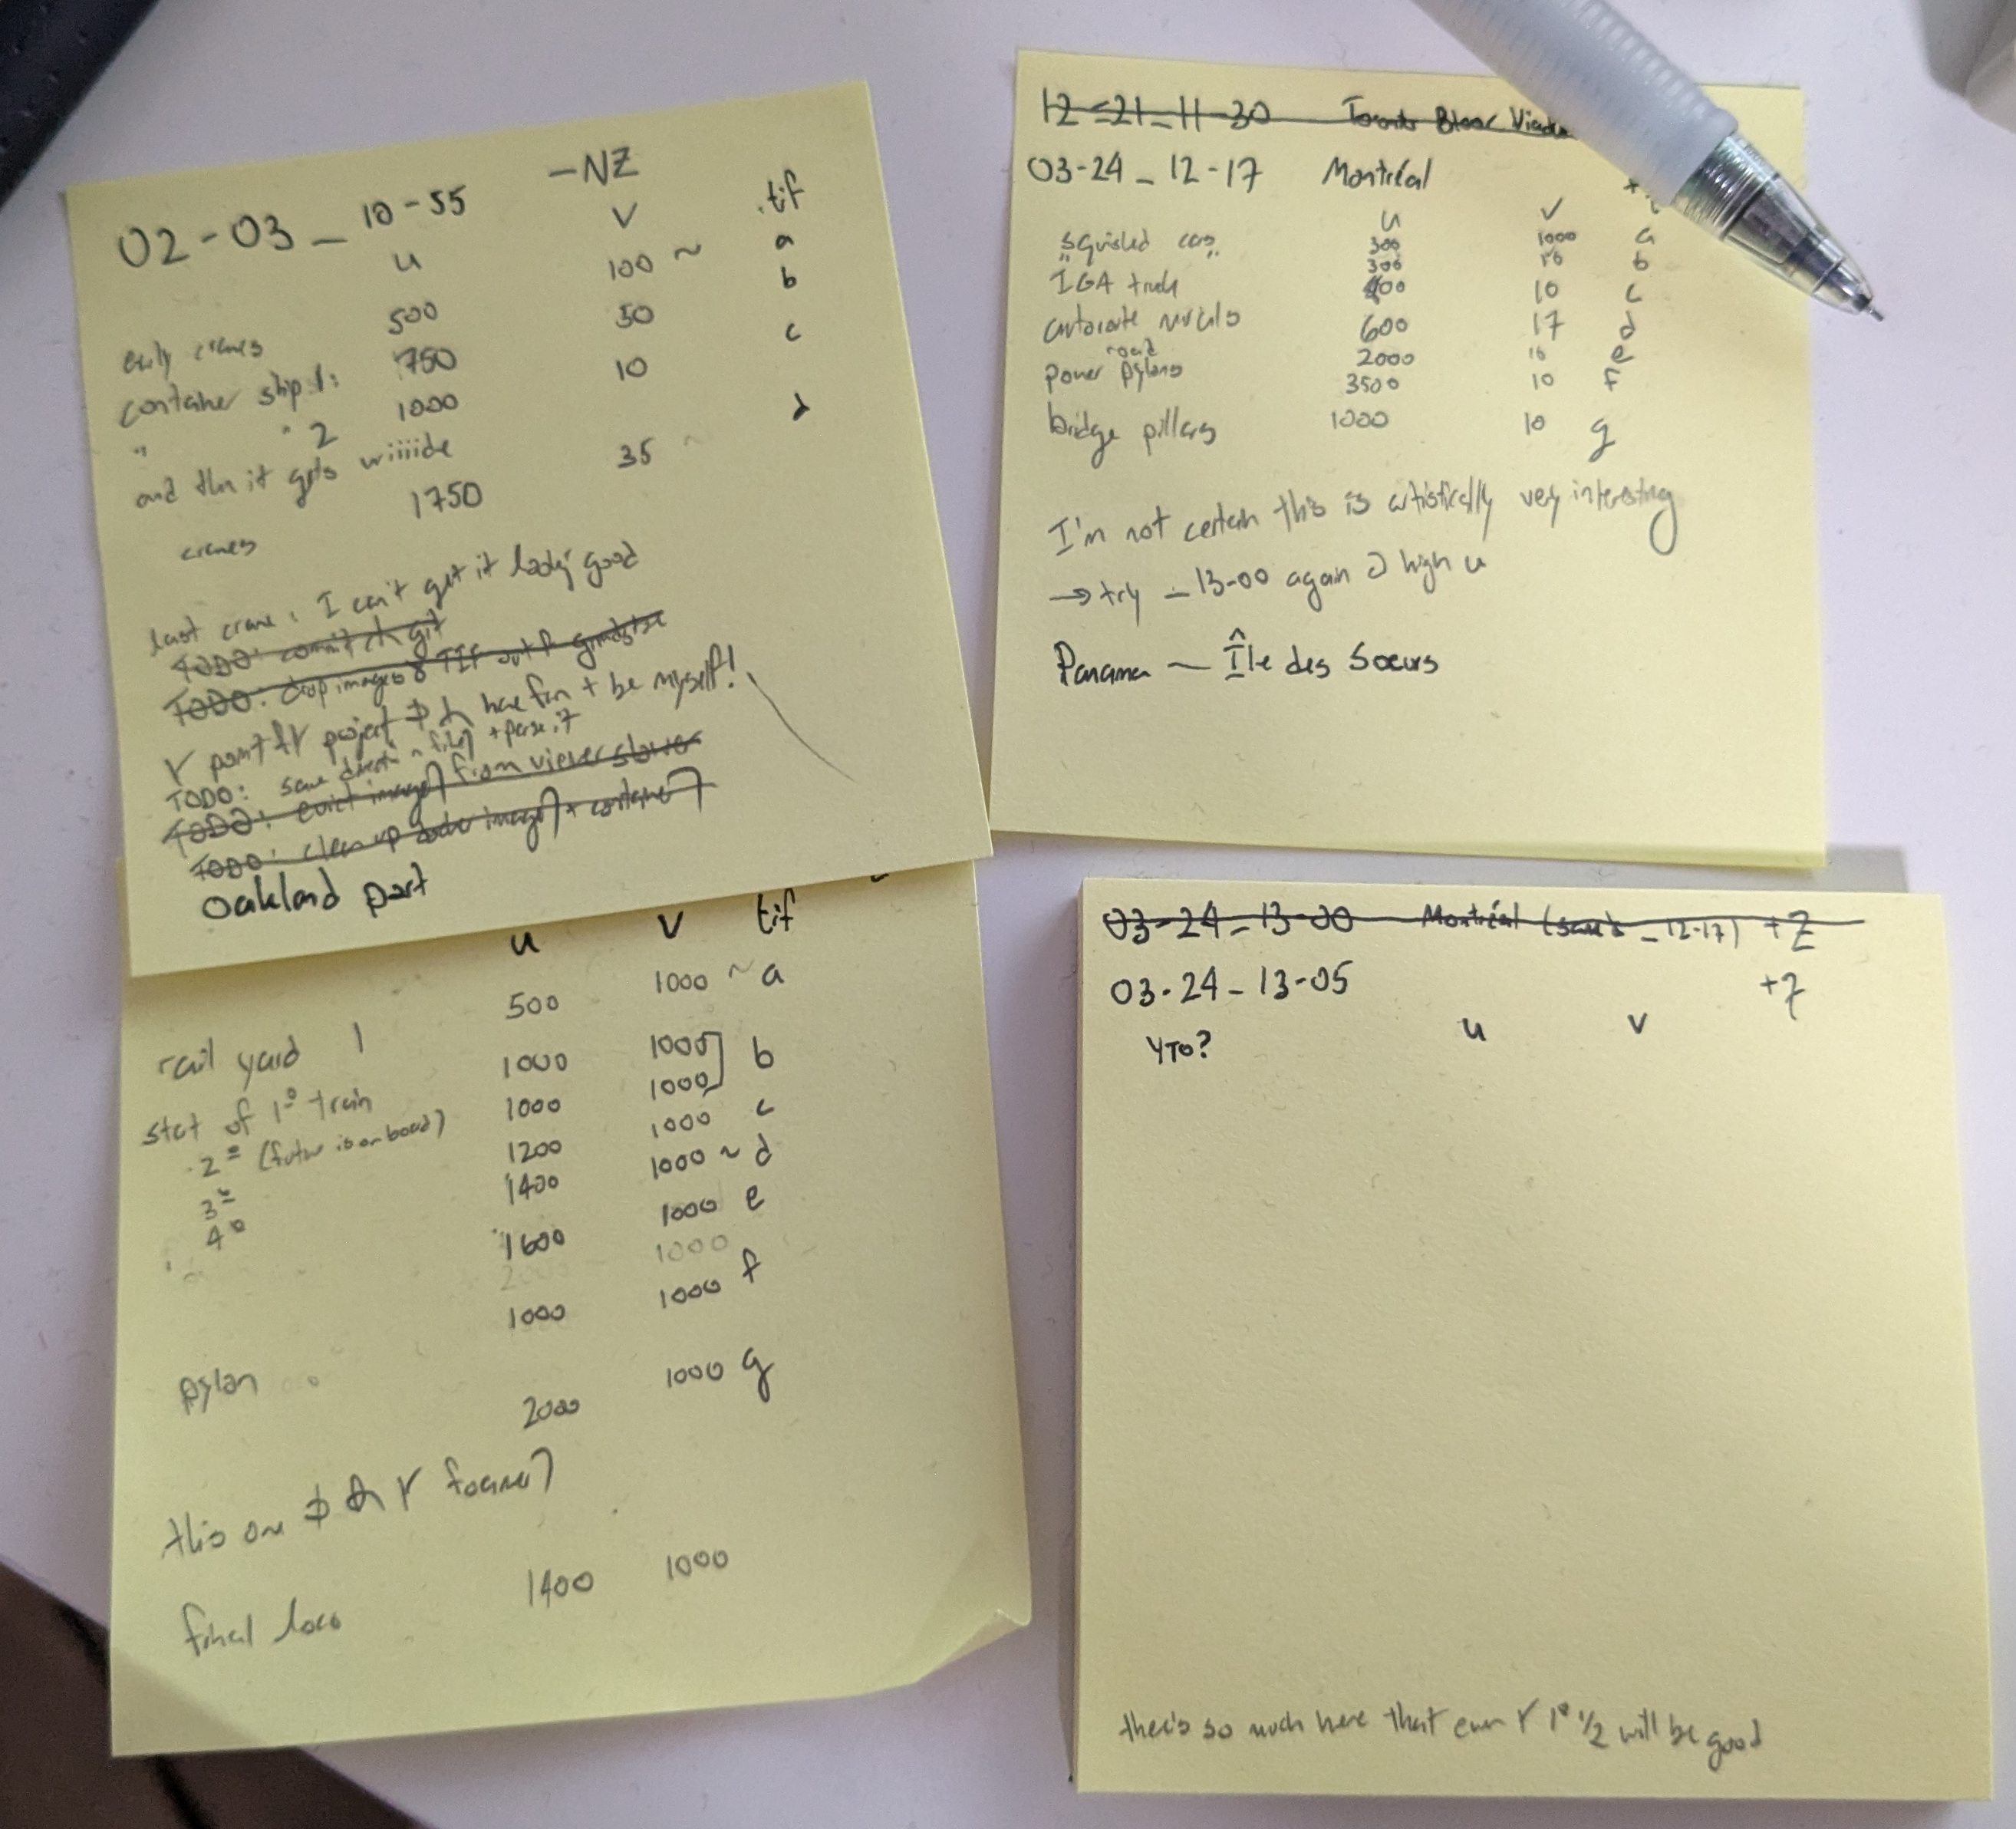
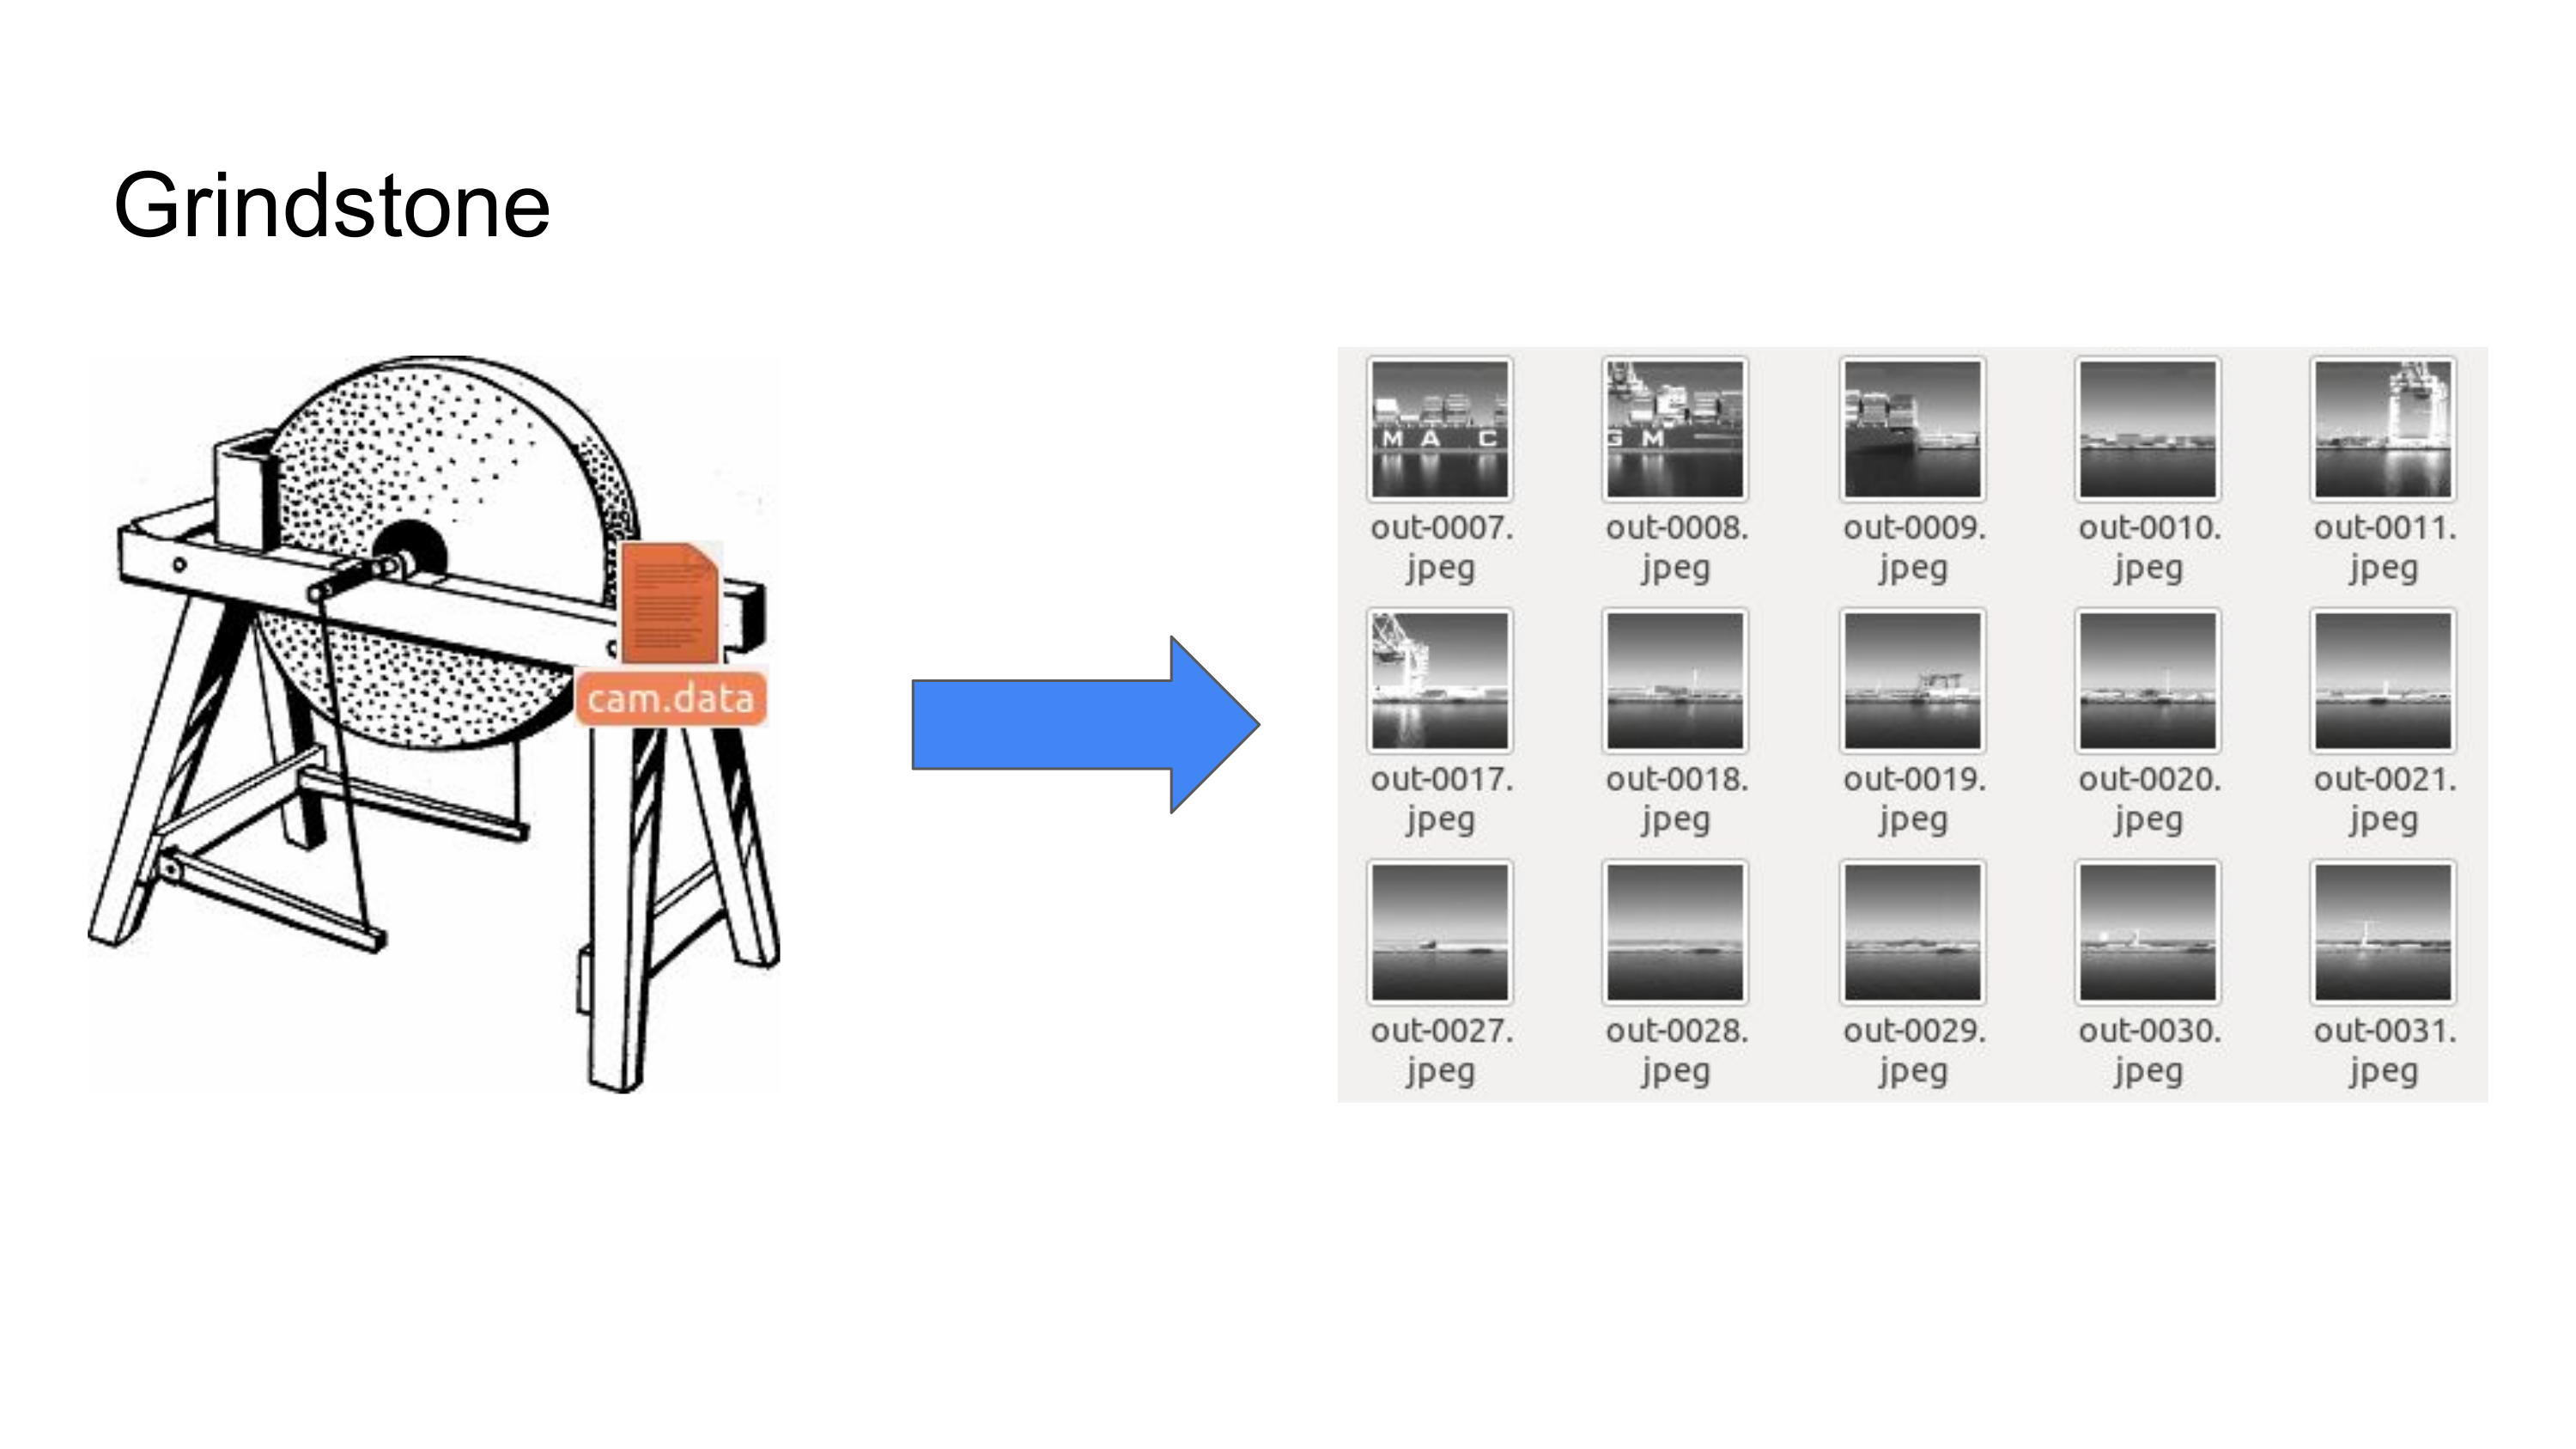
The program that takes the accelerometer data into account for every line of the image is called grindstone, since it grinds multi-gigabyte raw captures down into smaller usable images. My first version was loosely based on my very bad slit scan code from earlier and was extremely slow, taking hours to capture a minutes-long capture. It would often fail to save after running for hours because the resulting image was too big for the JPEG format, and debugging it was an absolute pain.
I ended up nerdsniping my friend Maddie into rewriting grindstone in idiomatic NumPy, to make the mathematical operations that were going on clearer (she insists that all the operations were already in the original, and her changes were along the lines of "transforming it into a magical girl"). Maddie would later split this version into a "perhaps slightly overengineered" pipeline of several different stages, making it easier to experiment, and swap in different operations, output strategies, and the like. Thanks to her help, I've been able to try different combinations of parameters much more easily, and get results I'm much happier with.
In April, my friend Ari and I went for a ride on the Mattapan Line as the leaves were coming in on the trees. The pictures I took didn't come out due to a capture software bug (see Capture) and I haven't gotten around to going back yet, but it left us with the thought that color line cam photos might look cool, especially in autumn.
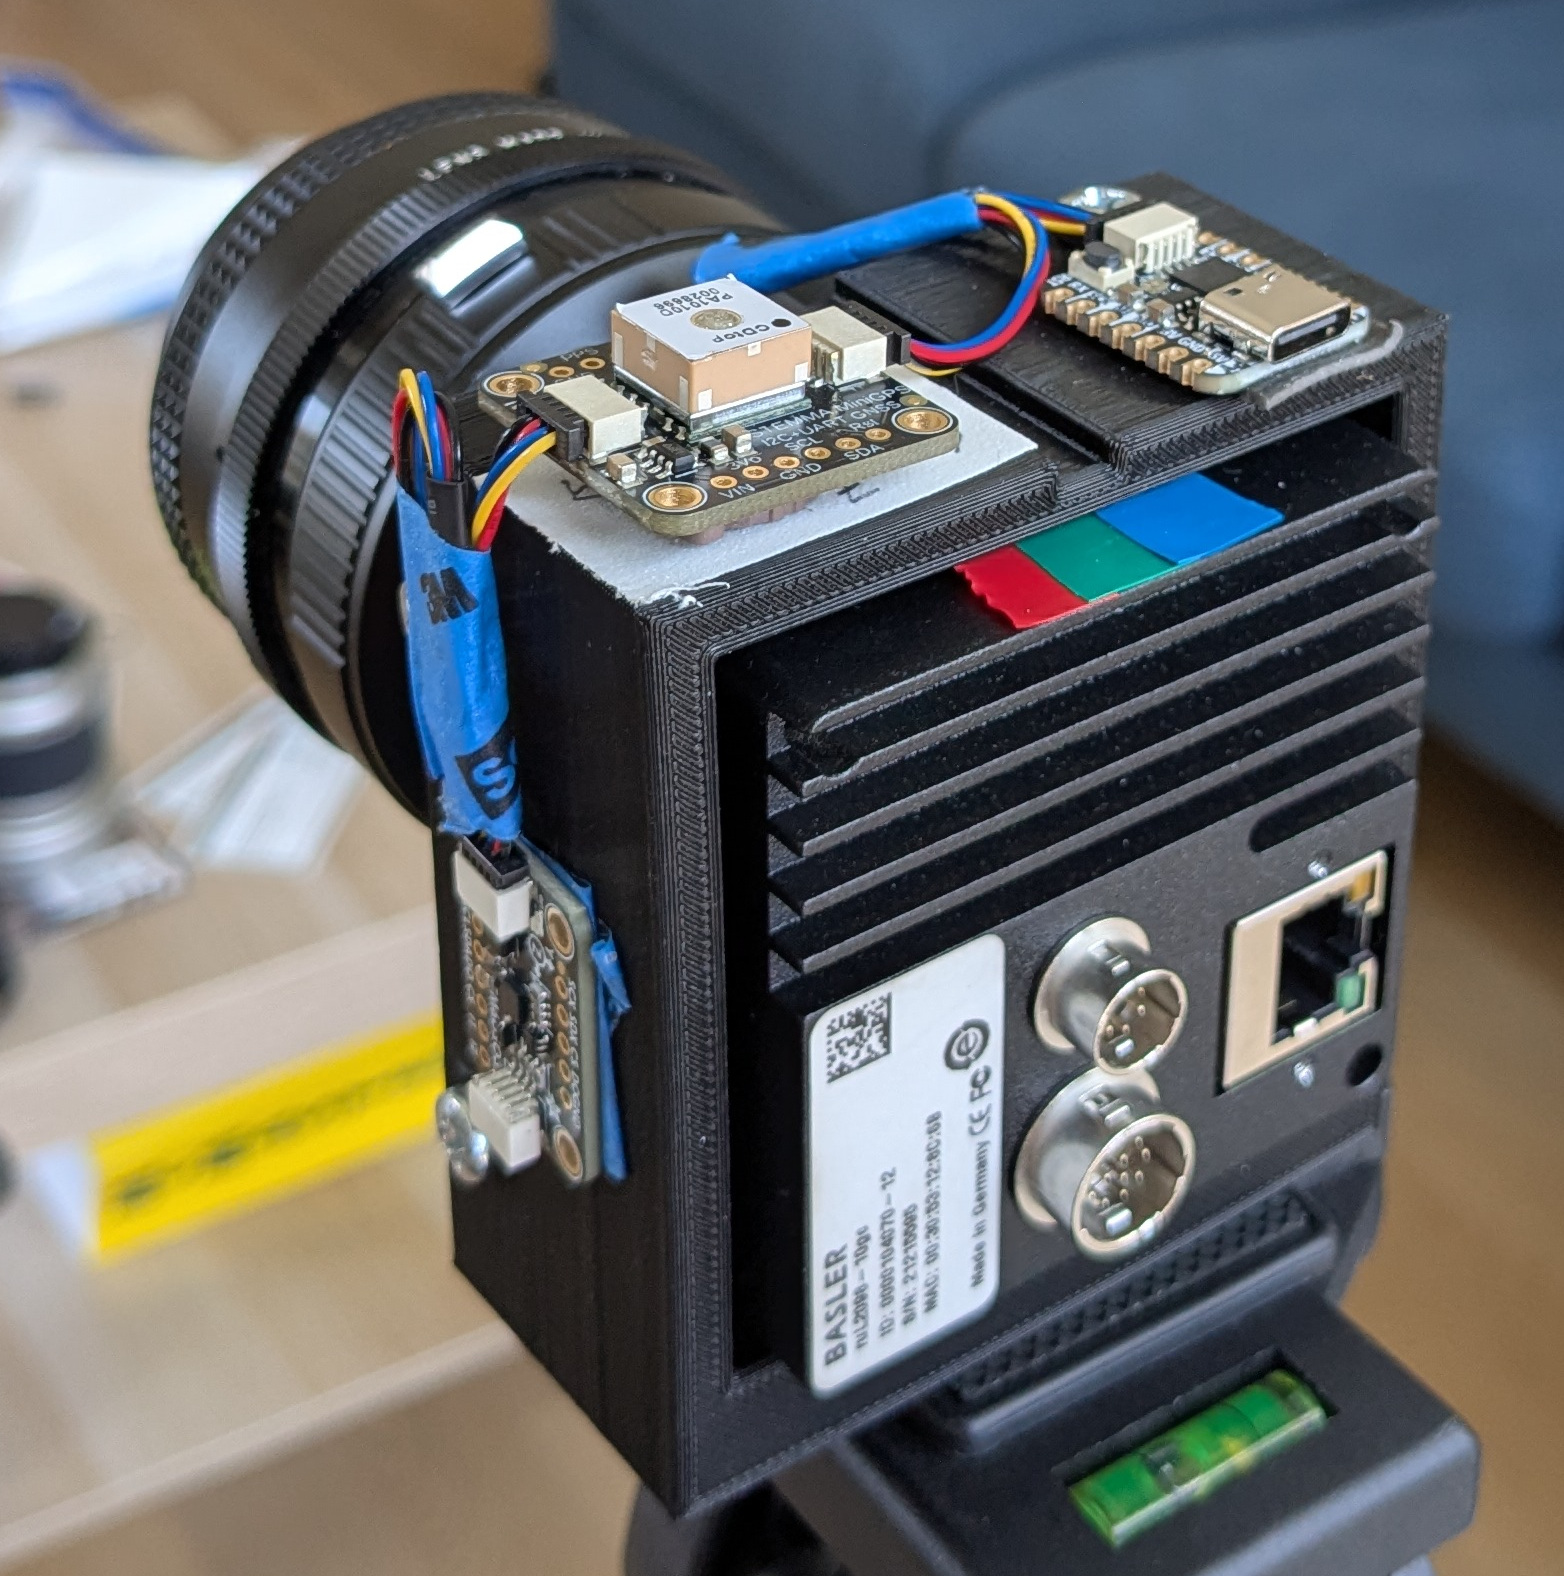
While browsing ebay late one night, I found a very good deal on a color line camera of the same generation as the monochrome one I already had (the Basler ruL2098-10gc, 3x2098 pixels at around 10,000 lines per second). After a bit of disassembly (it came to me in the housing it was used in on some factory line) and swapping the lens mount over, the camera was ready mechanically.
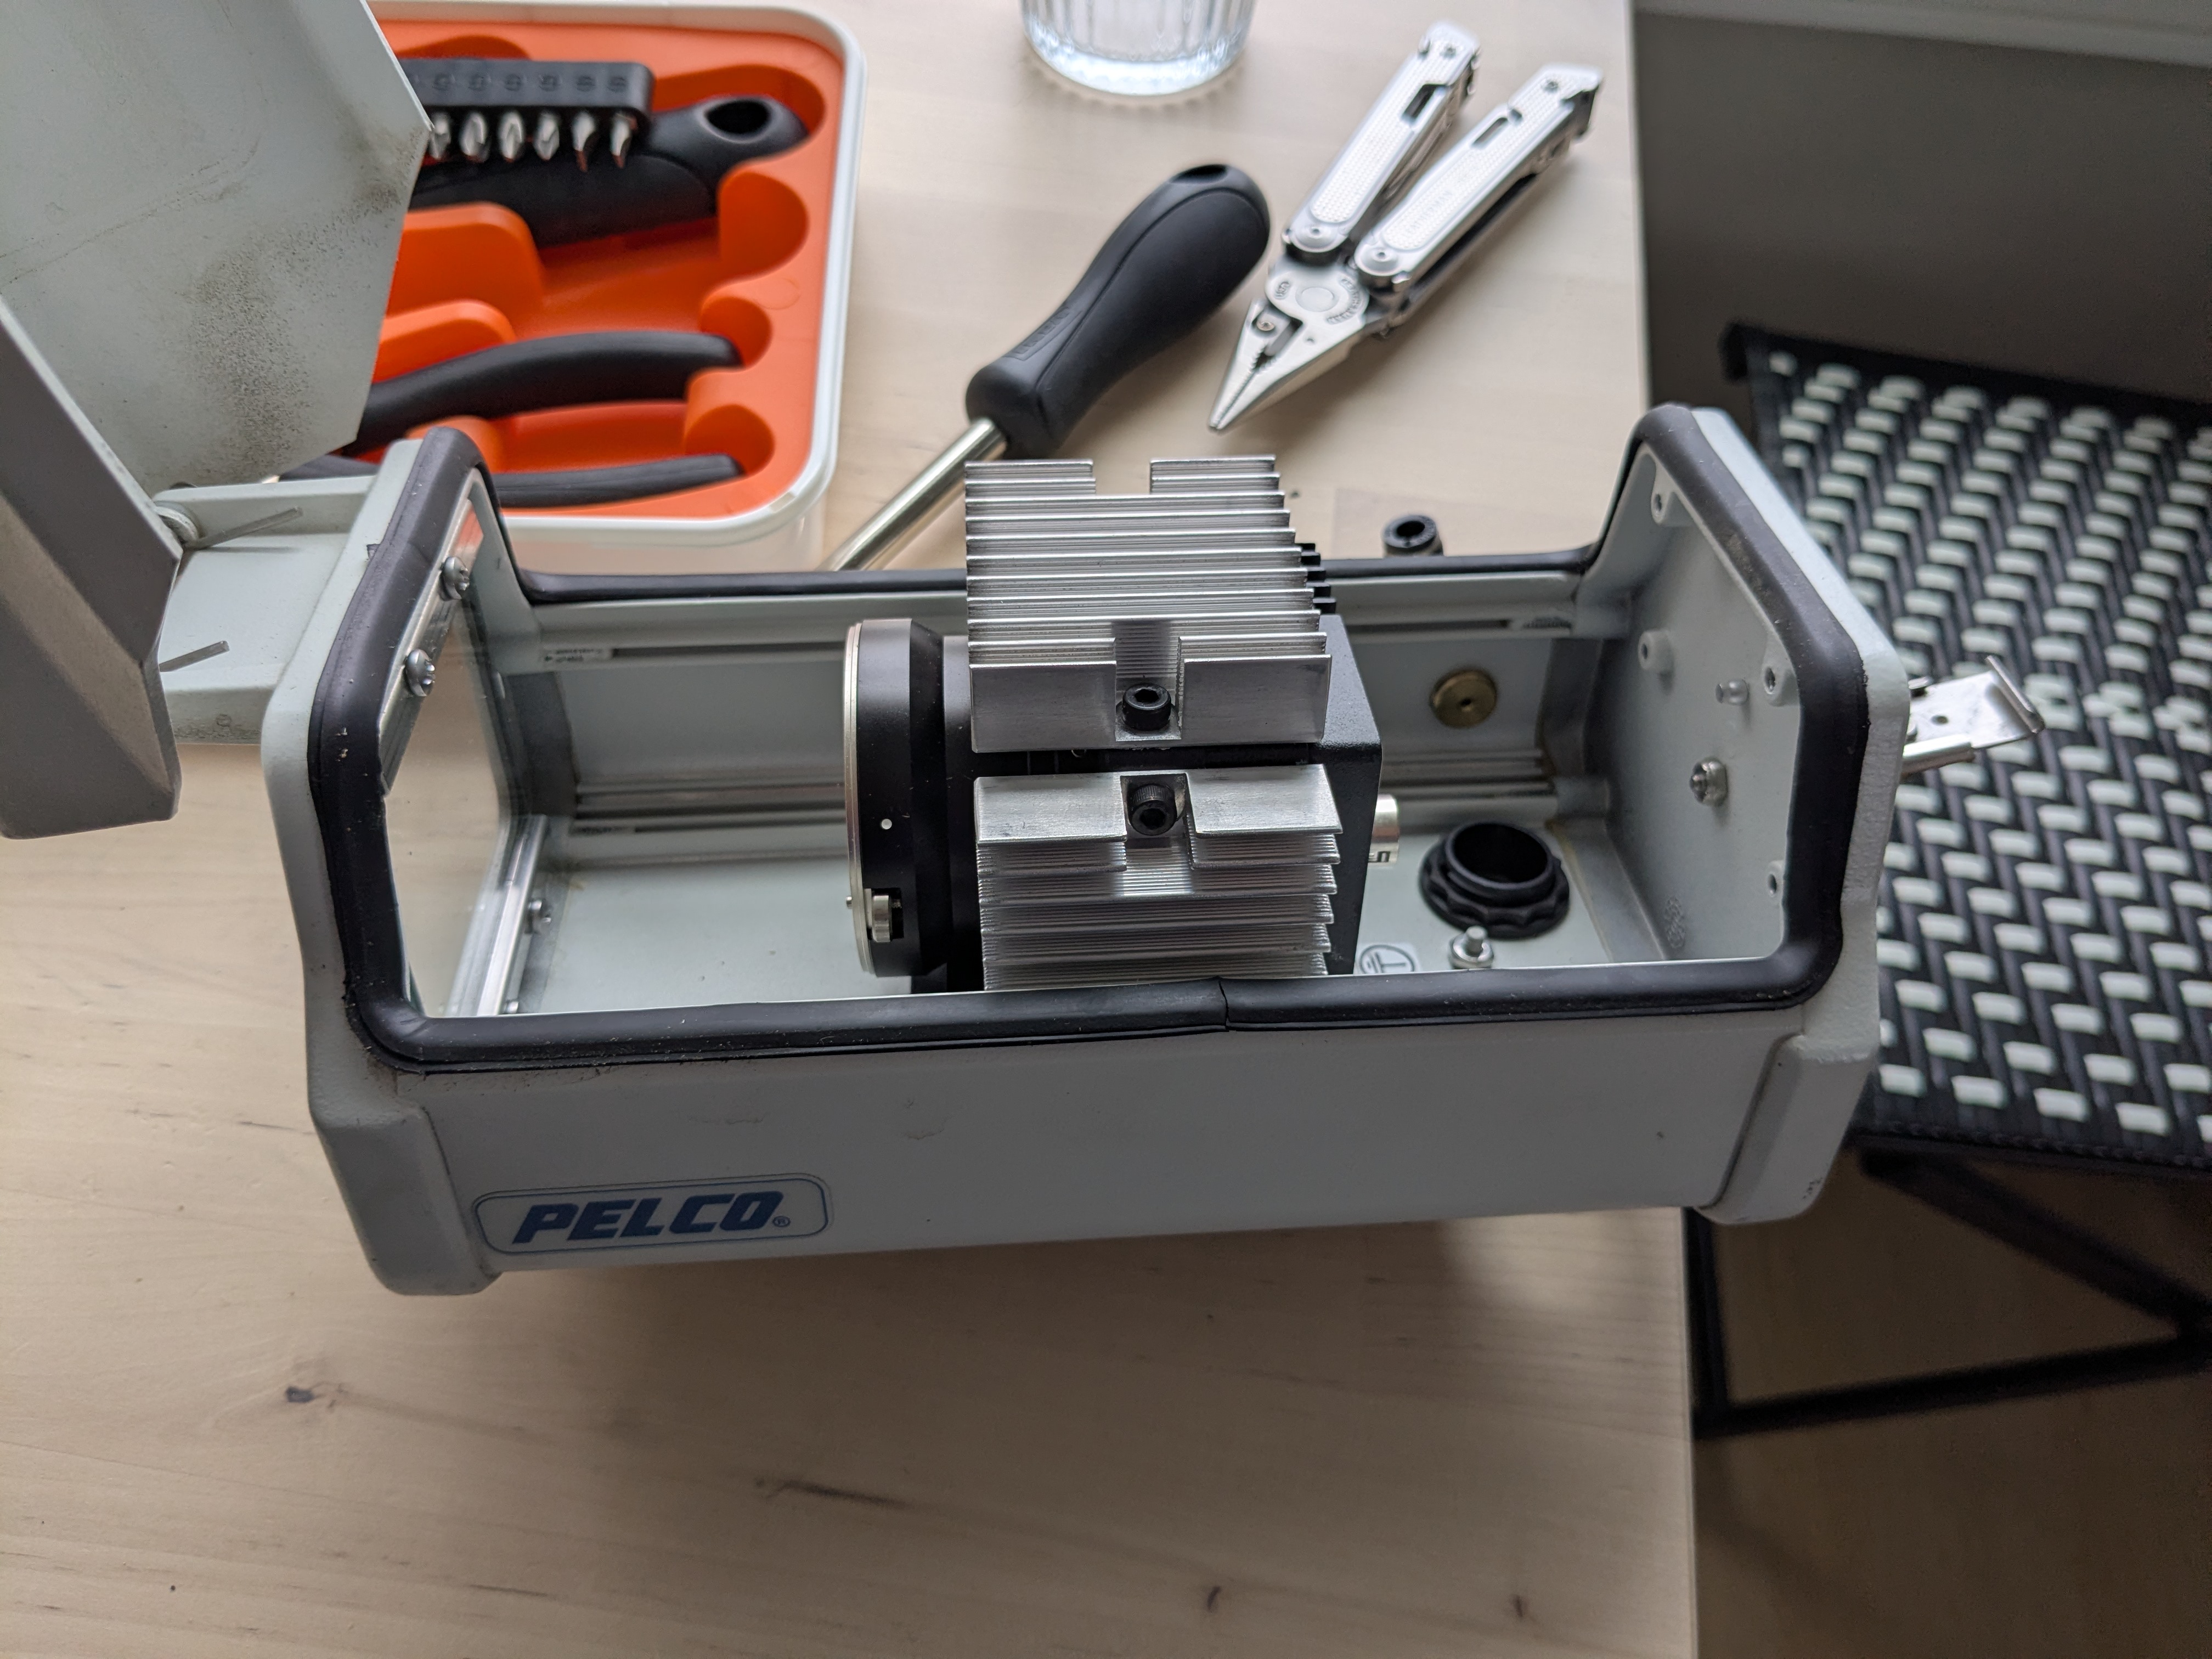
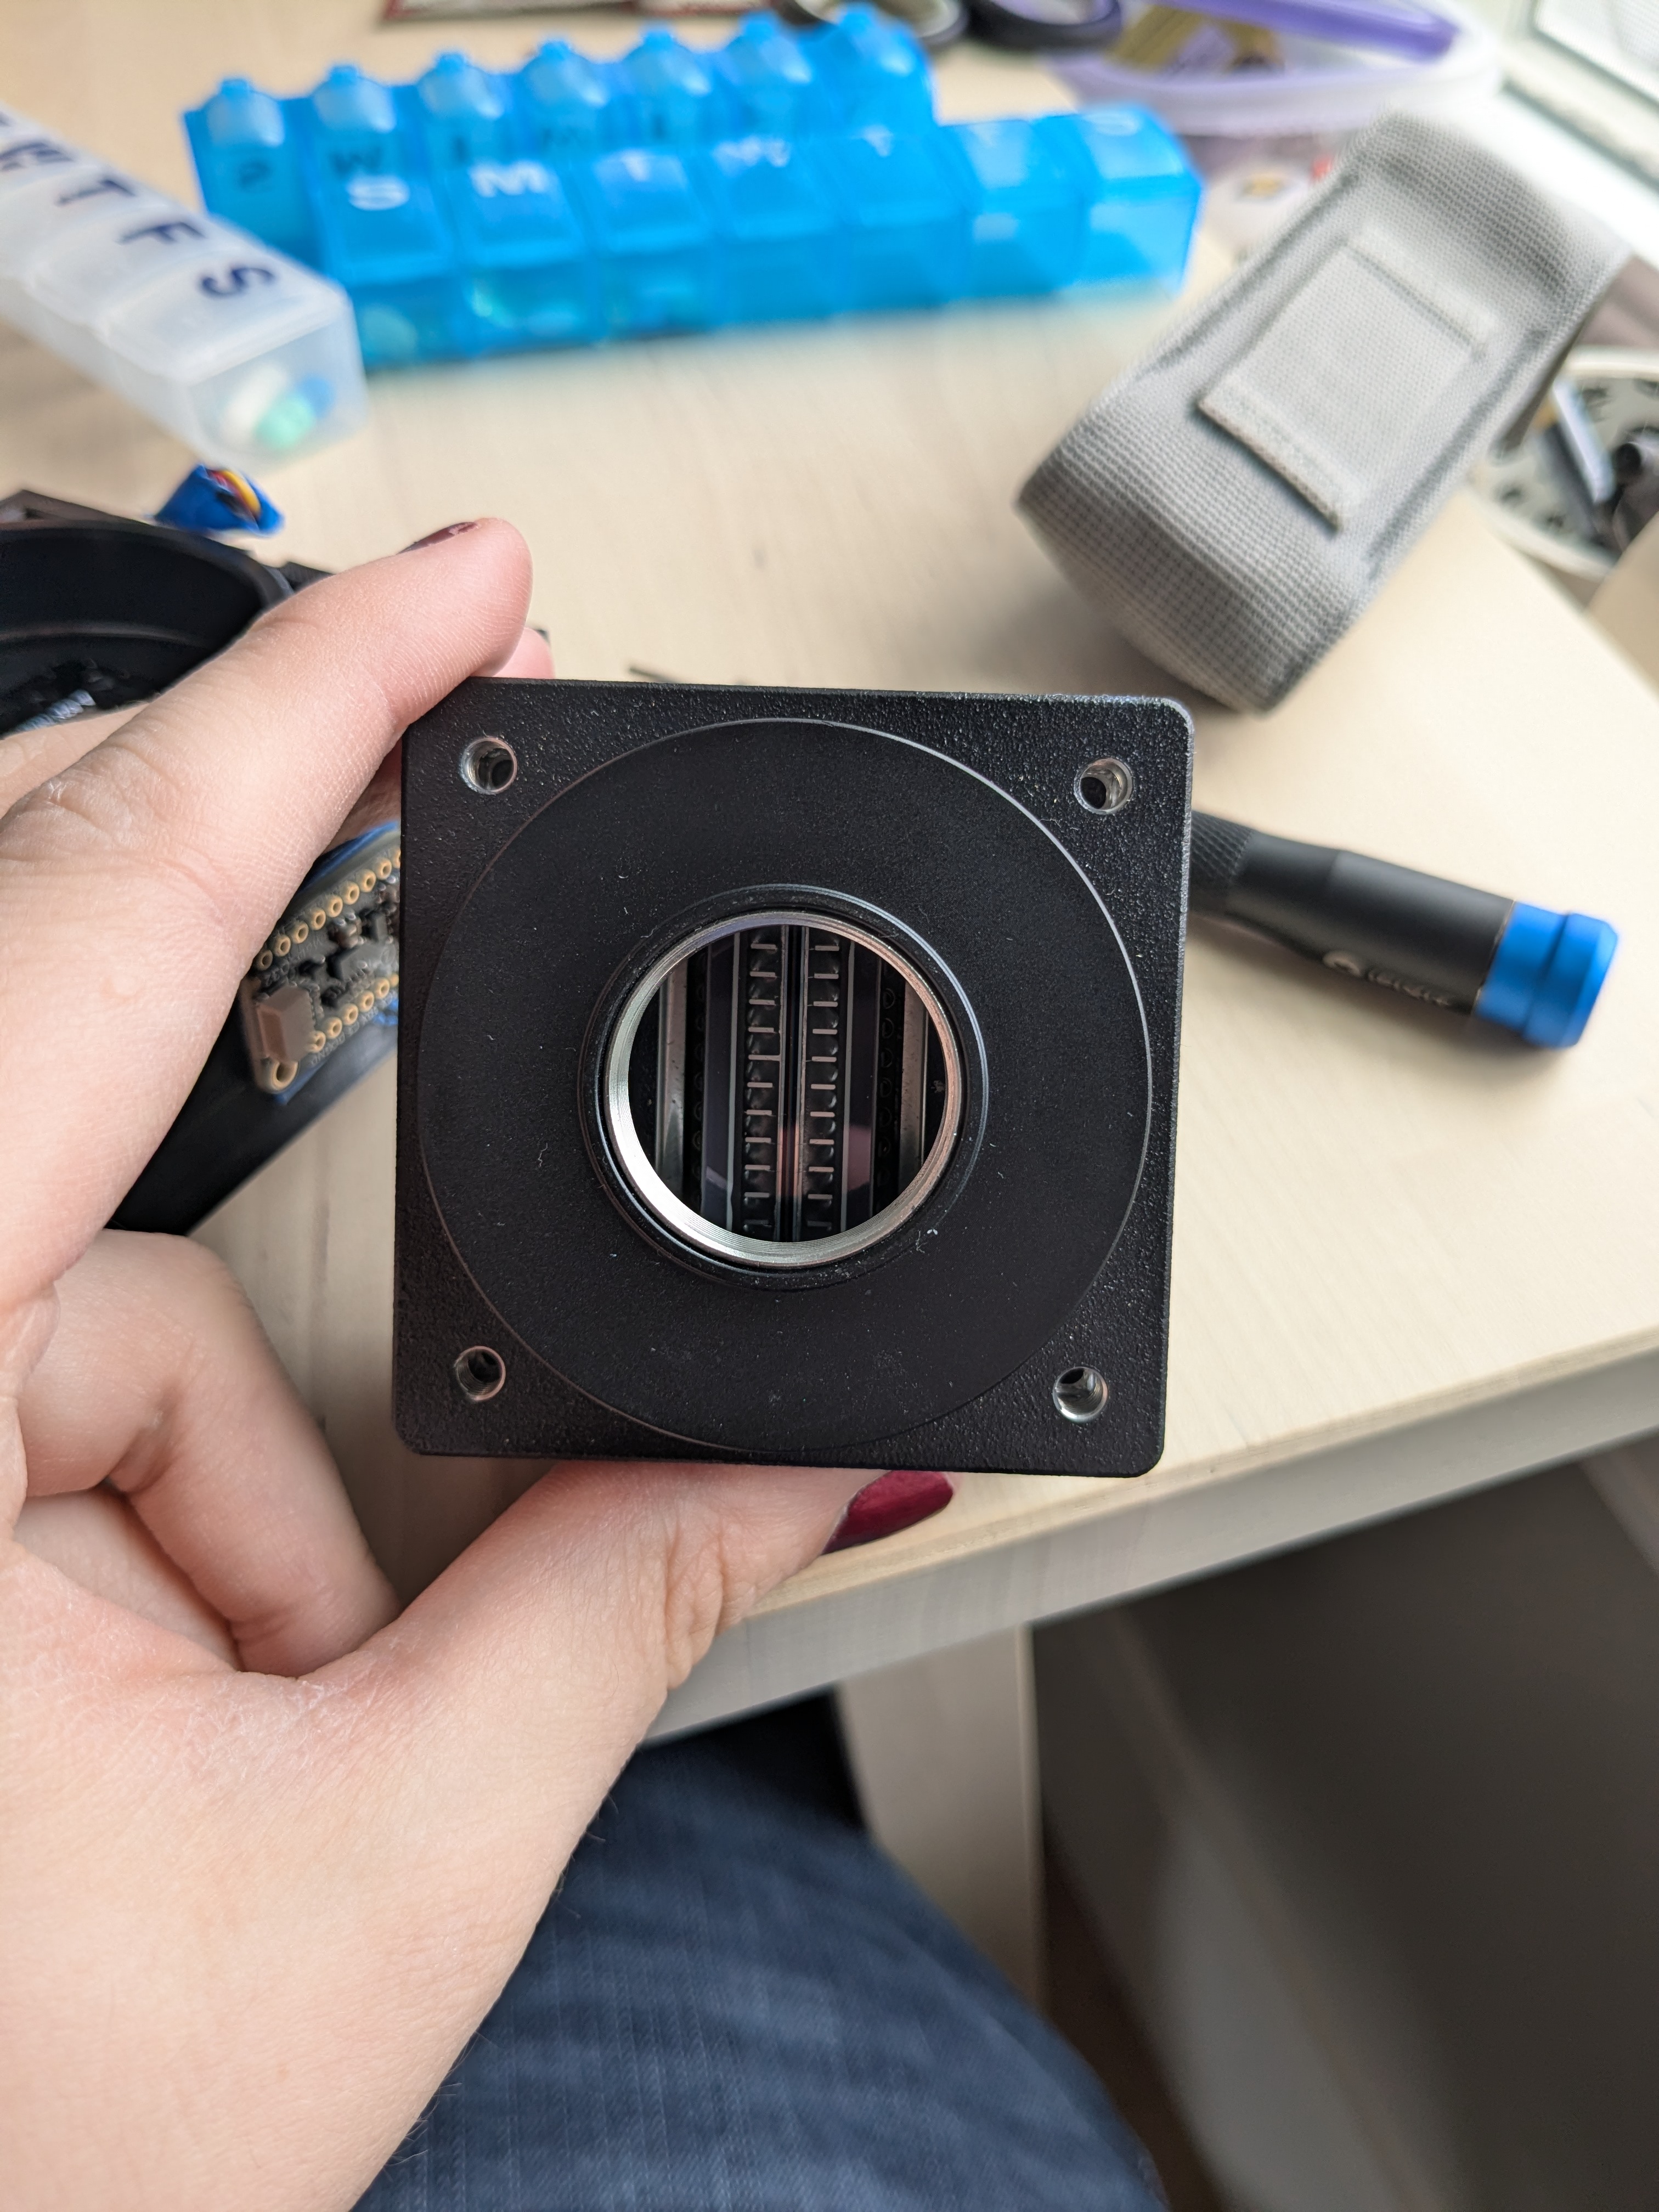
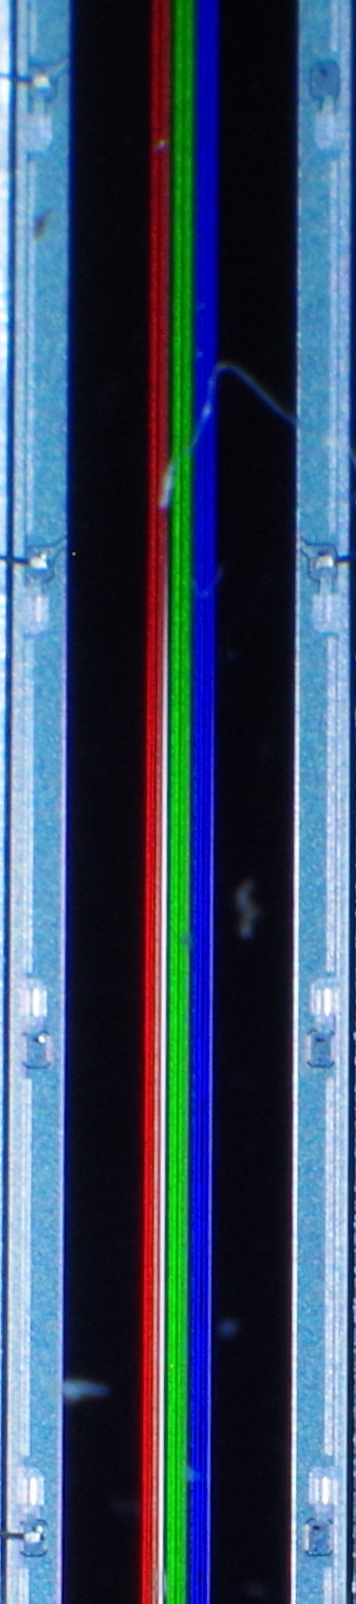
I ended up putting red, green, and blue stripes on it so I could tell the cameras apart without taking the lens off or squinting at tiny text on the label.
The capture software side wasn't that much harder, although I did have to fix a bunch of assumptions about the size of each line and redo the rotation for the GUI
Thanks to the very modular way that Maddie rewrote grindstone, adding support for color images wasn't too difficult, although we did have to fix some strange-looking bugs.
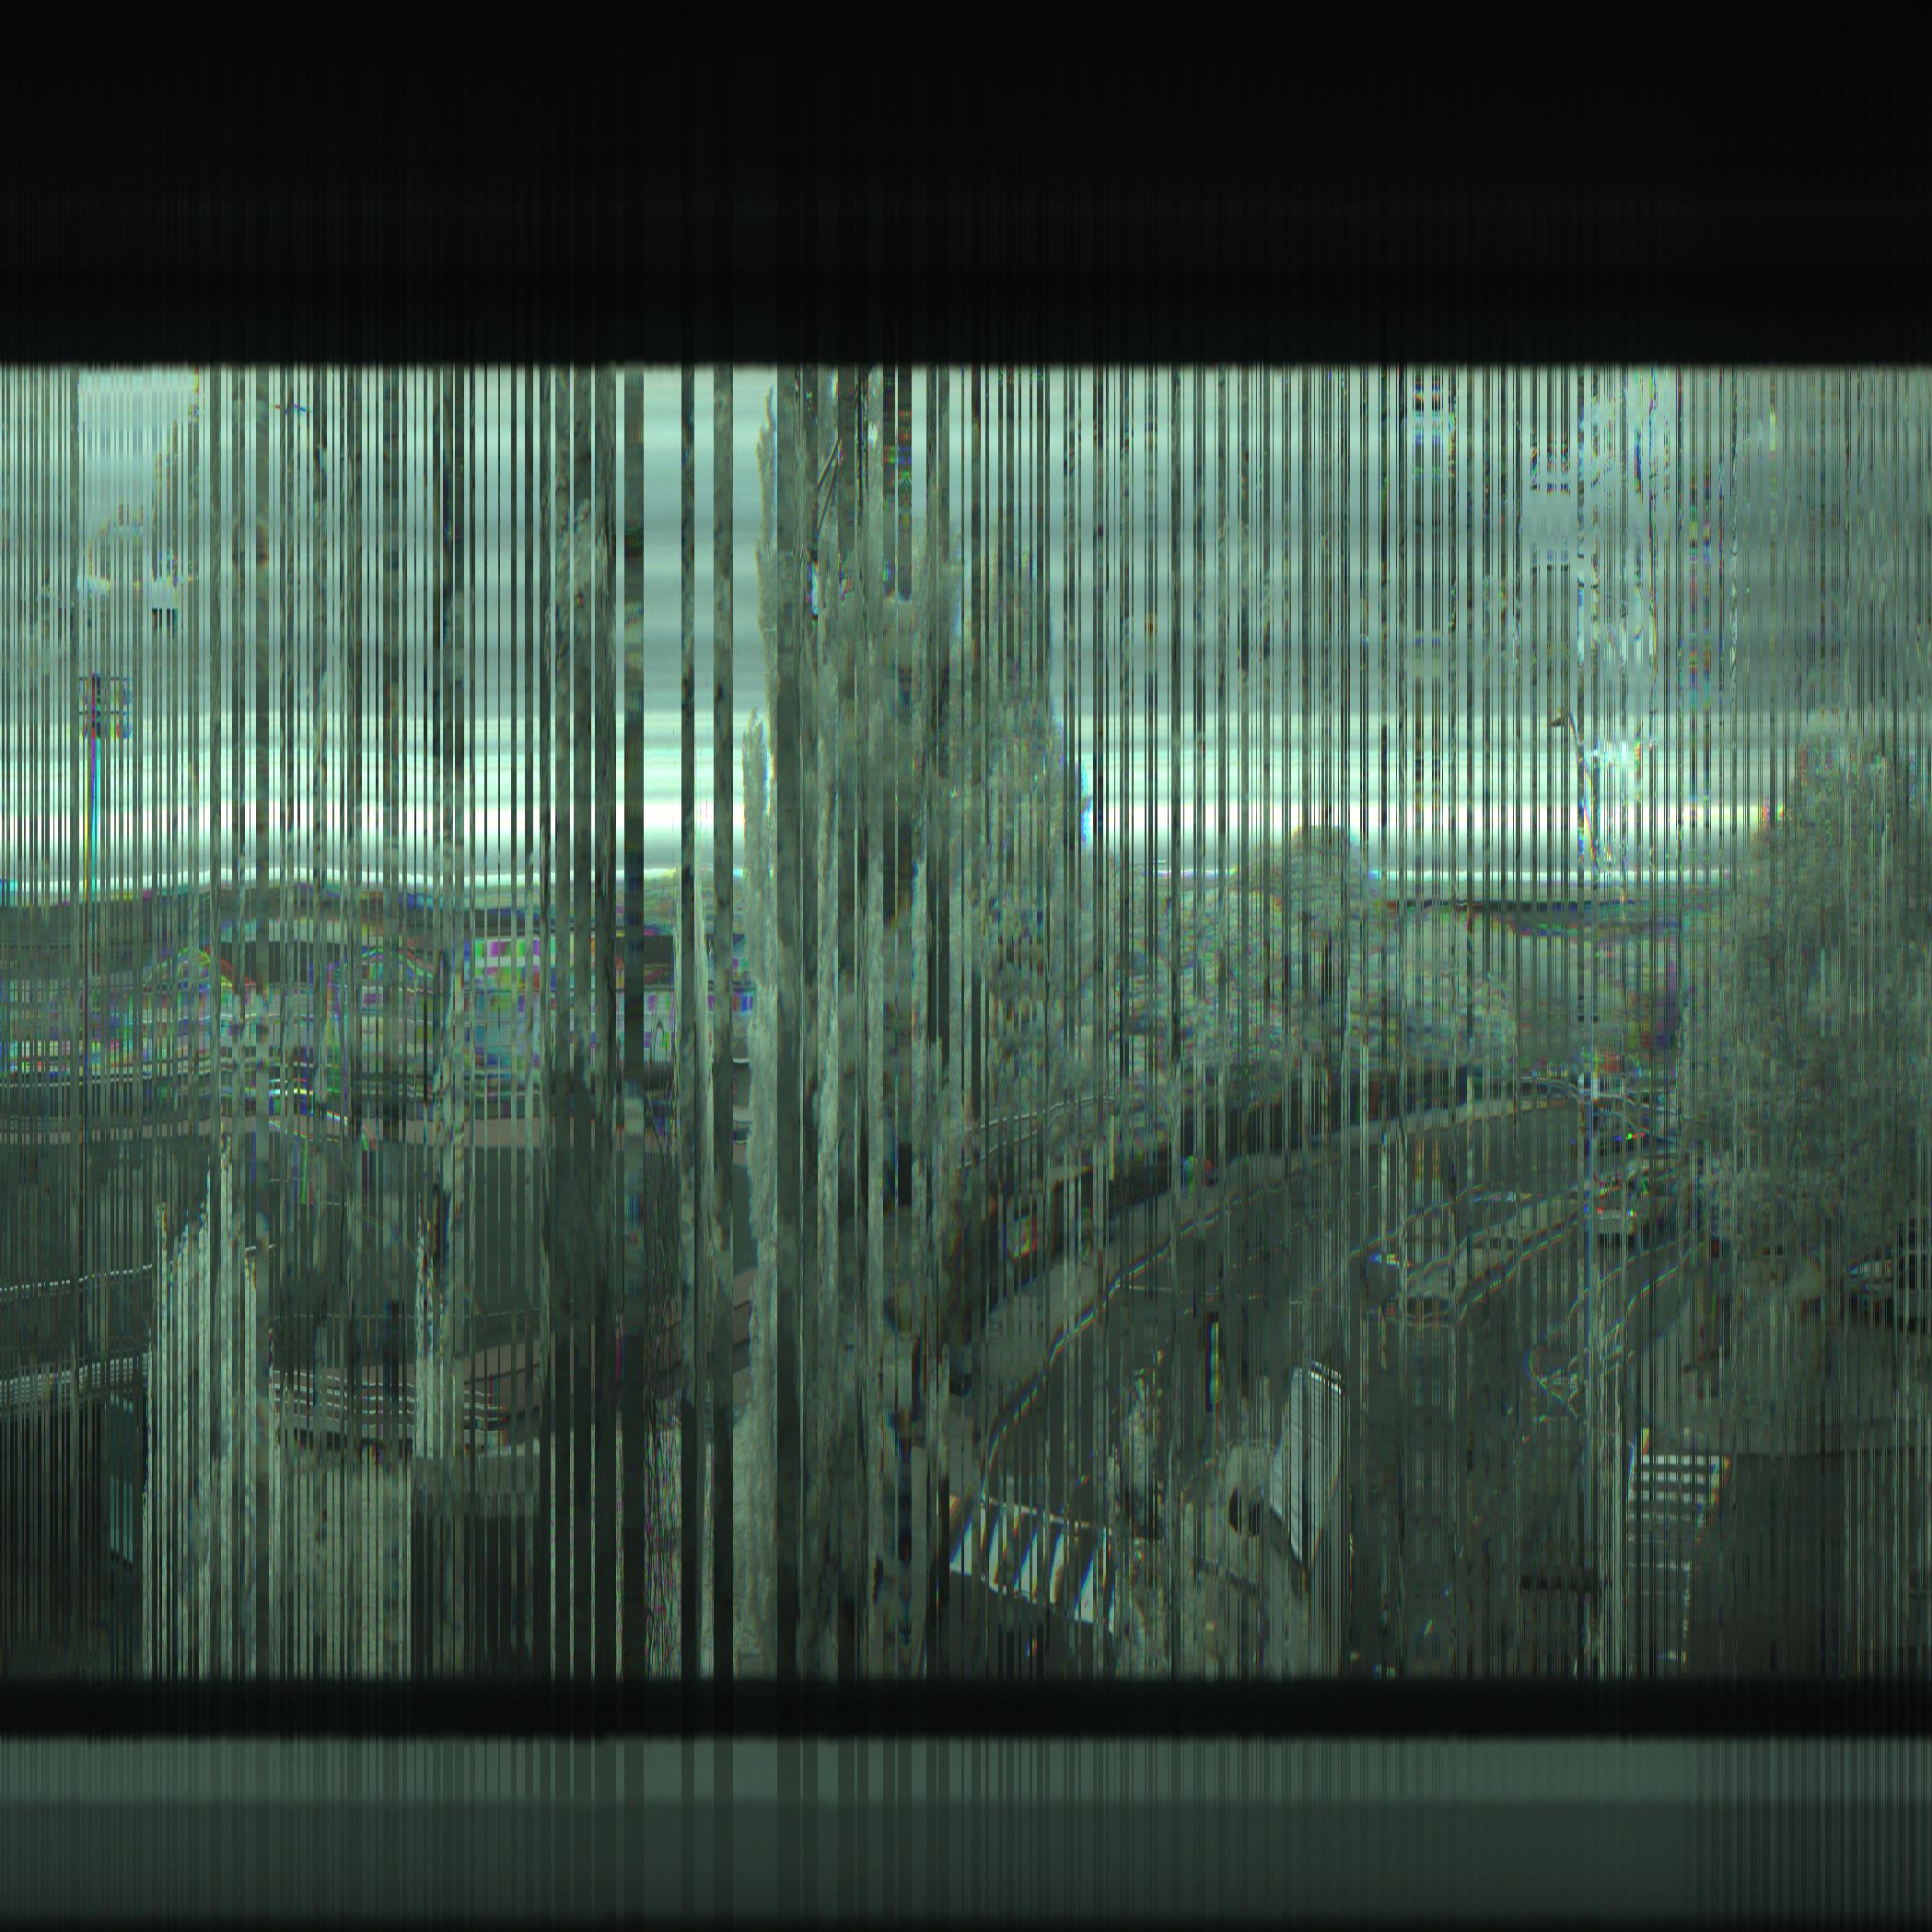
With capturing and processing images mostly working, more problems became apparent. The most visible one is that leaves are all far brighter than they should be. 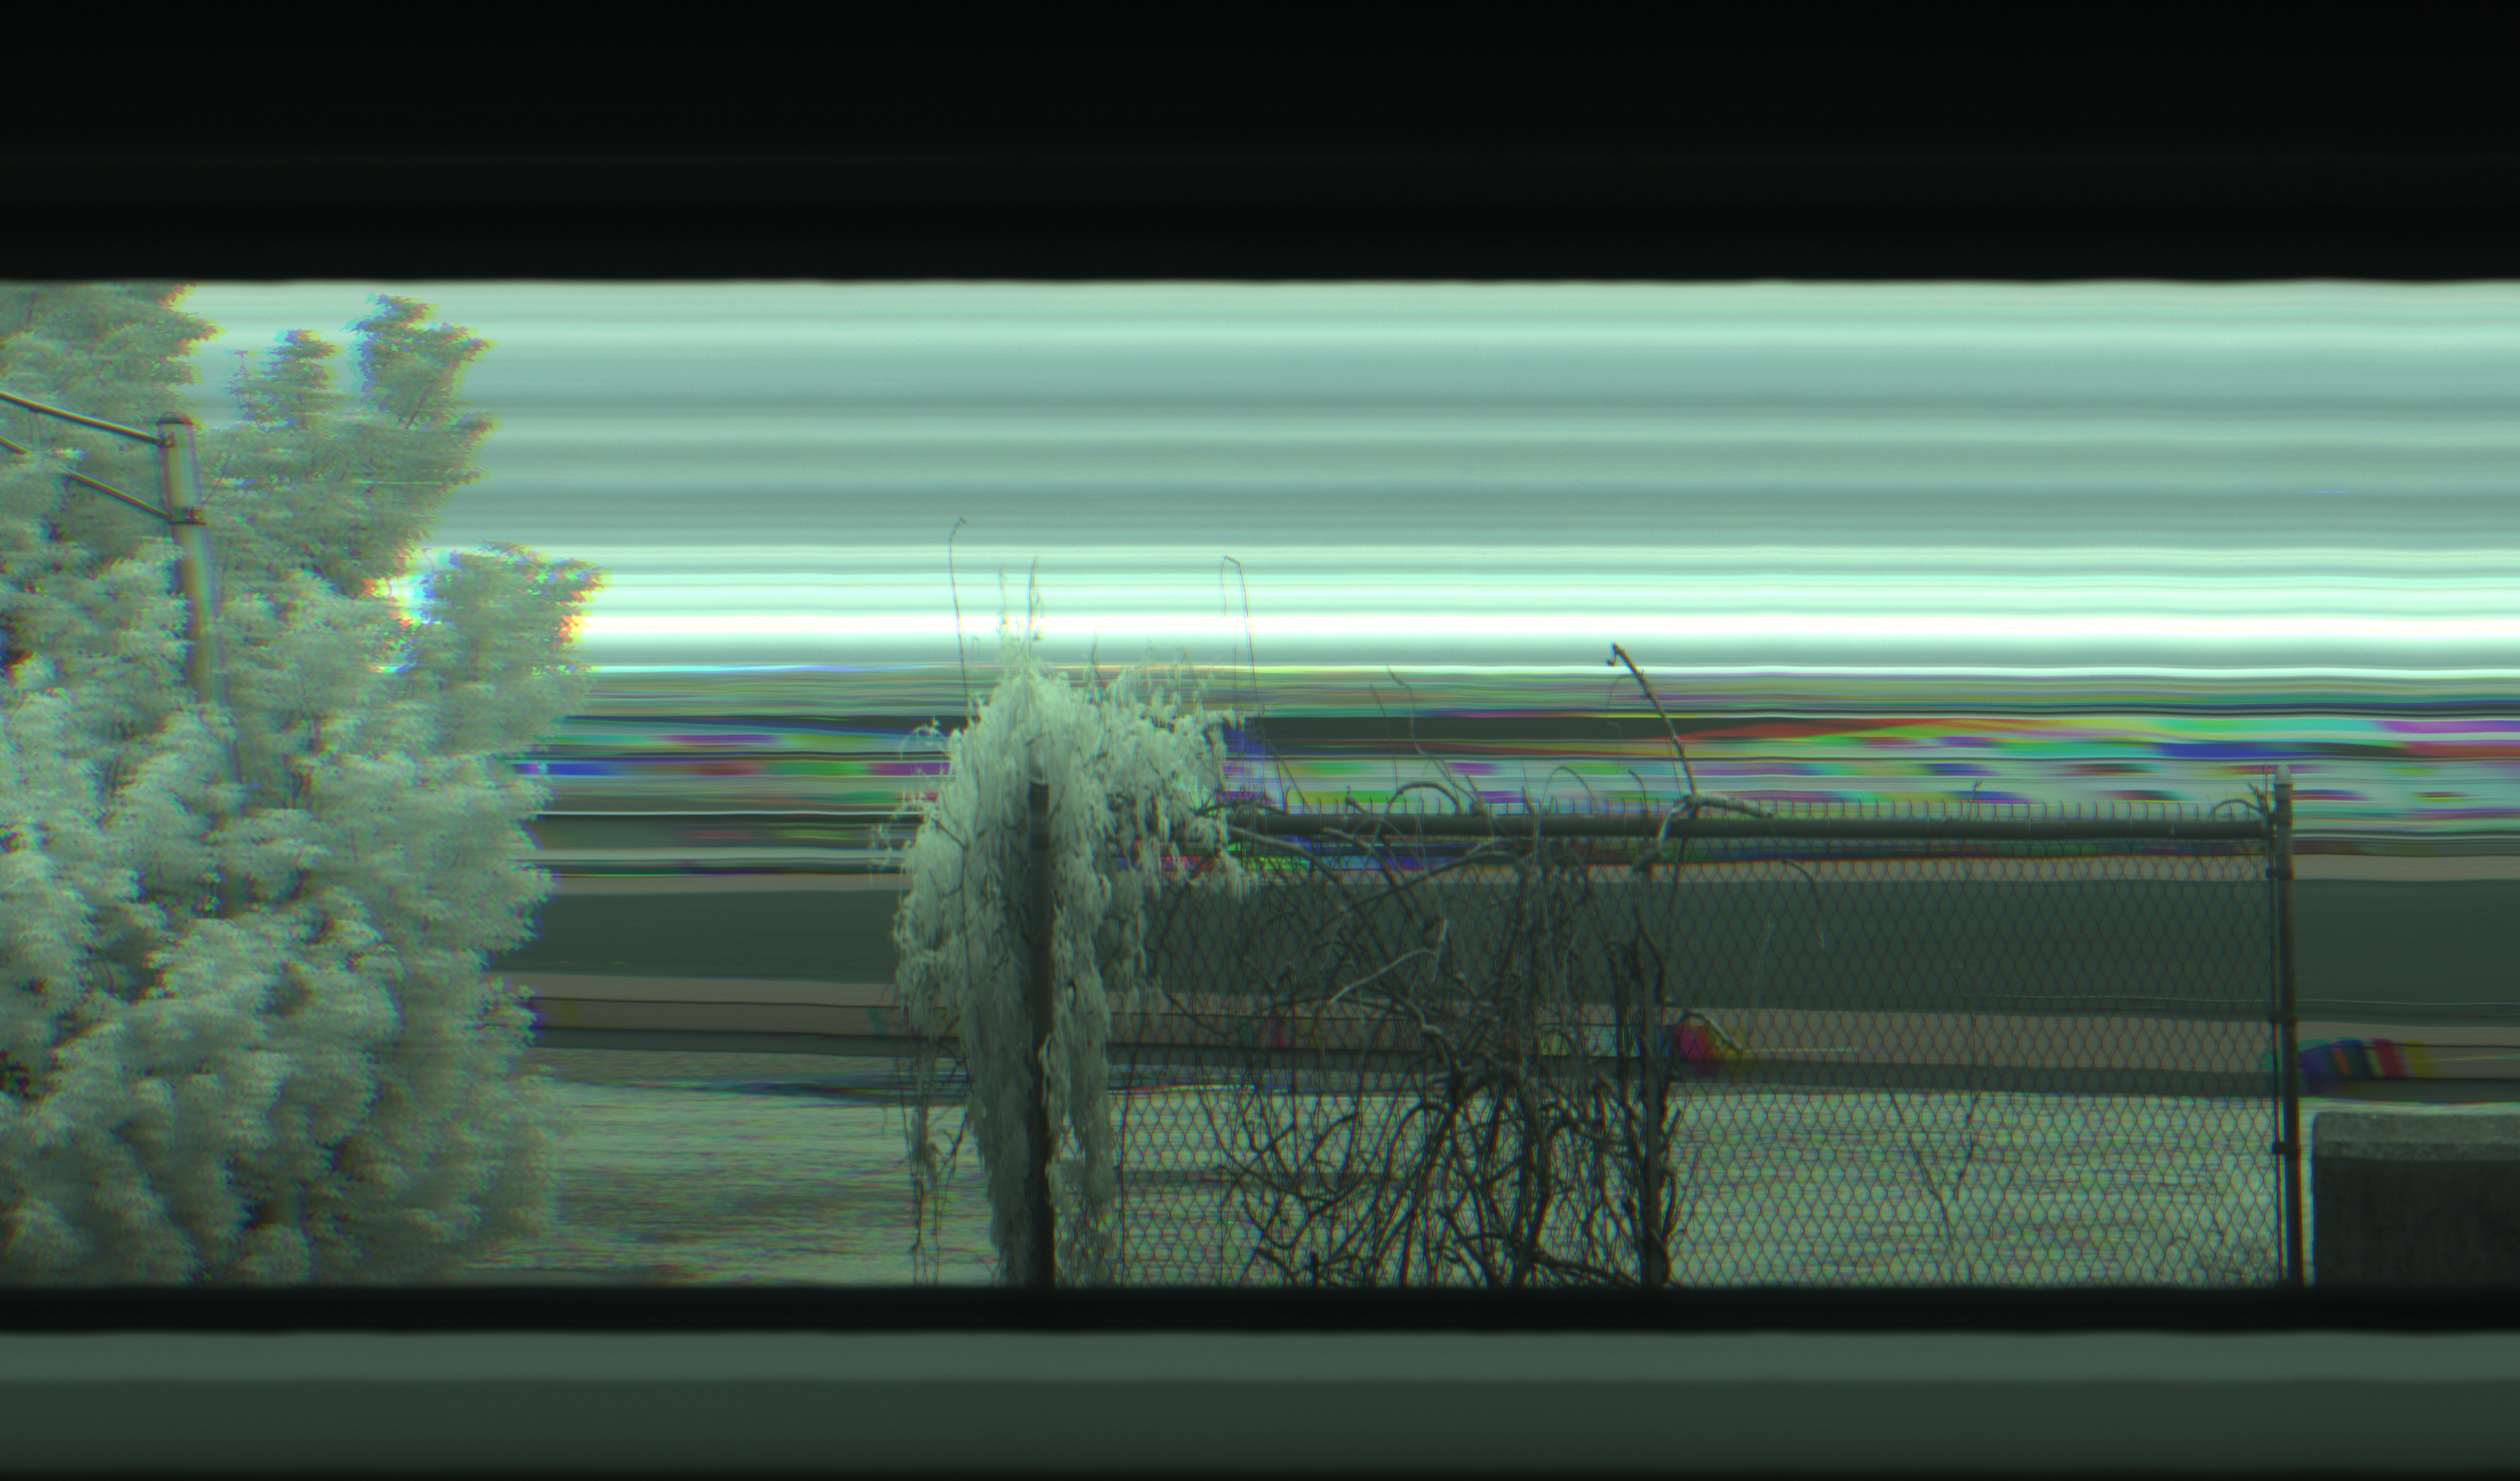
I will admit the effect does look pretty good in the right light. This picture taken in Manchester-by-the-Sea, north of Boston, is both grayscale and colorful at once. (Read on to learn what the color fringes in the background are.)
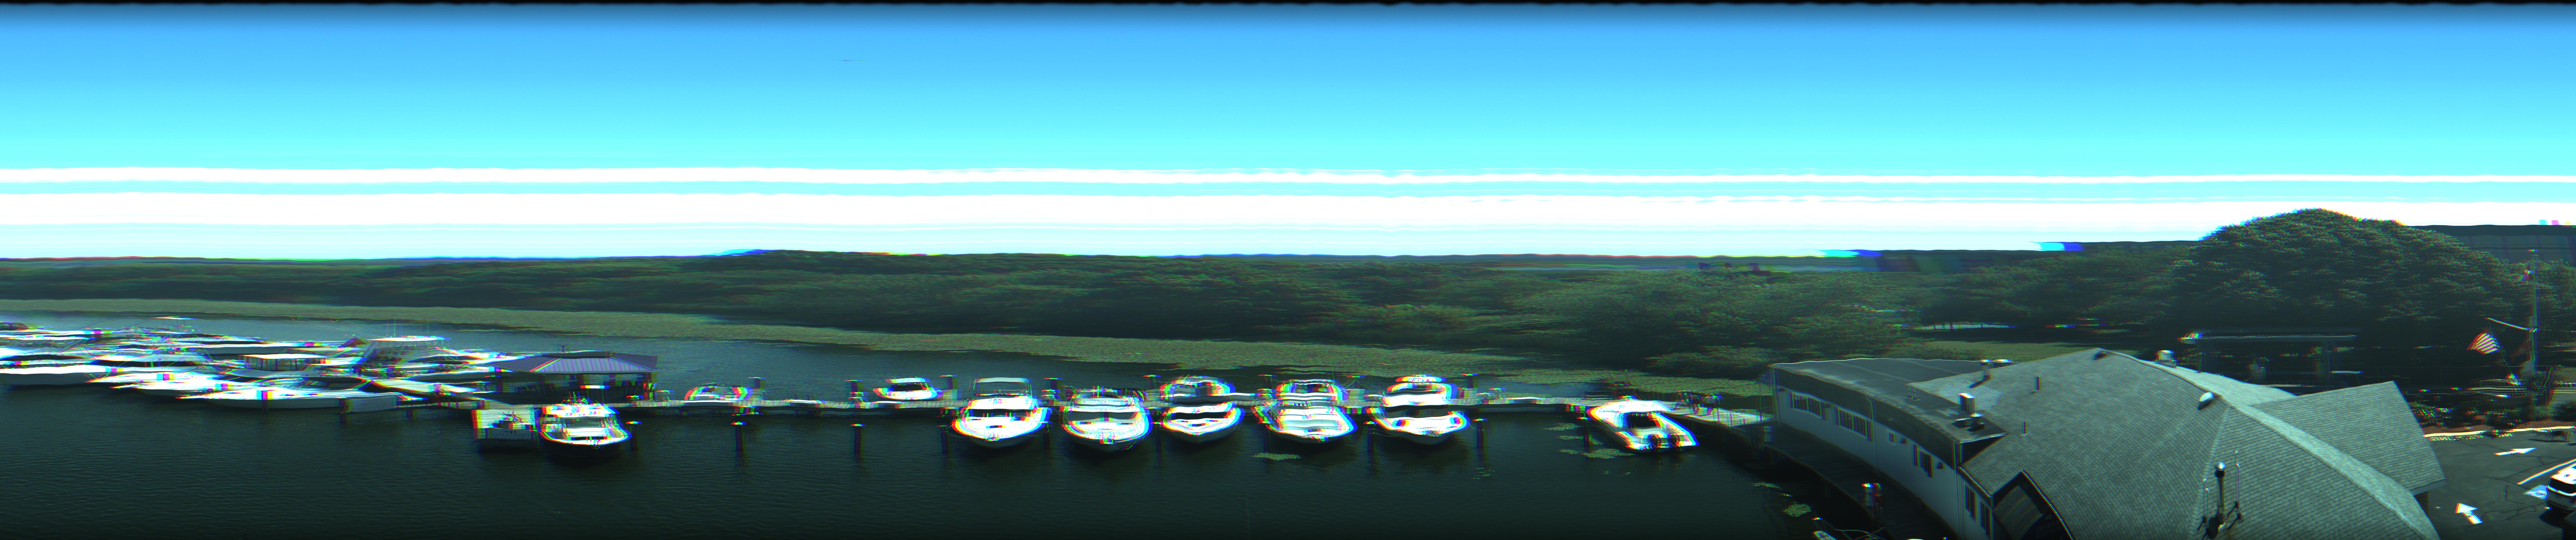
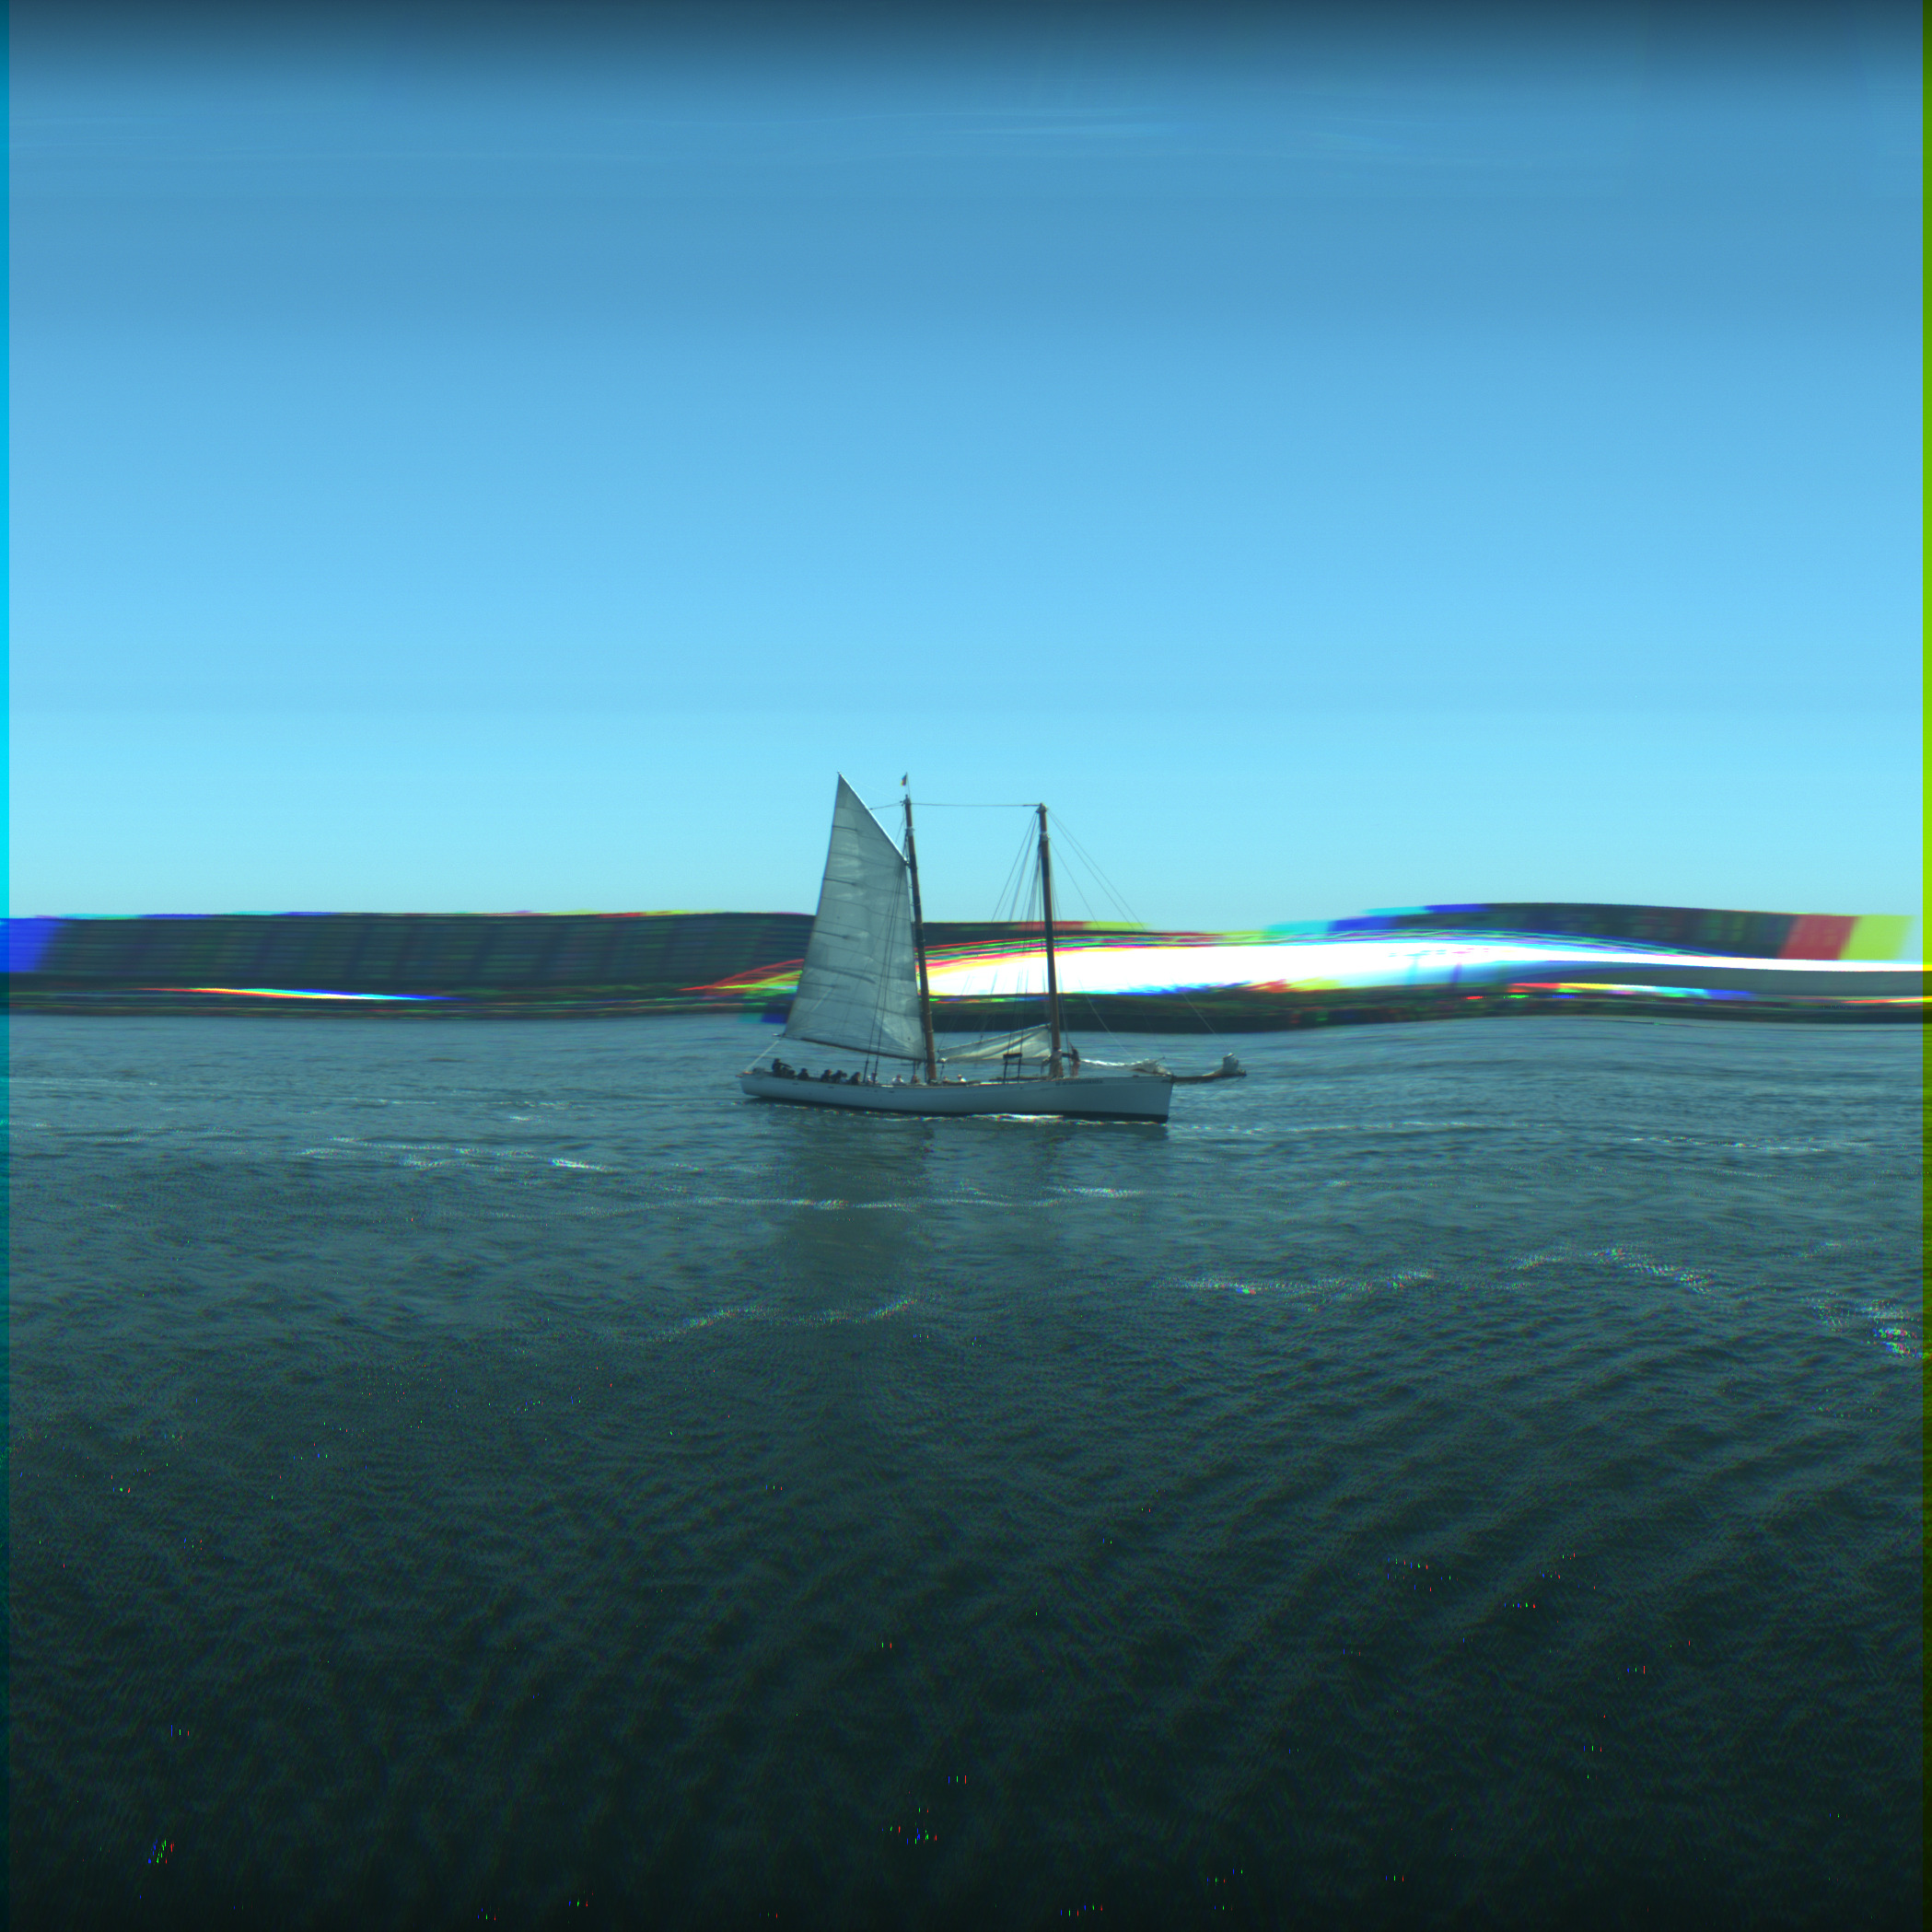
The next problem is that some things end up with weird red, green, and blue fringes, especially subjects that are further from the camera or moving faster. 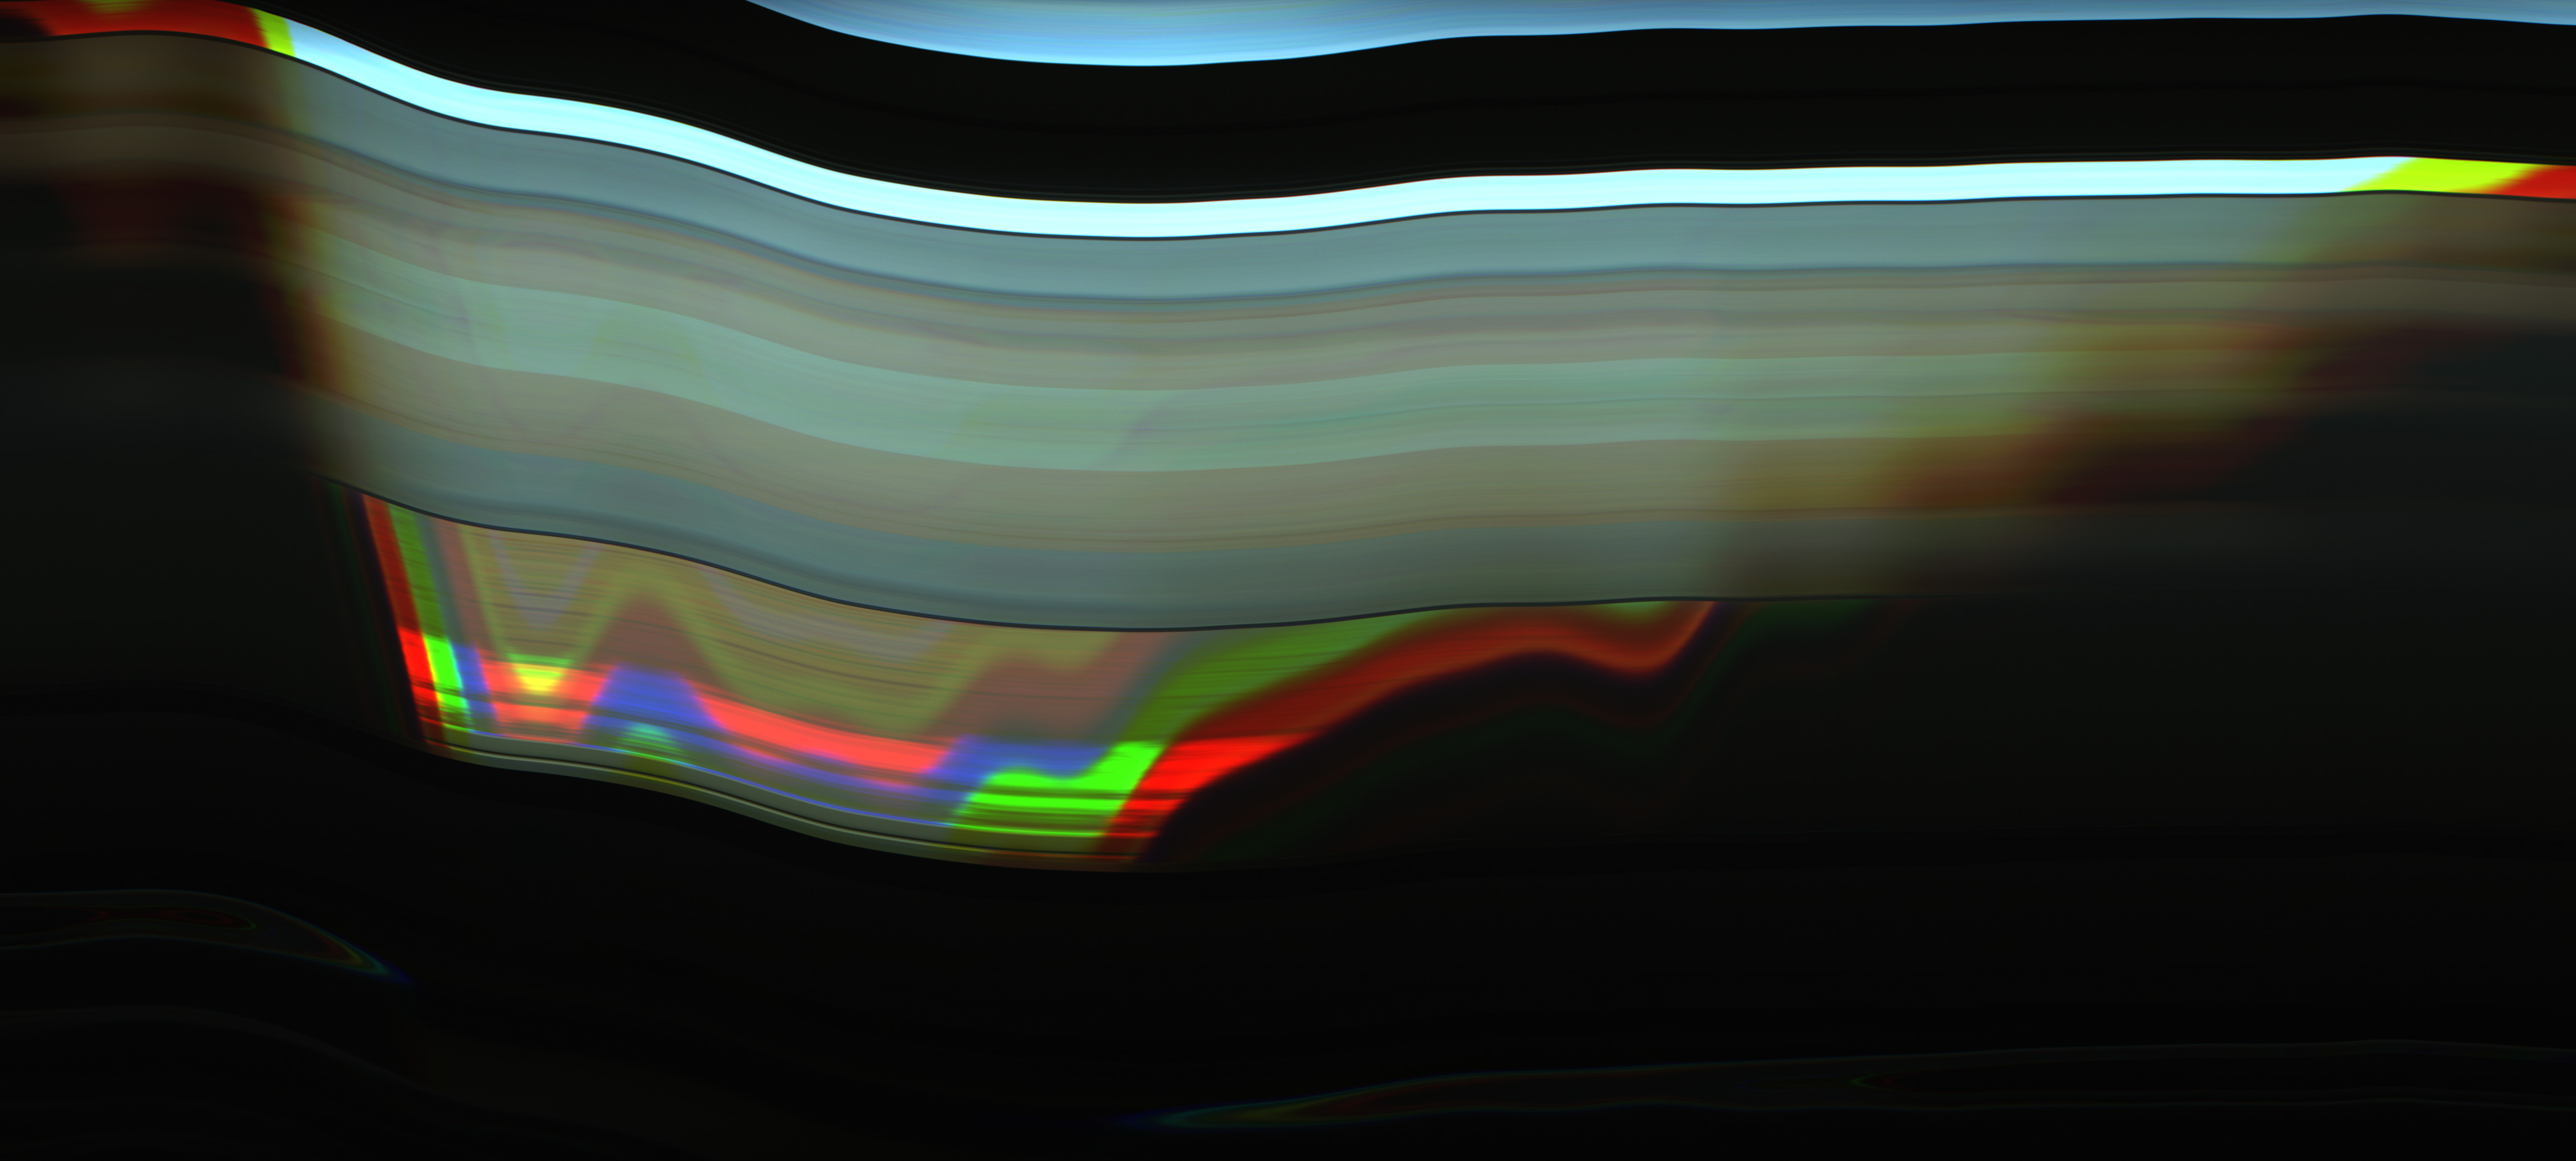
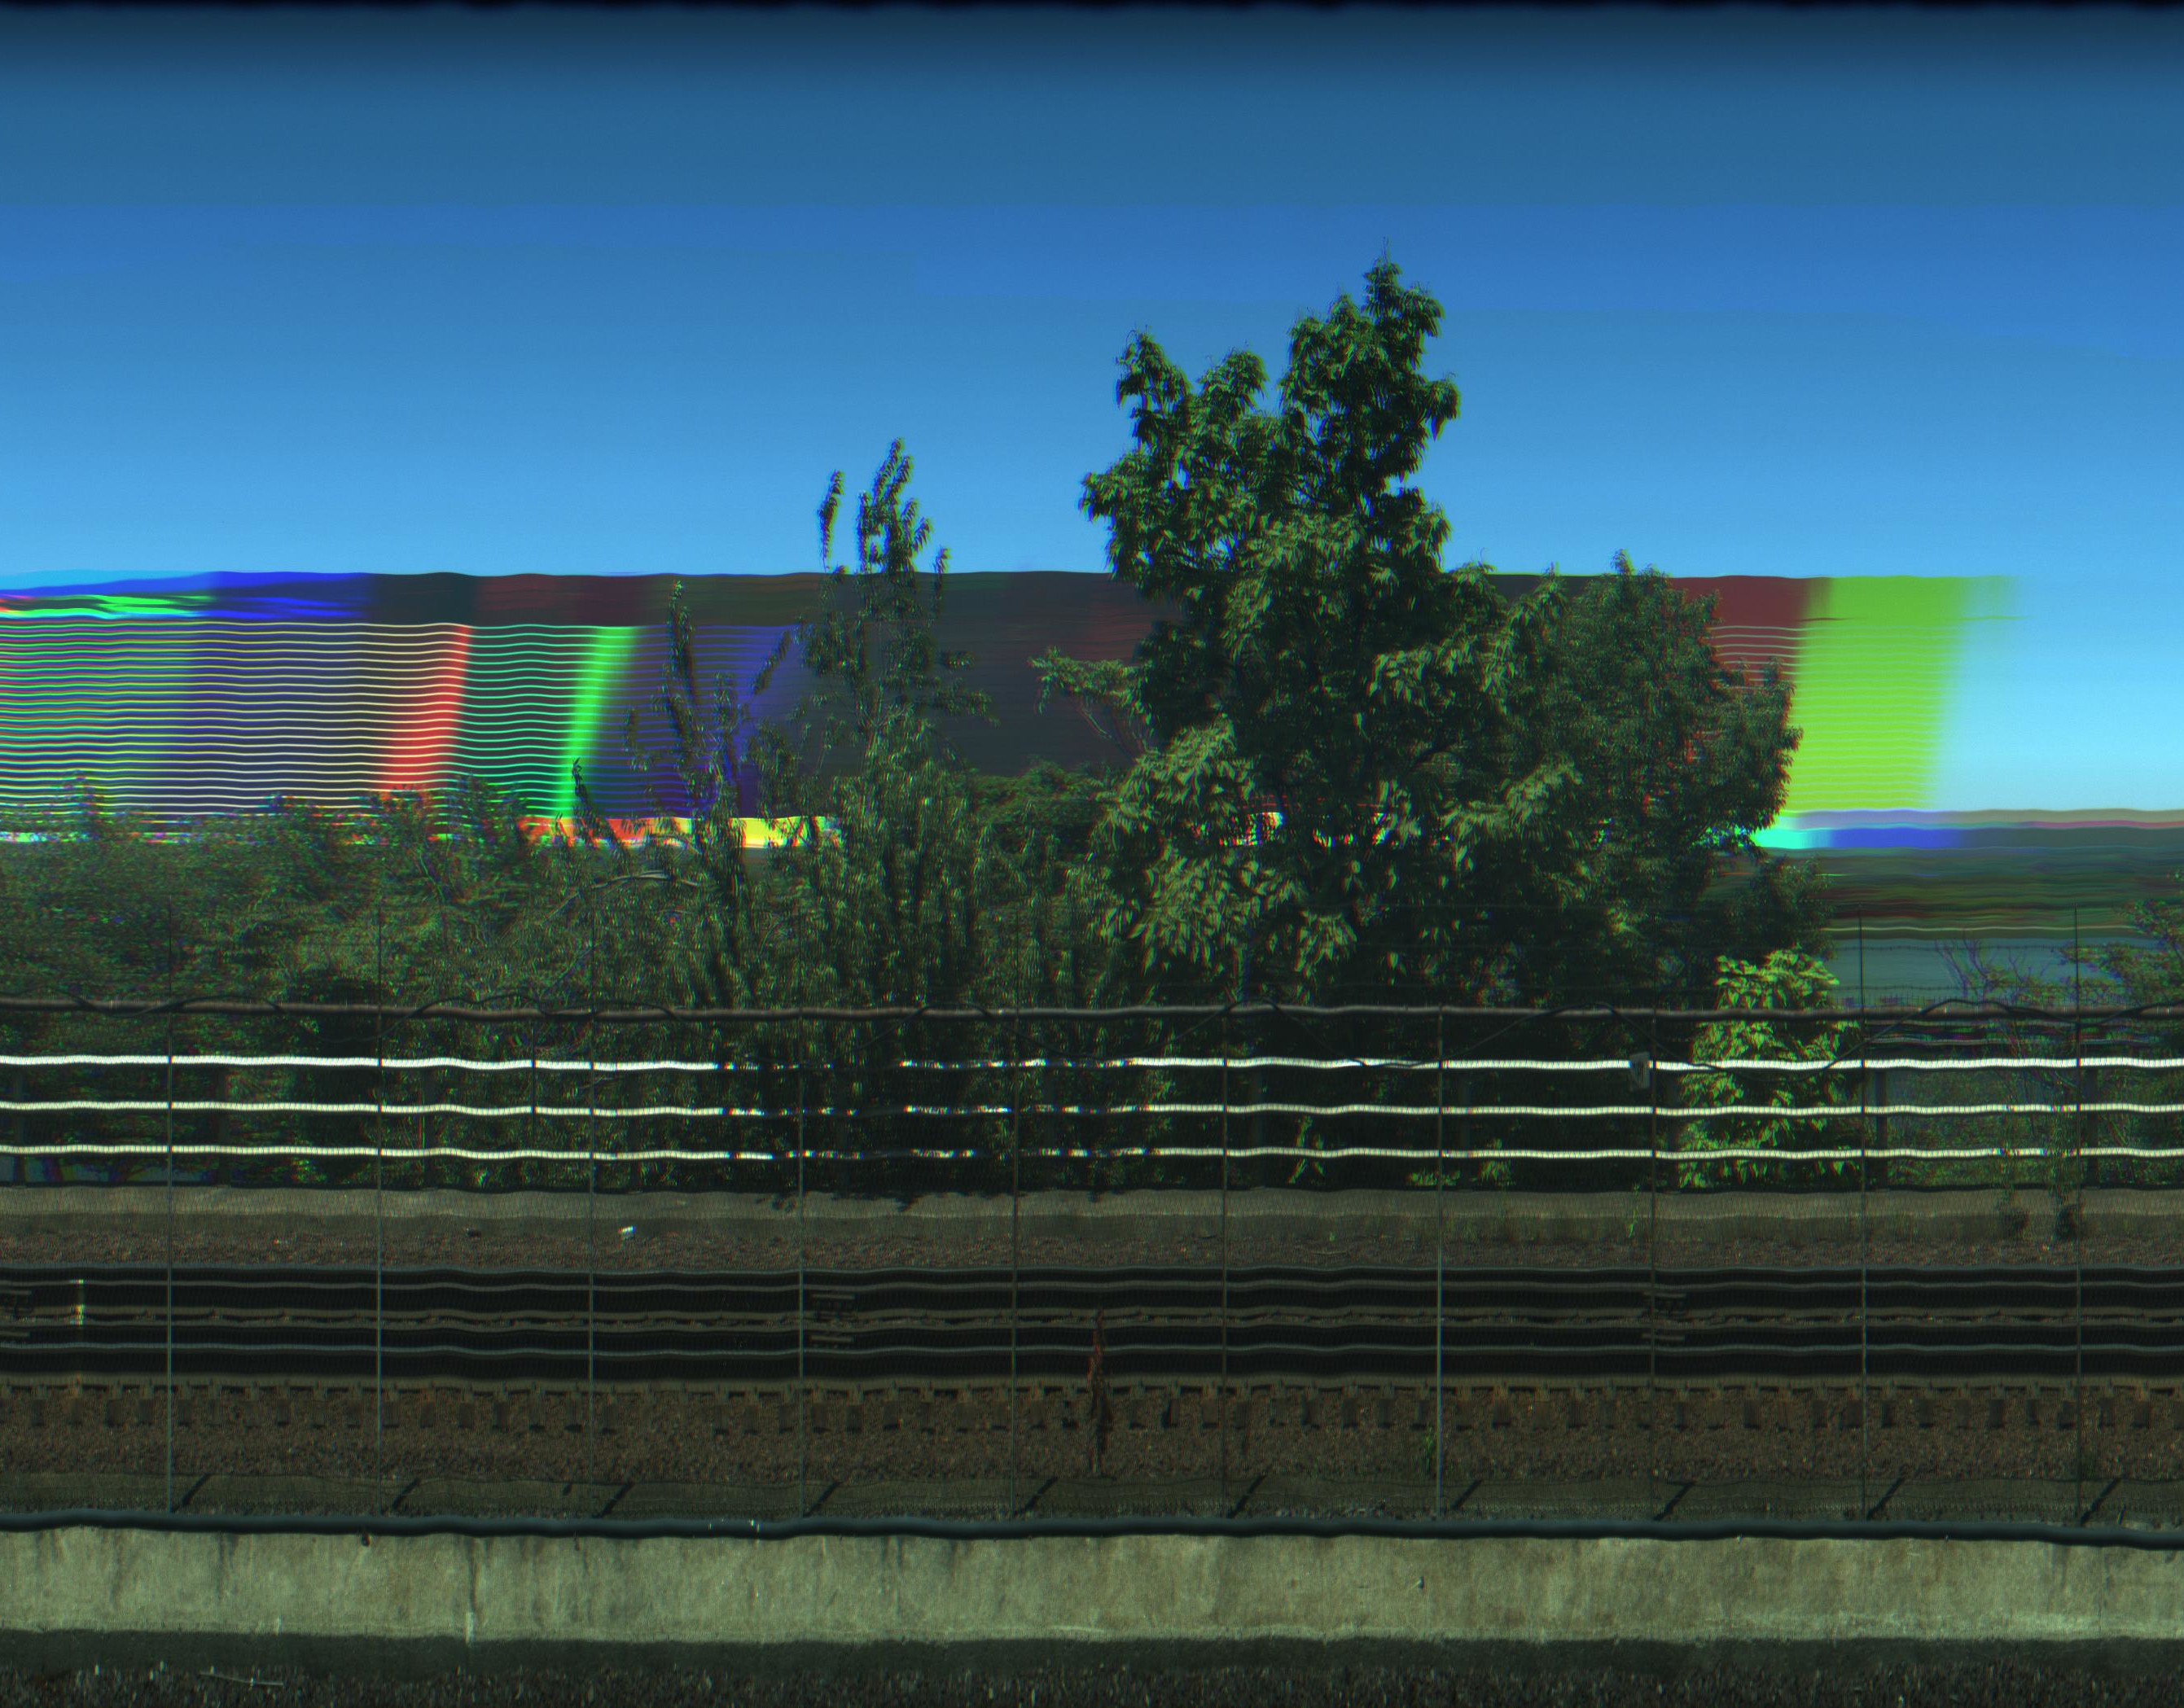
I correct for it for a given subject by shifting the red and blue channels to line up with the green channel. Since the lines are evenly spaced, I can shift by the same amount in opposite directions rather than having to measure separate offsets for each channel. In theory, I could decide how far to shift by correlating brightness shifts across channels, but at present, I do it manually. 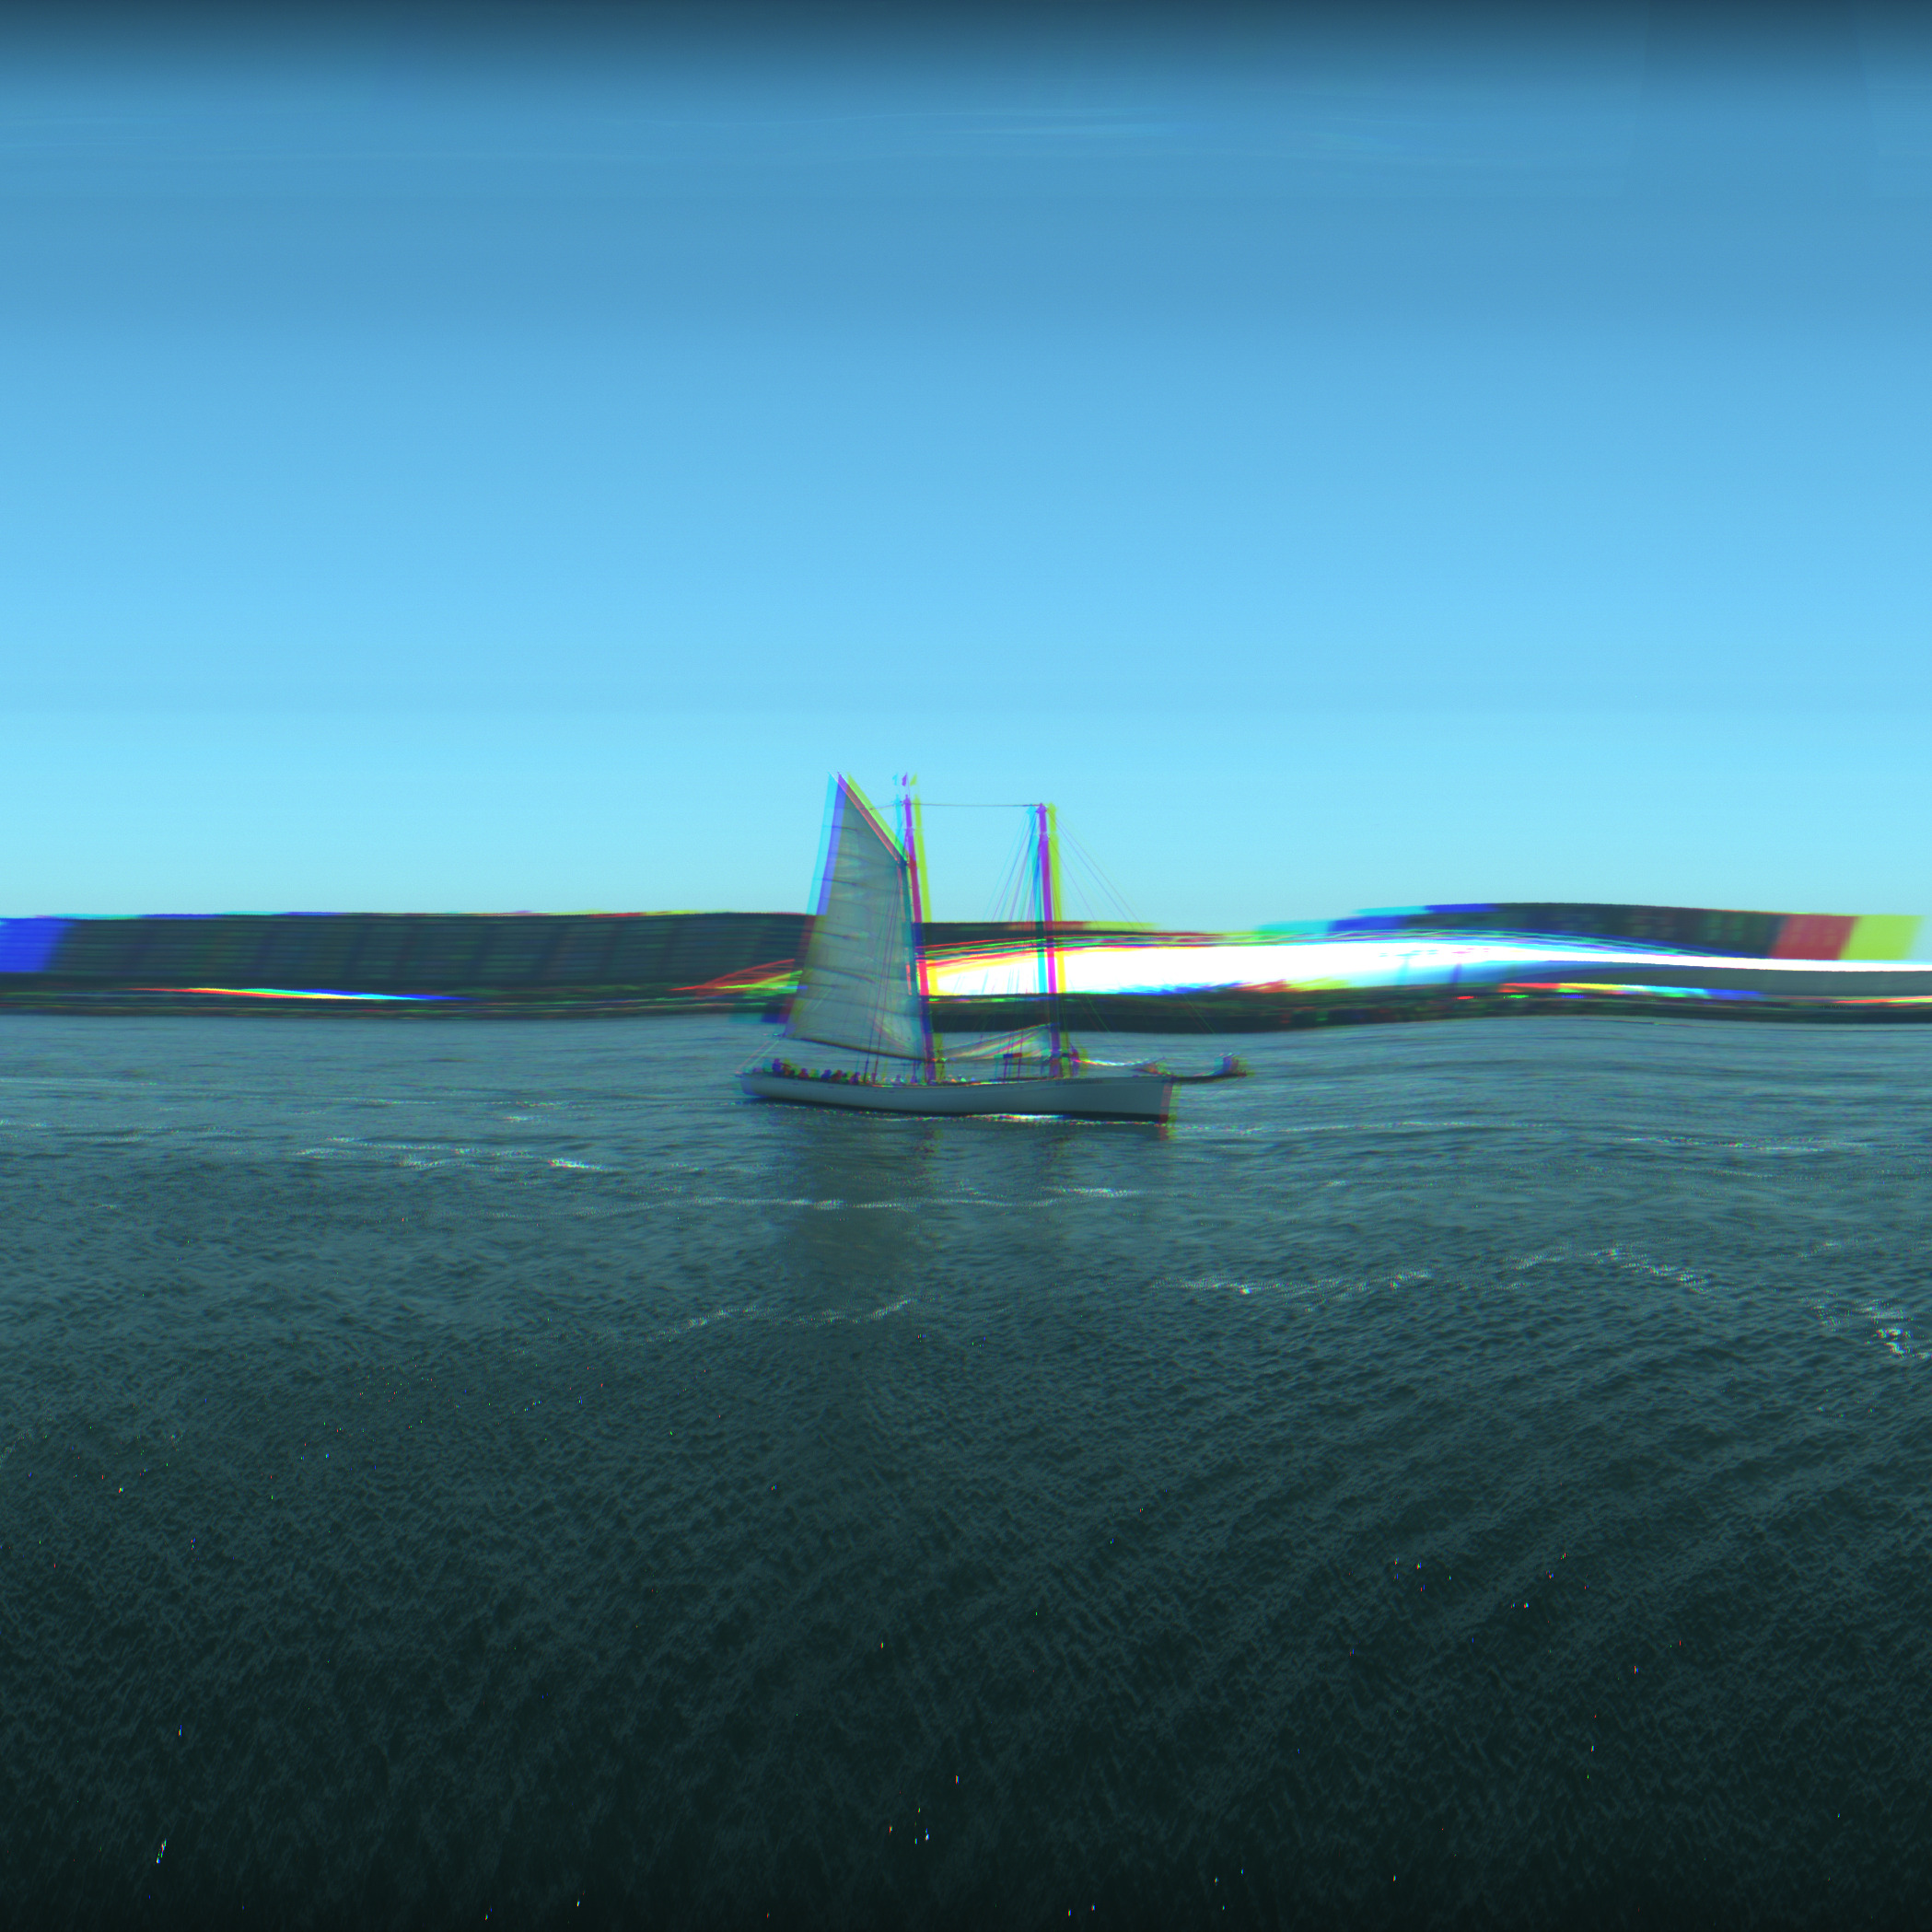
Displaying and sharing the pictures I've taken has been a pain throughout the project. Most software on my computer doesn't like how big they are, and the most reliable tool I've found for viewing them has been GNU IMP, which feels a bit overkill. The messaging apps I text my friends on get upset with wide images too and sometimes compress them into tiny garbage. I was worried this pain would continue in the browser, but the OpenSeadragon project had already done the heavy lifting for me and made an easy way to zoom around an image.
I used the vips utility to break my giant TIFFs up into small JPEG tiles to serve up and wrote a bit of javascript of my own to enable deep links into the gallery (mostly to make this very blog post easier). Web dev is not something I'm particularly good at, so I must apologize for how ugly it ended up looking.
I have many more ideas for this camera that I'm hoping to work on in the future. The biggest one is to make it not dependent on a laptop to capture images, which will make it less sketchy and easier to bring places. In order to do so, I'll end up fixing some of the problems that have been bothering with accelerometer data collection and the capture UI.
I'm also planning to improve the postprocessing tools. I want to implement something that takes a spreadsheet of line numbers and stitches and assembles from there. If I'm feeling really ambitious, I'm considering a GUI that lets me mark off segments and preview them at different distance-per-pixel values. I'm also tempted to try and actually use the GPS and implement a Kálmán filter, but I expect I'll put that off even further.
Yet another thing I want to try is taking more weird infrared photos, maybe doing ærochrome-style color swapping, like what RYE does.
I also want to characterize the mapping between the gain setting on the camera and ISO, which would allow me to scout out locations using just a light meter. I tried to do this previously, but light conditions outside kept shifting too much to get good results.
The capture-side code is available here and the postprocessor (grindstone) is available here.
I would like to extend a huge round of thanks to:
- Meadow (ferry/train riding, presentation prep, proofreading)
- Brooke (mechanical design help, 3D printing)
- Ari (train riding, code, presentation prep, proofreading)
- nyanotech (ferry/train riding)
- cat (train riding)
- Maddie (code, ferry riding, proofreading)
- kim (proofreading)
Without their help, none of this would have come out anywhere near as well as it did.
Thank you, as well, for reading this!