The trouble with testing and developing for rack-scale hardware is that rack-scale is not all that easy to come by. I mean, nevermind the whole DDR5-as-a-currency thing; even if all the parts were available in abundance, any completed racks go swiftly to the front lines (AKA our customers' data centers).
As a member of the Product Assurance Team at Oxide, I find that totally unfair yet completely reasonable. And so we have to get a bit creative. We have to be able to:
Replicate diverse customer networking topologies
Run our actual control plane
Test up to date versions of our software
Represent the hardware components (we make racks, after all) including our switches and microcontrollers
And the cherry on top: we need to do that without cutting special "test version" releases. Because we want to keep our CI sleek, but also because that wouldn’t be playing fair.
Now, don’t get me wrong — we’re not without our tricks. When I joined Oxide last year, one of the first things I was introduced to was our racklettes; that is, smaller than average racks of four sleds and two switches each. These racklettes can be initialized and run just like a real rack, precisely because they are a real rack. Just not in any form factor it would be economical to sell. But for testing they work like a charm. We have four of them today, soon to be eight, where we can test any combination of hardware/software requirement.
We also have our various simulated methods of running Omicron. You can read more about those at How to Run Simulated and the full(er) How to Run Guide. I won’t go into a ton of detail here, but suffice it to say that most parts of our control plane (and more) can be run independently, in tandem, and in various degrees of simulation.
What’s a Voxel?
Do you remember the game Q*bert? It was one of the first wildly popular isometric games, and looked a little like this:
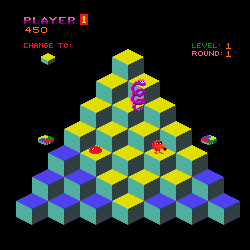
Why am I showing you a ridiculously small game screenshot? Well, each cube in that image represents a 'voxel,' or a point in 3D space. It’s actually the 3D version of a pixel. Volume Element + Pixel = Voxel. Neat, right?
Anyway, for Oxide, Virtual OXidE Labs (or Voxel) means an incredible amount of fidelity packed into a single piece of hardware. It is the spiritual successor to our prior virtual labs (known as a4x2) which allowed us to hack out decent racks running in VMs.
Pay attention to that word "fidelity" by the way. For it is, as Bryan Cantrill puts it, the Prime Directive: labs should use stock Oxide software without hack or modification.
This is what Voxel gives us. A complete software emulation stack, built on illumos in Rust, where we can build and test a variety of realistic configurations:
Sled virtualization provided by Propolis
BGP (numbered and unnumbered) or static networking with Debian and FRR
P4-powered switches via Oxide’s own SoftNPU, a software P4 switch
Microcontroller simulation and emulation for our Service Processor (SP) and Root of Trust (RoT)
And what’s more, it gives us all these features in a fairly small footprint. At home, I run Voxel labs on a Minisforum MS-A2 mini-PC with a 32-thread AMD Ryzen 9 9955HX and 96GB RAM. On that computer, I can spin up 6 sleds with ease, either in the form of one rack or in a multirack configuration (two separate racks, one management plane). All it requires is Oxide Helios and a decently fast NVMe drive. Launch, and in about 10 minutes you have a full Oxide rack with each "sled" in its own Propolis VM — alongside switches (also in Propolis) and other infrastructure.
Image Creation
Remember how I said we have to use stock Oxide software? That actually makes things easier. The first thing we do (following a common practice in hypervisor tooling) is to create a reusable snapshot.
Oxide sleds are only ever one of two things: a normal sled (a "gimlet" for the first generation, "cosmo" for the current) or a "scrimlet," which is a sled wired to the sidecar switches that runs a switch zone. It’s all amazingly elegant in its complexity, you should read more about it in our networking docs.
To create a snapshot for Voxel, all we must do is create a "sled" (virtual machine), install our control plane (Omicron) on it, snapshot it before the point of configuration, et voilà: a ready-to-launch sled. The control plane can be installed one of two ways:
- From source
Voxel clones the Omicron repo on GitHub (or uses a locally defined source for rapid development) and uses
cargoto compile- From TUF repo
We use Tufaceous to package Omicron releases using The Update Framework (TUF) and our CI tool Buildomat
Using the second option as an example, here’s the beginning of the process where voxel image create pulls out the key pieces that make up the sled config:
$ pfexec ./target/debug/voxel image create --from-tuf ../5d176e0be7e5cc0d3288c1bef10005ec31f2cd7c.zip 5d176e0be7e5cc0d3288c1bef10005ec31f2cd7cAfter a decent amount of unpacking and staging, it will launch a VM that everything gets written/installed to. And finally:
[voxel] ready: voxel-cp version=unknown unpacked_artifacts=18 built=2026-09-06T21:37:58
[voxel] clearing device-instance map, halting
[voxel] flushing, up to 25s
[voxel] stopping hypervisor
[voxel] writing voxel image voxel-cp-5d176e0be7e-tuf
That image is a zfs snapshot which can be used and reused to create our rack.
Ready for Launch
Launching the rack uses a similar process, except the control plane is already installed. All we need at this point is:
An "frr" image (the Debian VMs for networking)
A control plane image (like the one we just created)
The
voxel-initagent that gives each virtual sled its assignment
The log output is pretty long, but you can scroll through it if you’d like. I’ll recap after.
Like I said, a lot of steps. Here’s what happened:
Trust material is generated in the form of sprockets PKI
Emulated STM32H753 and LPC55 microcontrollers are flashed with Hubris firmware
Our automated network topology suite (known as falcon) wires the topology with simnet and VNIC pairs for every link, and stages the sleds (g0, g1, and g2 in this case)
Propolis VMs launch; 6 total in this example, with 3 driving the network and 3 as Oxide sleds
voxel-initruns: a lightweight Rust agent on each node thatSets up NAT and uplink addressing
Configures underlay setup on each sled
Writes the M.2 partition layout on emulated boot disks and labels five U.2 data disks
Seeds the host phase 2 image and install dataset to the M.2s
Assigns the scrimlets and runs a switch enforcer so they "remember" their identity across restarts
Activates
sled-agent, the per-sled configuration layer for the control plane
Connects to the commission API for
wicketd, which brings the rack through its initialization phases
It’s a complex dance of steps, and I really buried the lede on the whole "emulated
microcontrollers" front. But suffice it to say these are the complete and right steps for
any Oxide rack, except the hardware is represented as distinct pieces of code. For example,
need a new interconnect between two virtual racks? Add a couple lines of code in rack.rs.
There are a few things that don’t follow the Prime Directive (yet!). For example, those certs that make up the sprockets PKI up top aren’t set at manufacturing and coming from the RoT like our production racks. But that’s one of those things that we can live with for now, as it doesn’t affect actual rack runtime.
Emulating Service Processors
This is the bit I mentioned a moment ago. A big part of what makes our racks unique is
the embedded RoT and SP
in every sled. We’ve long had an SpSim construct that served as a stub for the service
processor and would return the right info at the right times. But that’s simulation, not
emulation. It’s always going to be happy path, and that’s just not enough fidelity for
real testing cases.
As such, we built actual emulated Cortex-M7 and Cortex-M33 devices for illumos and Linux (x86 and ARM). The repo for this tool (sp-emu) is open source. Each of the two devices runs in a single thread, and (mostly) faithfully emulates the three main requirements: instructions, time, and interrupts.
From there, you can flash our Hubris firmware directly to these emulated devices, and then communicate by way of an ordinary socket. The Voxel lab can speak with these virtual devices via the Management Gateway Service (MGS) and Inter-Processor Communication Channel (IPCC). You can learn everything you want and more about these concepts in the Management Gateway Service repo and Hubris docs.
There really is no "run real microcontrollers as virtual devices with this one neat trick!"
I can think of. But the real challenge of sp-emu’s job is time. Remember all of the code
we’re running there is meant for silicon. Hubris schedules off a 1ms SysTick and the emulator doesn’t
use wall time; as such, we had to invent a clock. That said, emulated hardware is also
slower than the real thing. So there’s… well, less time per time. So instead of trying
to get all temporal about it, time became instructions. For example, I give you maybe_tick:
In this case, we count instructions against the kernel’s own reload value and fire exceptions anywhere the single-priority design makes it safe to take it — in thread mode, interrupts unmasked. By the same token, peripheral access costs one tick of our clock (an instruction), whereas on silicon it might stall for dozens of cycles on the bus.
You may have noticed self.exception_entry which is defined
elsewhere in the code:
fn exception_entry(&mut self, vecnum: u32, bus: &mut Bus)
In short, this function models everything the hardware does on a Cortex-M core taking
an exception, all the way between "exception becomes active" to the first handler
instruction. vecnum here is an ARMv7-M exception number (also the vector table index
for that exception’s handler). bus is the memory system which is used to actually
push the frame and read the table.
Hubris has a non-preemptible kernel, though it schedules tasks preemptively. SVCall, PendSV, SysTick and all IRQs run at the same priority level, while faults keep a higher priority. As such, the emulator doesn’t have to nest handlers. It processes pending IRQs based on the PRIMASK, FAULTMASK, and BASEPRI settings. If one of them pended PendSV, that will perform the deferred context switch for the kernel. For more details on how it works internally, you can check this lovely bit of documentation.
if let Some(irq) = bus.next_irq() {There’s a lot more we can talk about here, but to sum it all up you can look at this pseudo-ish loop:
Note: yes I’m aware I said there’s no cycles then have a field named cycles. That’s the "fake it till you make it" part of emulation.
That’s the overall heartbeat of sp-emu, and it runs ad infinitum. Everything else exists to make those calls seem real.
And One More Thing
Past the actual working of the emulated sleds and microcontrollers, it’s all good ol'
fashion user experience. When you’re running that many components on a single system, it
can get really confusing trying to figure out what pieces are where, how to connect
to one sled on one rack versus another, etc. So the voxel command that we use to
launch and destroy virtual racks also serves as a connectivity tool. For example:
$ pfexec ./target/debug/voxel host login g0That command logs the user straight into the g0 sled in the global zone. Alternatively:
$ pfexec ./target/debug/voxel tp login switch0tp in this case acts like our technician ports,
and allows the user to connect straight to a switch zone for rack-wide commands and networking.
There are also numerous commands to manage things like images (export/import, delete), config
(network topology, sled sizing, multi-rack, etc.), and more features coming as we build.
Voxel is available under the MPL 2.0 license for download. You’ll need to run Helios as your OS to run Voxel. I’d recommend 16+ threads and 64GB+ RAM, plus a good premium NVMe with onboard DRAM.